Hi Walker.
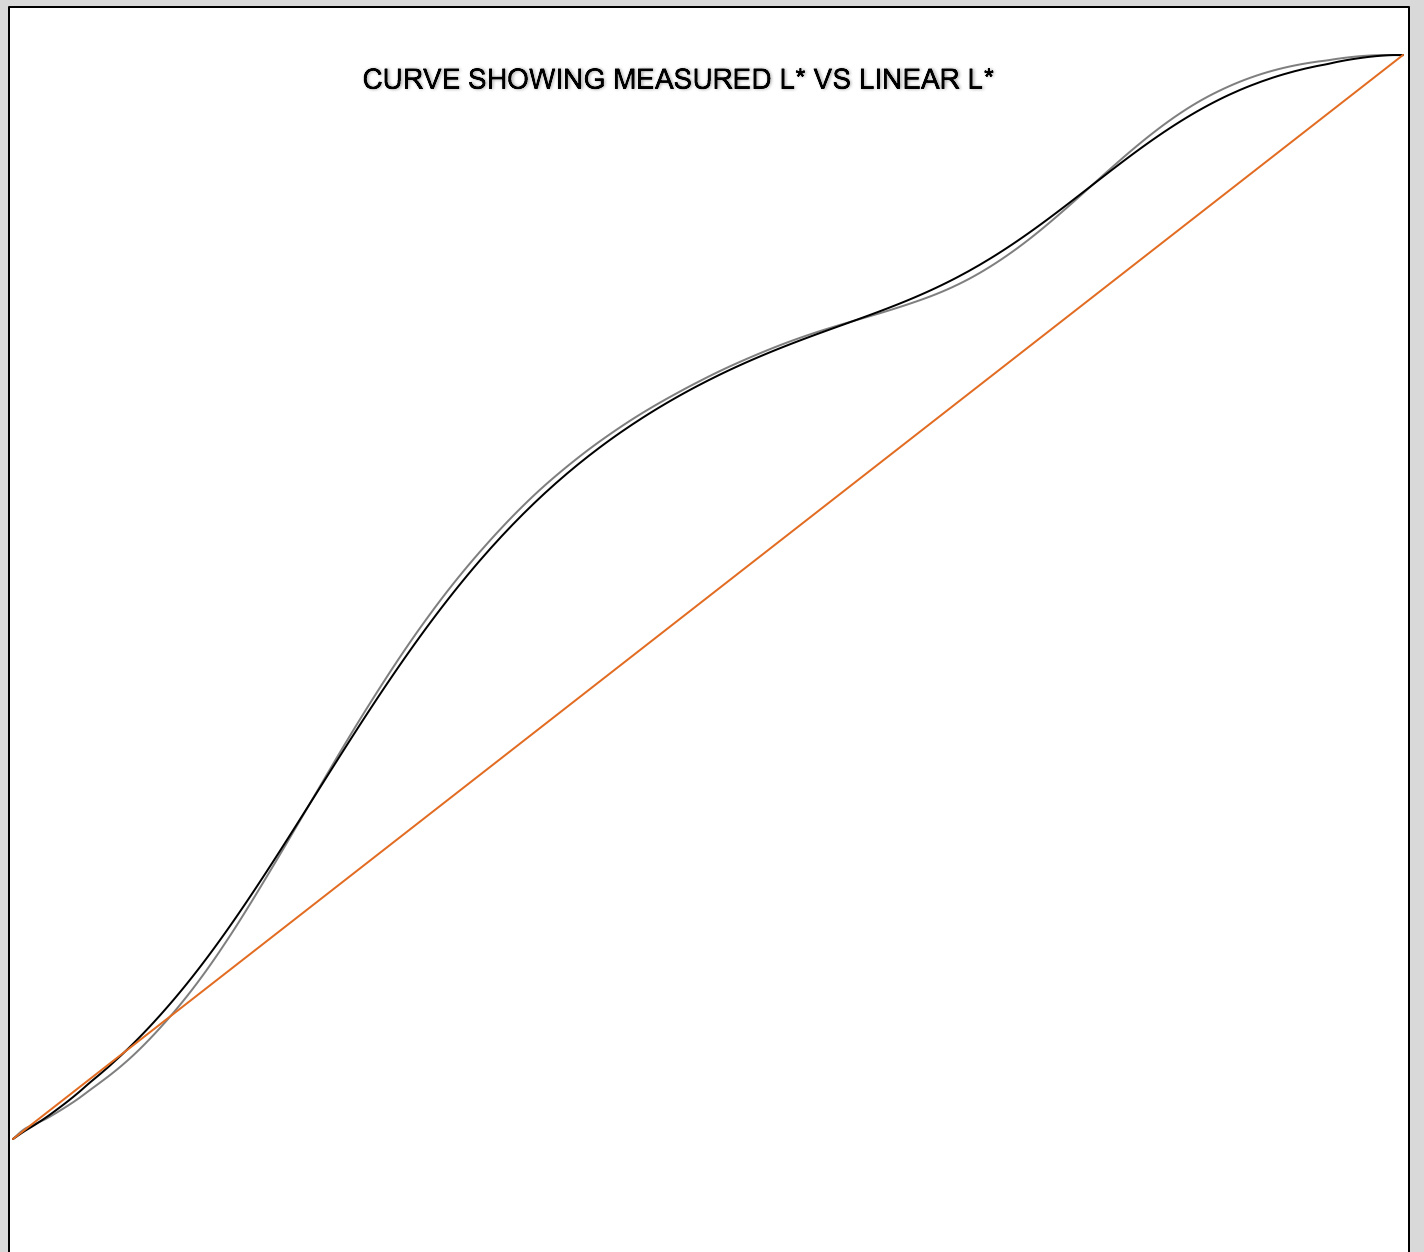
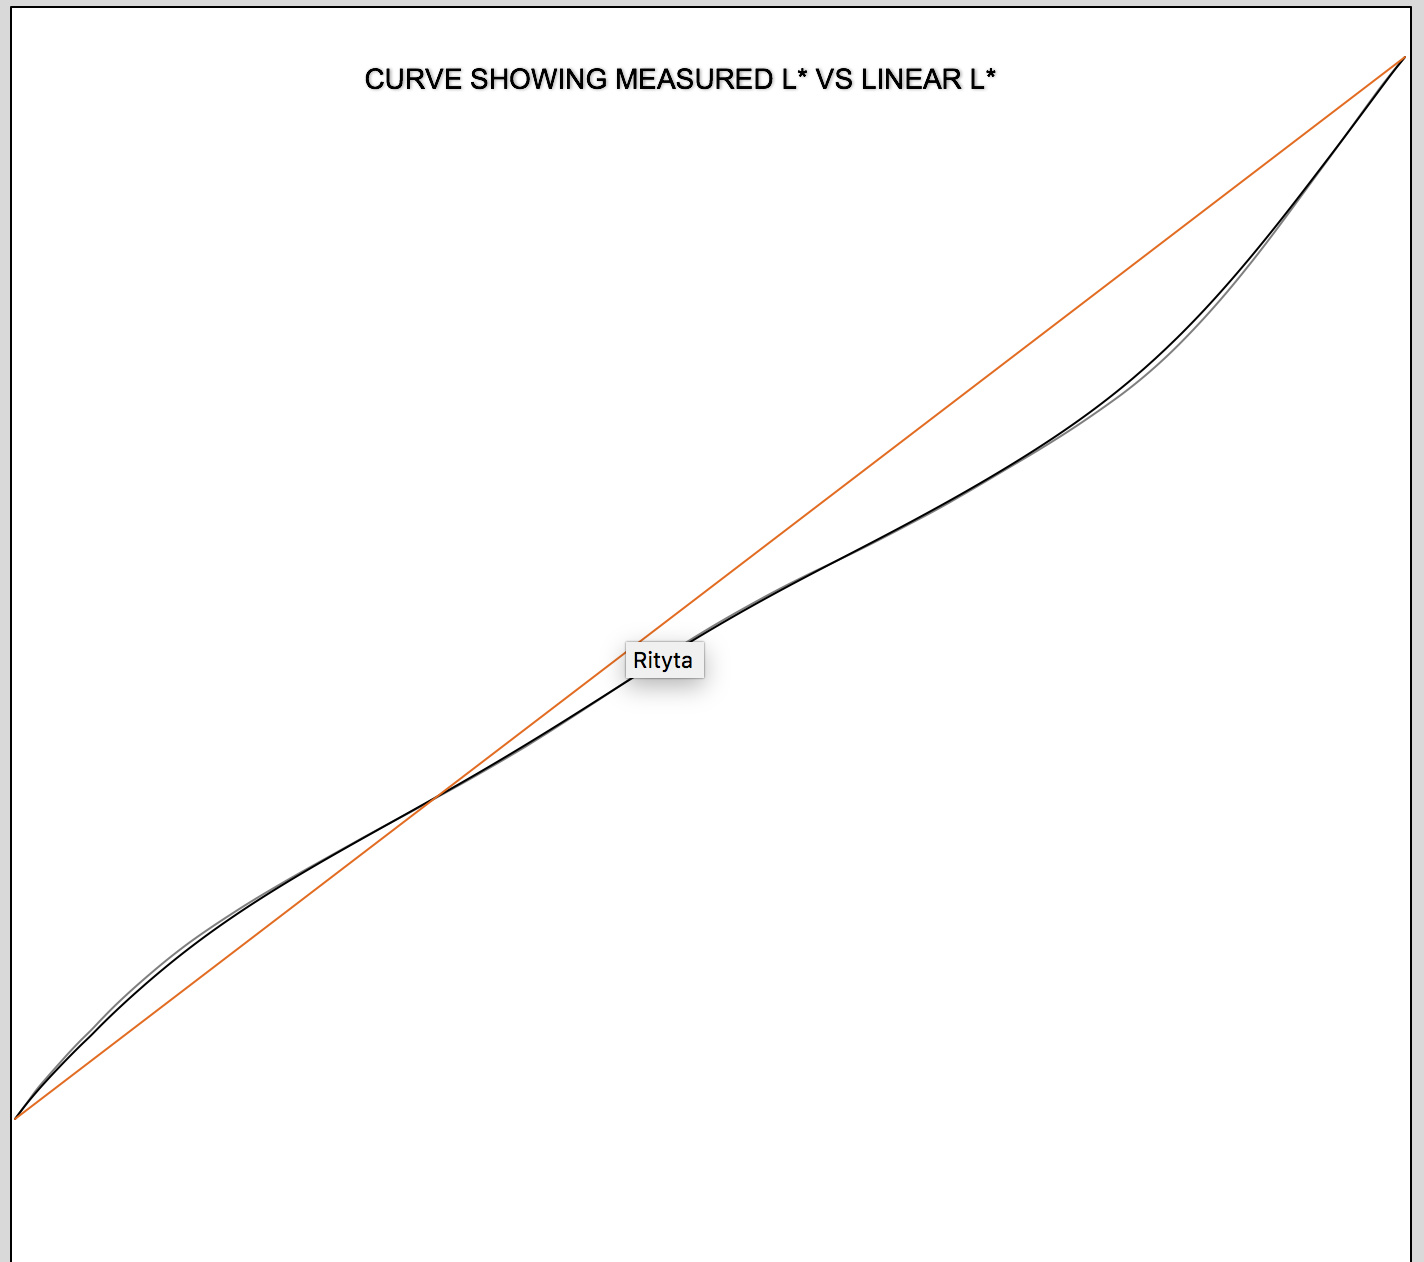
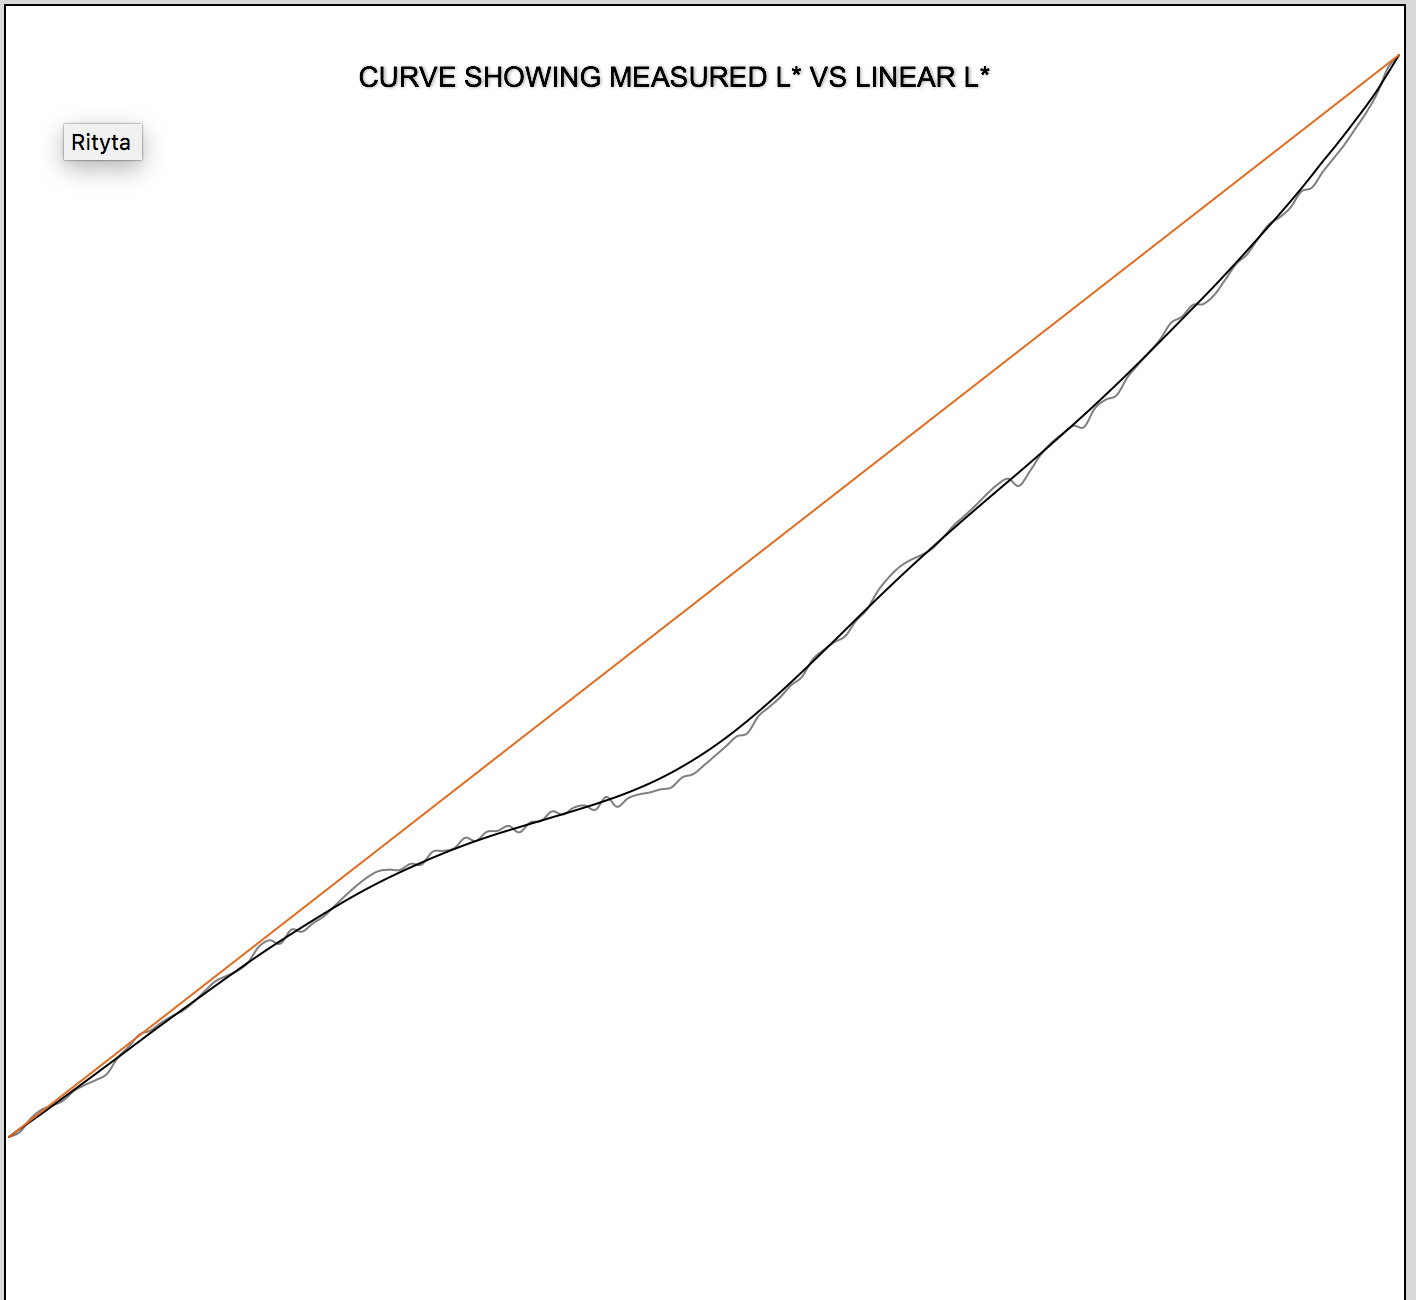
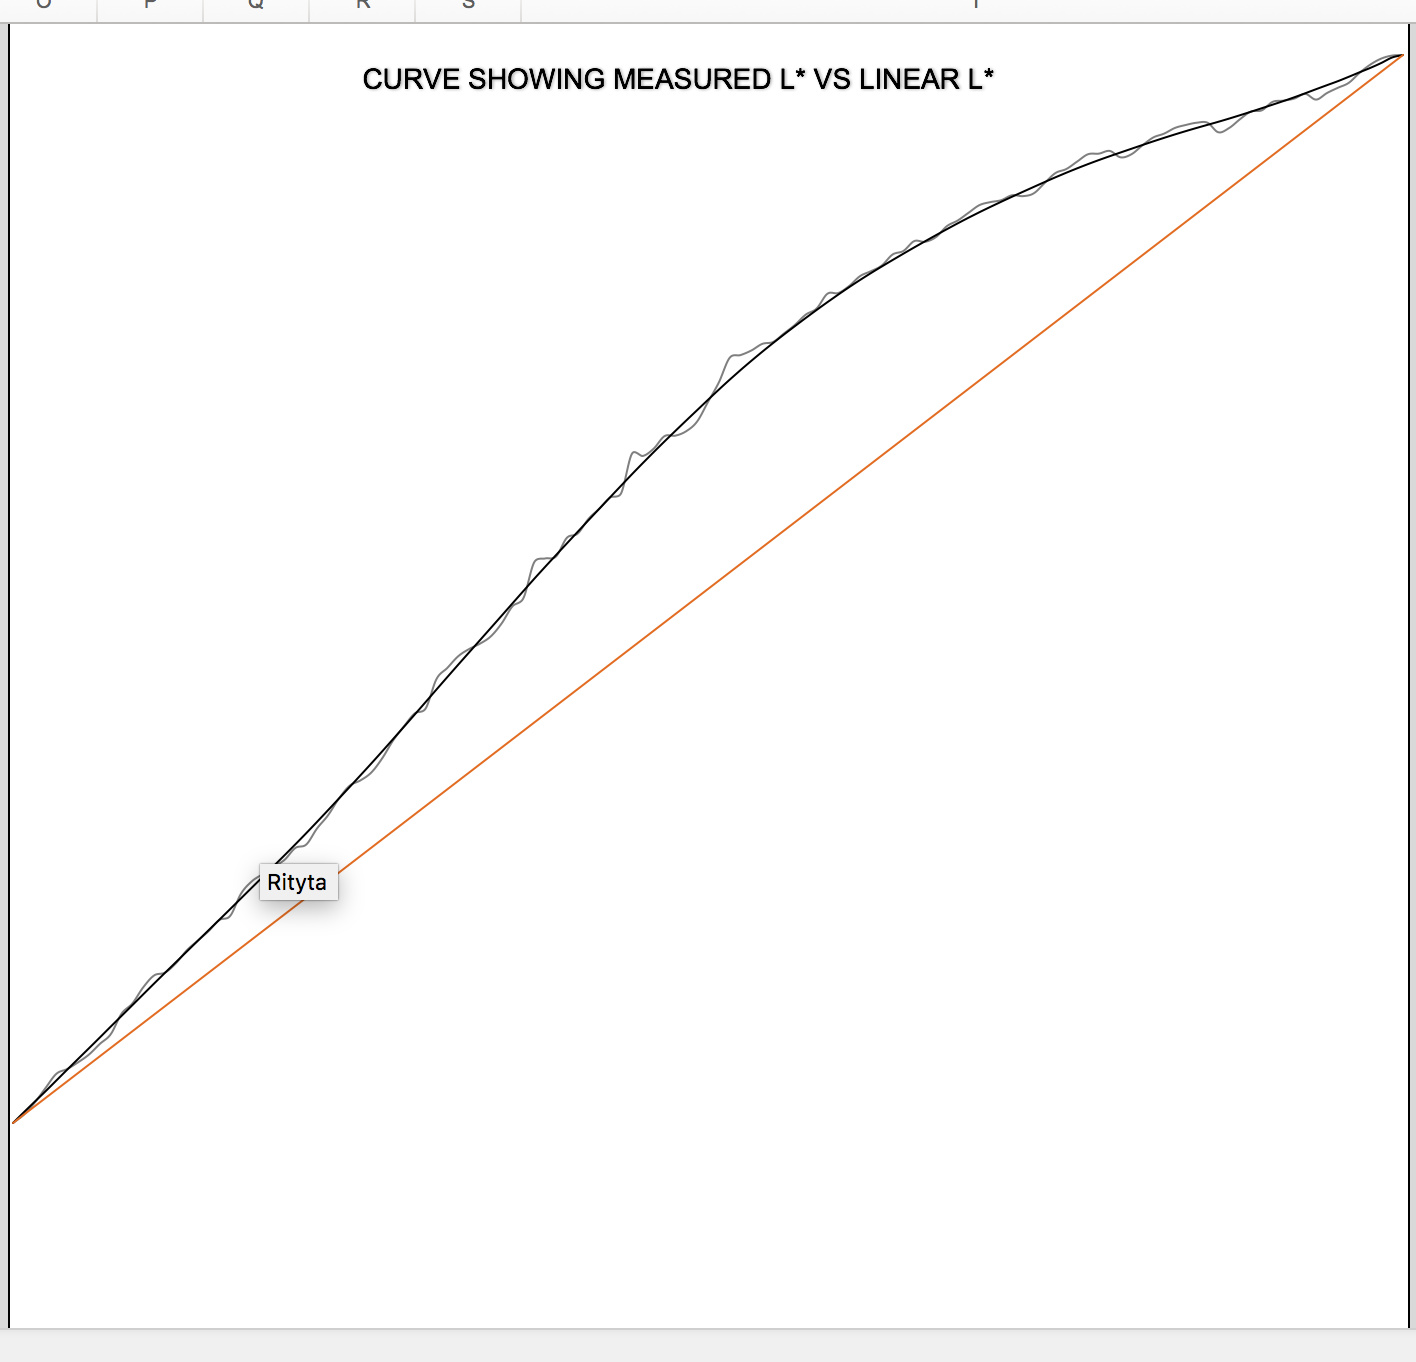
I got the printer up and running now but I have problems regarding making the curve. At the workshop we got a good curve on the first try and then it was only further refined for each iteration. When I do this at home it seems the curve is swinging from to light and the program is not able to find the right curve. You can see this on the enclosed curves, lin-1 and lin-2 is from already smoothed text files as you probably have figured out already.
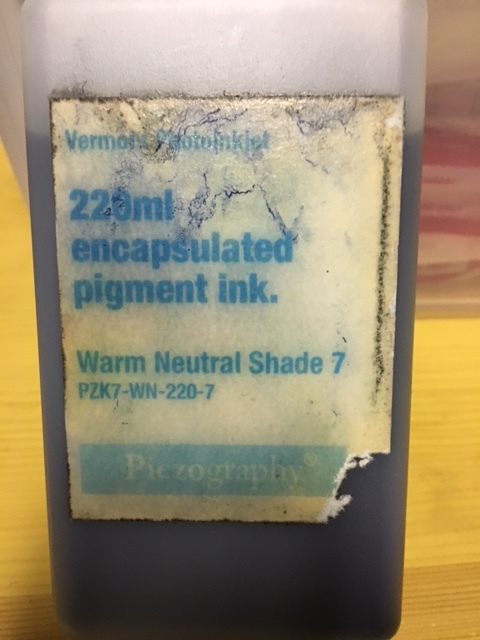
I’m not sure I have the right inkset ? Enclosed is an image of one ink bottle , (I had a leak in the box, that’s why it looks so ugly).
One more thing, in the instructions for DN P2 it says to put photo black ink in the yellow channel. Since I didn’t have any, I put the new superblack matte ink in there because I didn’t think it would be used when making negatives, but only for glossy paper prints. Now it seems the printer is using it anyway, maybe this is the reason of the troubles.
The darkroom process is stable, I print with a Stouffer 31-step tablet on each print, so I can see that there are no variations there.
some more enclosed images
Ok. So you have MK ink in the Yellow channel and PK ink in the Black channel correct? The first thing you need to do is print with a NON P2 PiezoDN curve. This will use your PK ink instead of MK ink.
The second thing is there is something really off in your process that is requiring massively dense negatives for some reason. I suggest re-doing your Min Time for Max Black through the Pictoricho again (use the Stouffer if you have to). Your exposure is requiring incredibly dense negatives and this is de-stabilizing your curve requiring more than 50% of the tones to be printed with maximum black density. We noticed something similar when our bulb was going.
best,
Walker
Hi again.
So, regarding the inks, I made a stupid assumption. I thought that PK wasn’t used in the DN process, so i filled the Yellow cartridge with HDMK instead. I will order a new yellow cartridge and some PK ink, and do things in a proper way. I hope the delivery times from your European site aren’t very long.
The rest of my ink bottles are labeled - PZK7 in the various shades, are these ok to use ?
I looked at the exposure time and of course you are right. I will correct this to the shortest time possible.
Thank you for your patience with an old confused man.
Best, Johan
You’ll be all set with the HD-PK.
best,
Walker
Hi Walker.
Still no success. I have put the HD-PK ink in the yellow channel as instructed. I have shortened the exposure time from 7min30sec to 4minutes (any shorter and I can see the edge of the unprinted film). I made a print from one of the negatives that I made at the workshop and I get a very nice, properly exposed print so I think my proccess is ok.
When I make the print from the first test chart of the 129-step table it comes out quite dark, like two or three steps underexposed. Then I start making linearisations and the curve oscillates between too light and too dark again.
Before I start sending you screenshots of curves and such, I have a question, can this be because I use warm-neutral inks instead of selenium ? The inks are a bit old and when I make a regular piezography print it’s a little bit light and blueish in the shadows. Or am I doing something wrong in the linearisation proccess? Could my spectrometer be broken ? It’s an eye1-pro meter.
Please help. I’m going bonkers here.
Best, Johan
Please show screenshots of your entire print process if you would. Also let me know the LOT numbers of the inks. Your inks may have settled and then you may have printed that settled pigment before agitating them.
-Walker
<span style=“color: #000000; font-family: Helvetica; font-size: 12px;”>Hi Walker.</span>
I’m sending you this on pm instead of on the forum because of all the attachments.
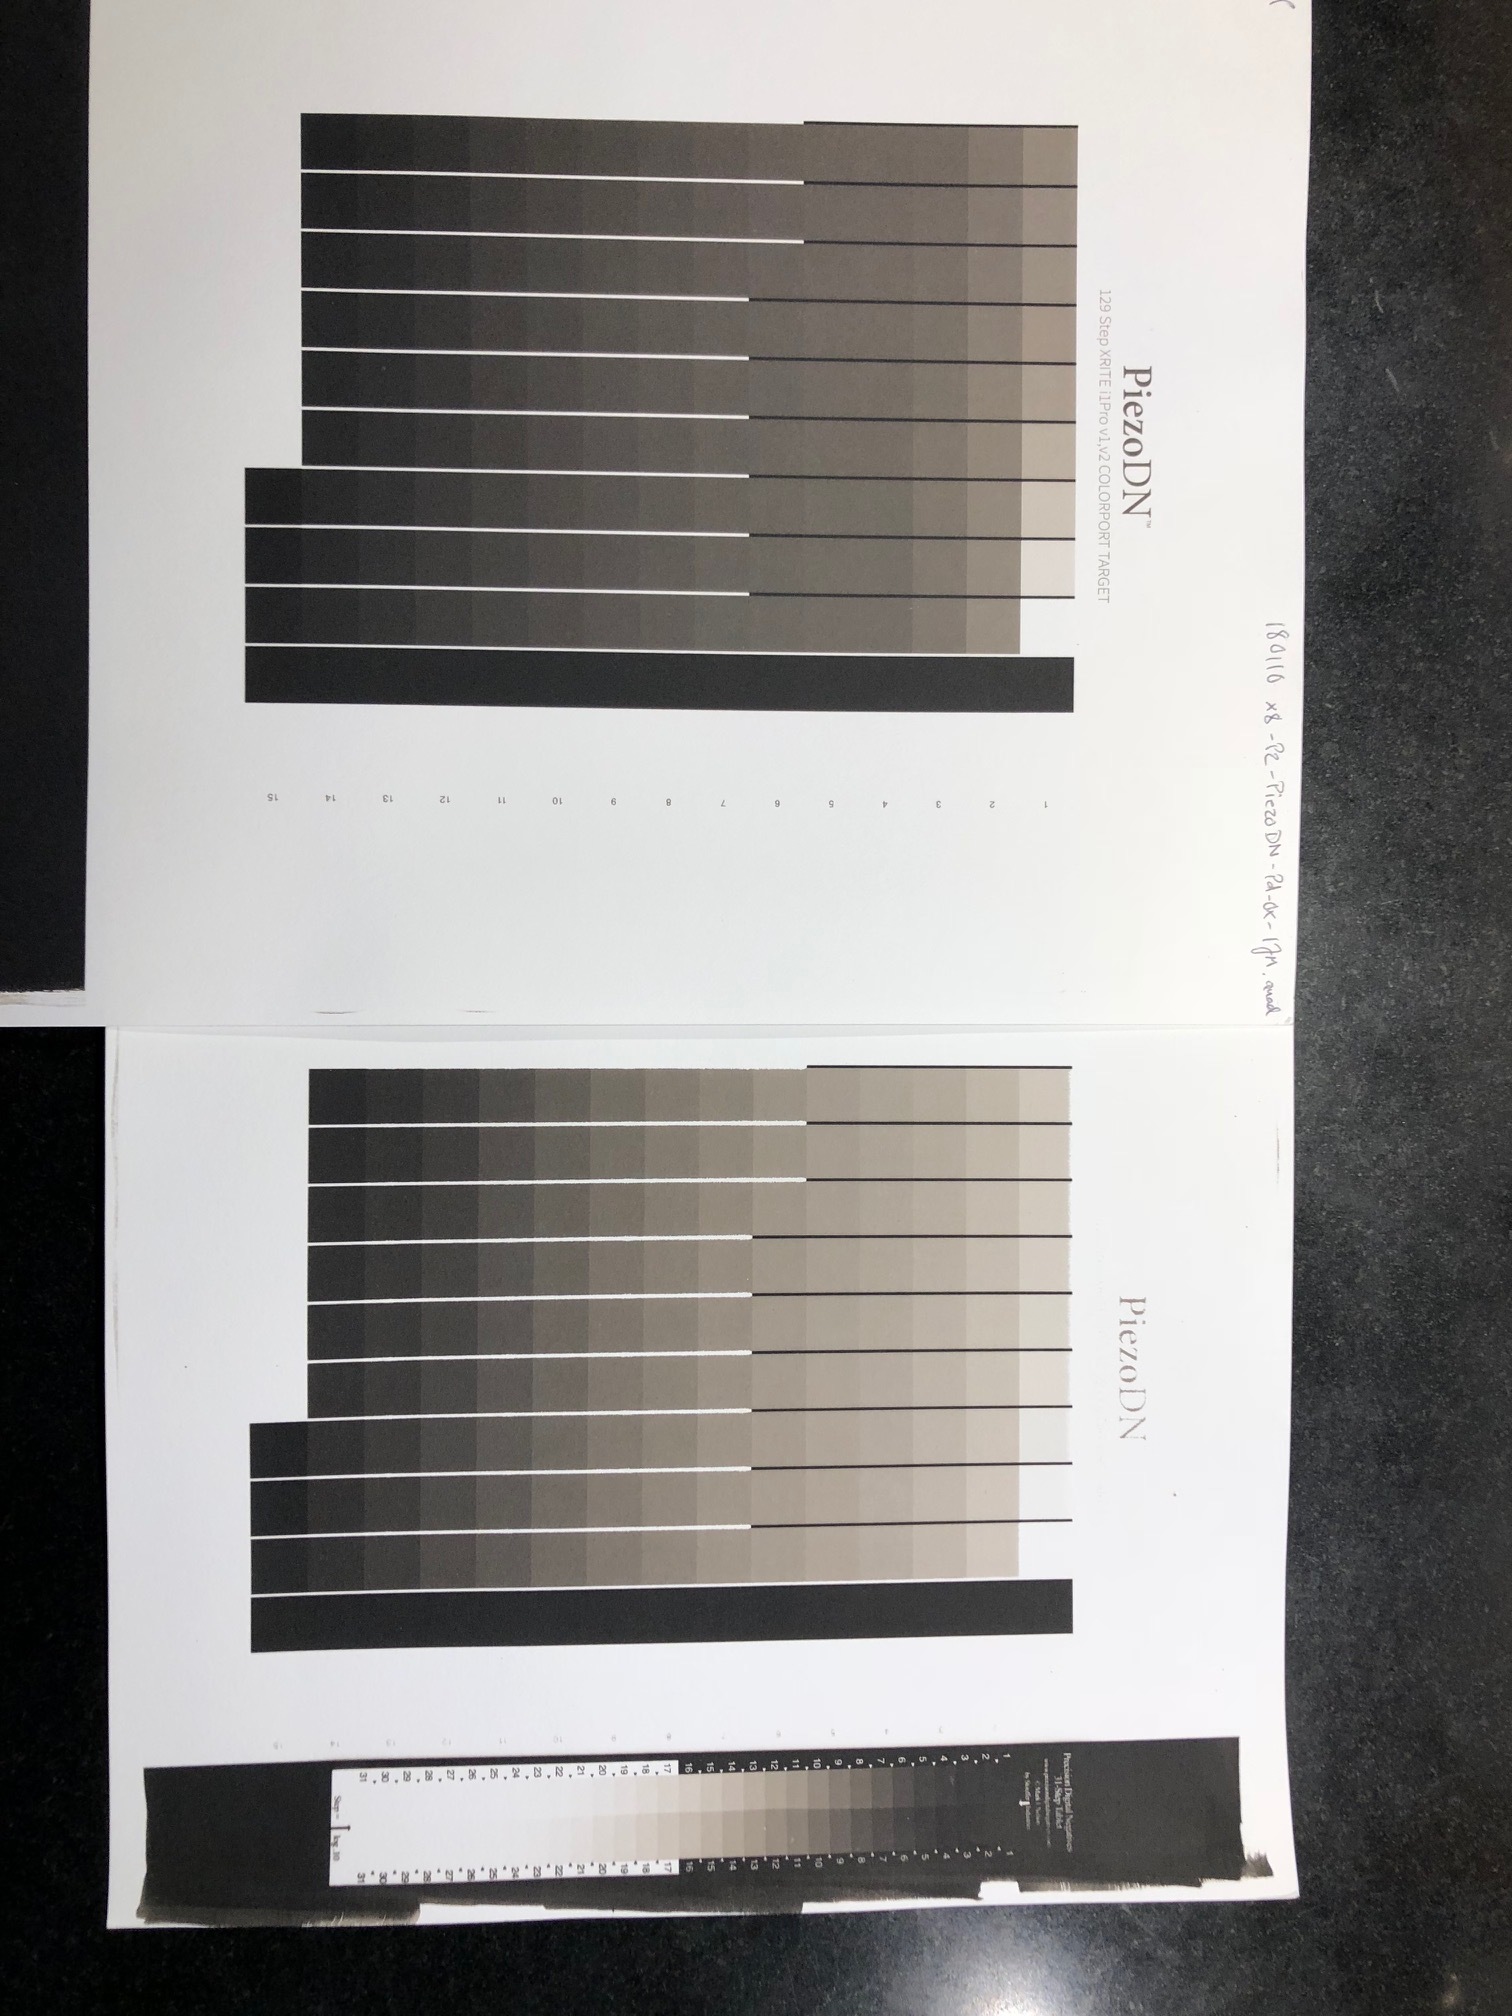
Enclosed are images of the latest series of test prints, I have taken the images with my iPhone but I think you can get the necessary information from them anyway.
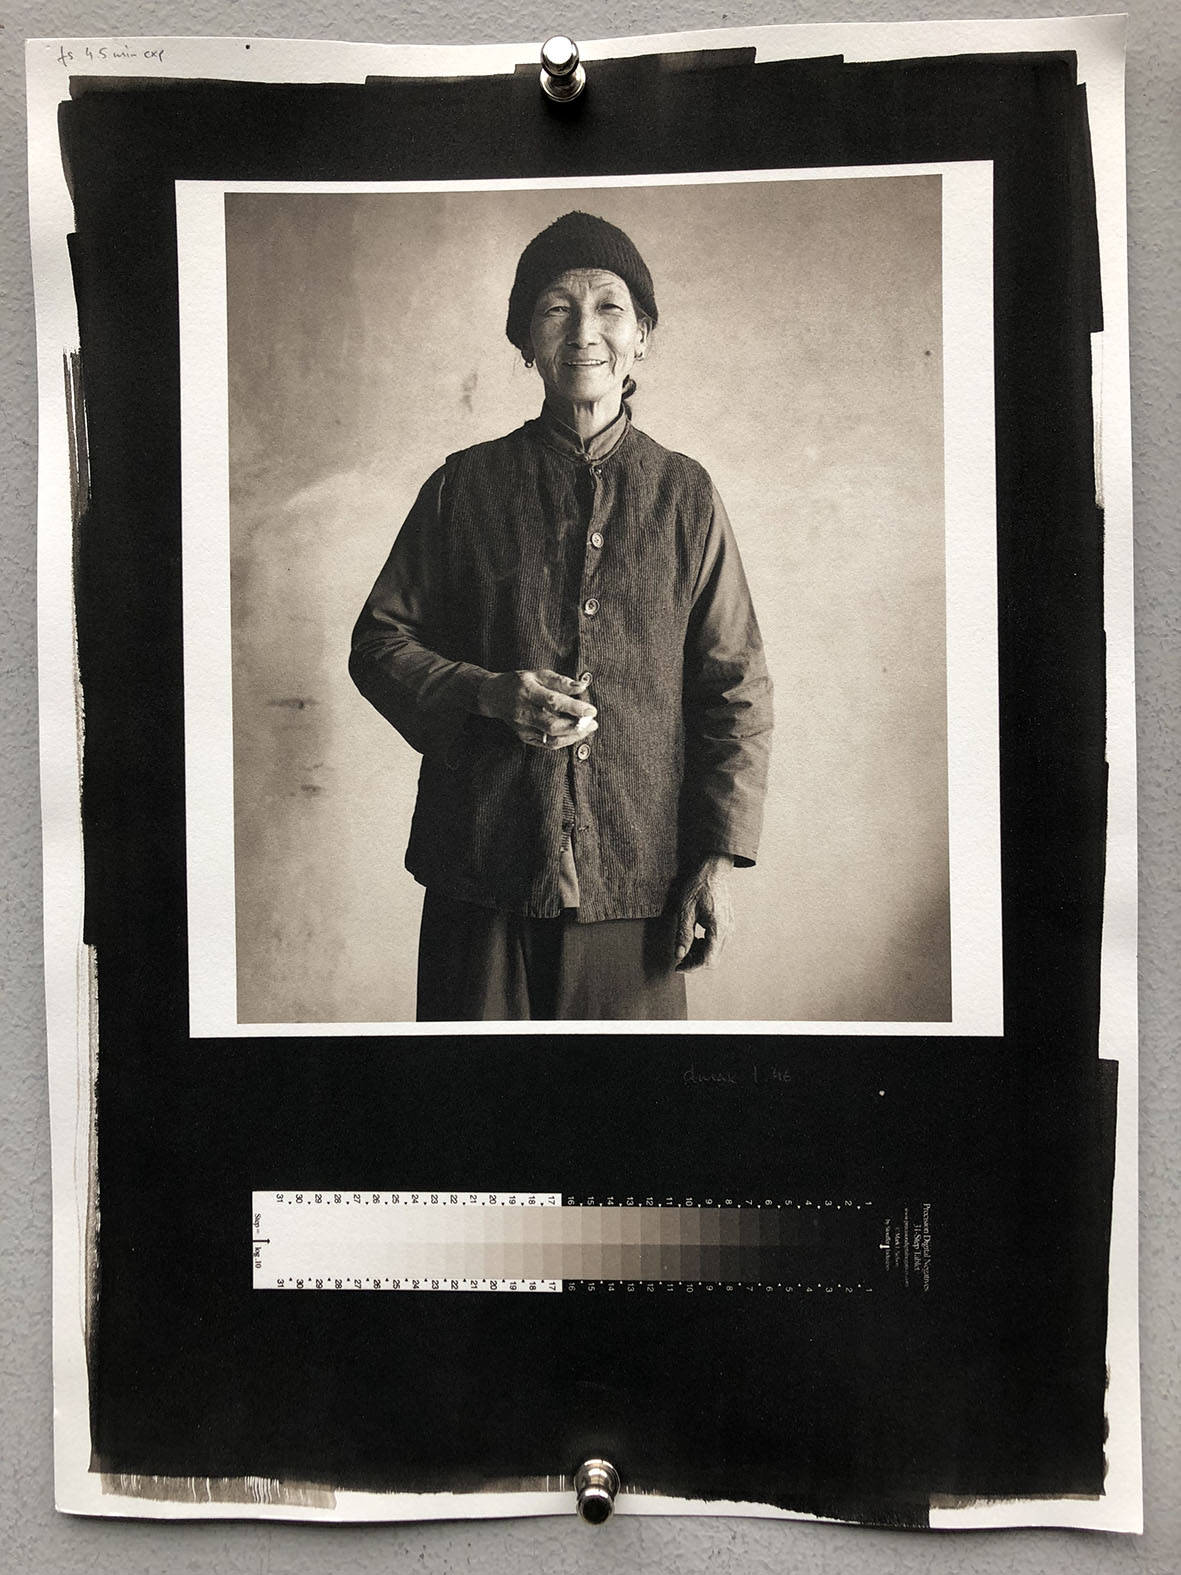
I have also made a print from one of the negatives that we made at the workshop and as you can see it comes out pretty much perfect.
The inks in the printer are warm neutral inks that I originally intended to make piezographyprints with.
They don’t have a batch number but they have an expiry date: dec 2015, they have sat in unopened bottles until I got back from the workshop.
I have ultraHD-MK and HD-PK in the #1 and #4 position on my 4800 printer.
As you know I started out with UltraHD-MK in the #4 position and when I switched this to HD-PK I also had to change my negative film.
I started printing on a roll of Pictorico which I wasn’t sure if it was Ultra Premium or not, the new ink caused puddling so I switched into sheets of Pictorico Ultra Premium.
I’m just trying to give you clues here of what’s going. It might not have anything to do with the problem.
My own thoughts are that something is off with the inks or printer since the first test print is so dark compared to what I remember from the workshop.
Please let me know if I can provide you with any more information.
All the Best,
Johan
<span style=“color: #000000; font-family: Helvetica; font-size: 12px;”>Hi again.</span>
There is one more thing I would like to tell you.
Since the beginning of starting to make the tests I’ve had a nagging feeling that something is wrong when I choose curve in the Quadtone rip dialog box, in Print Tool.
If I have the right curve already set when I open Print Tool and just start to print the negative, or if I switch to a different curve and then switch back to the appropriate one, I have a feeling that I get different results.
This same could apply for when choosing printer in Print Tool.
Do you think this is possible, or is it my imagination ?
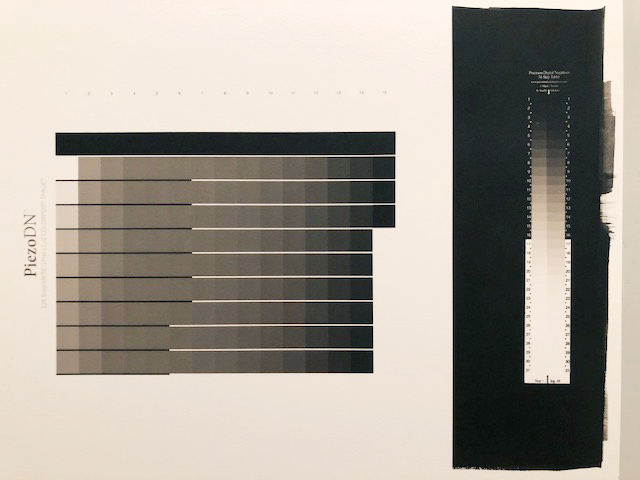
Here is an image of two test charts, one is on the Pictorico roll when I got ink puddling and the other on Pictorico UltraPremium sheet. Same curve, same inkset, same exposure.
As you can see, the print on roll film is much lighter and closer to the right look of the test chart ???
Can it be so different, just between two Pictorico films ?
All the Best,
Johan
This is the same test chart on Pictorico Premium roll and Pictorico Ultra Premium sheet.
Dear Johan. I think you need to do this.
-
Re-install QuadtoneRIP.
-
Re-fresh you curves by deleting all printer and (internal) curve by follow these instructions: https://piezography.com/install-delete-quadtonerip-curves/
-
Make sure no curve has weird dashes, etc in it’s name.
-
Make sure no curve is more than 32 chars long.
-
Install the new curves using the install.command in the printer’s curve folder (if on Mac).
-
Print a test on each paper (roll/sheet) without changing any settings but roll/sheet in QTR.
Please provide screenshots if things mess up so I can debug here.
best,
Walker
If the tests I carried out for myself are anything to go by, for UV processes the required exposure times for Pictorico Premium and Ultra Premium are very different, the Ultra requiring at least 50% more exposure. I don’t think a direct comparison can be made without adjusting for this.
Yes. PiezoDN requires Ultra Premium (generally).
best,
Walker
Hi Walker.
Thank you for your patience. I made a real mess this time when I tried to email you images of test charts, curves, text files etc.
I will start from the beginning according to your instructions and we will see how it goes.
I’ve got one more question for you at this point: Occasionally I start up the Epson driver to perform a Nozzle check and a cleaning if needed. Could this interfere in anyway with Quadtone Rip and give the variation in density that I’m suspecting ?
All the best,
Johan
Epson driver doesn’t effect it at all.
best,
Walker
Hi.
So today I have started from square one. I have followed your instructions exactly. I’m using Pictorico Ultra Premium, nothing else.
I still get a test chart that is much darker than I remember from the workshop.
I have not made a linearisation because I think the problem is before that in the process.
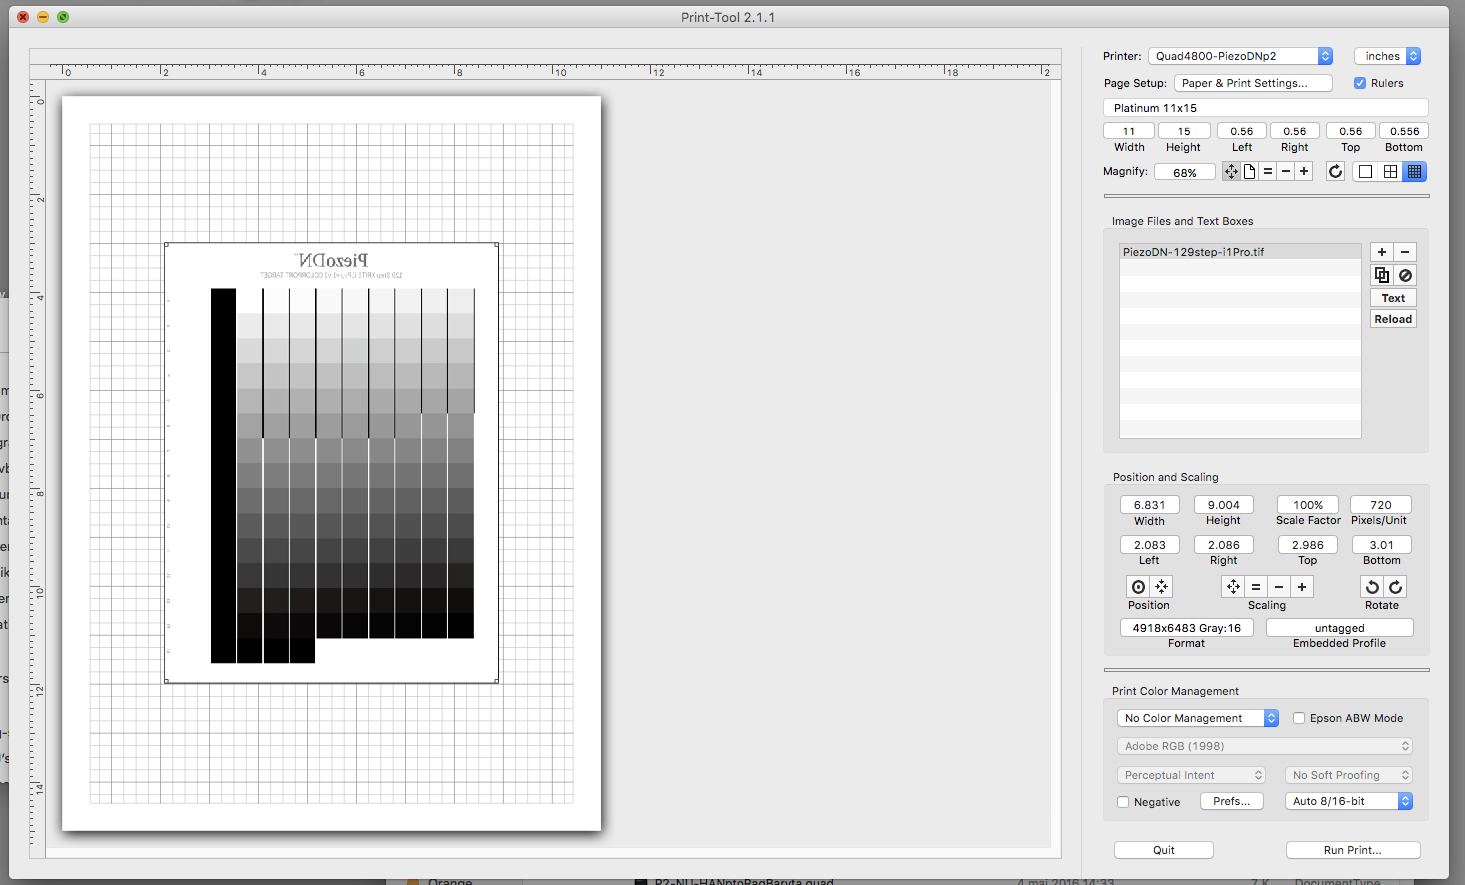
[attachment file=29567]
This is what the test chart looks like.
[attachment file=29568]
[attachment file=29569]
[attachment file=29570]
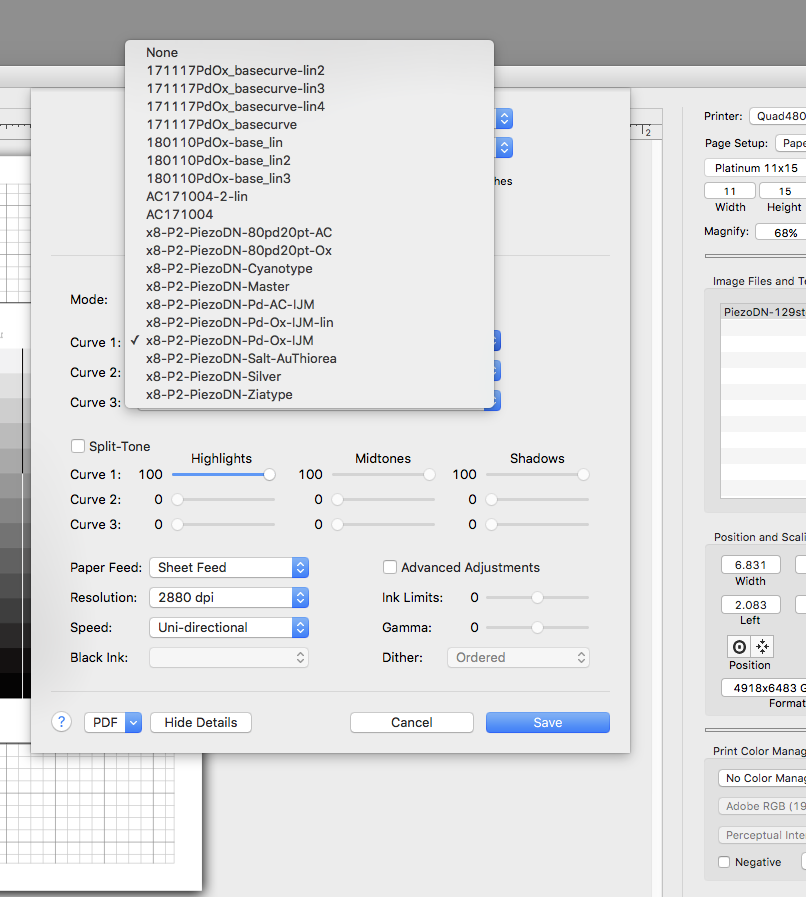
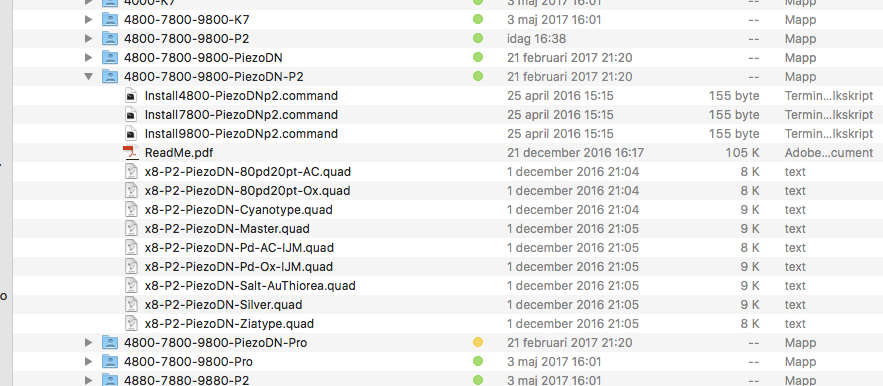
One strange thing,I deleted all curves from both places and reinstalled the original ones, in spite of this the deleted ones still come up when I choose curve in Print Tool. As you can see in the last screenshot (next post, because this one is full), those curves are no longer in the Curves folder in Piezography.
Here is the screenshot from the curves folder
[attachment file=29573]
I made a print from a negative we made at the workshop and it comes out quite nicely, so I think my darkroom process is not very different from yours.
[attachment file=29574]
Best,
Johan
I’d like to add that I’ve made some successful Piezography linearisations and some very nice Piezography prints, so I’m not totally lost in the process.
But the DN part is more problematic to me.
Johan
Dear Johan.
The original IJM curve was built for a specific light bulb. Most likely your bulb produces a different wave-length and so needs to actually go through the calibration process to print correctly. You can follow this process as it is documented in the PiezoDN chapter of the Manual. You will be using the CGATS smoother tool (part of the PiezoDN software) for this. It is VERY similar to linearizing Piezography for ink on paper.
Just about every darkroom printer has different metal and paper and printing conditions so there is not real “out of the box” negative that prints perfectly linear unlike when printing normal inkjet.
all the best,
Walker
The negative we made from our workshop was calibrated for our particular plate-maker which has a doped mercury bulb. This type of bulb prints darker than the normal bulbs out there. I think you have the same bulb!
I have attached the curves for doped mercury here. You will probably find them useful!
PiezoDN-Doped.zip (19.1 KB)