My first linearization didn't go so well

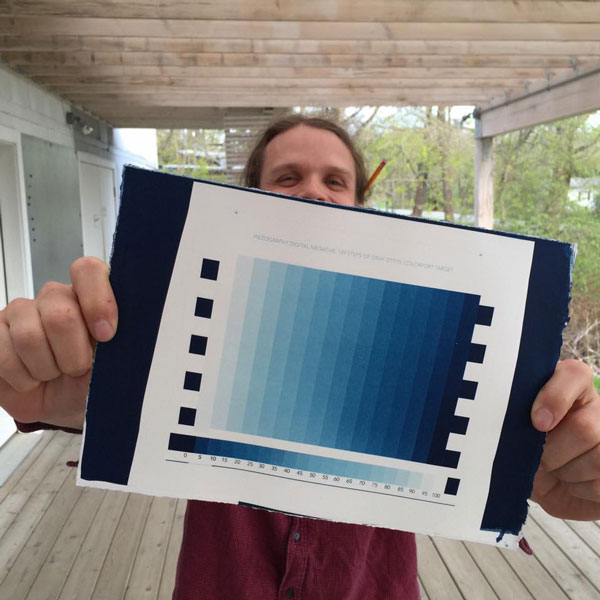
In the attached photo (attachment 1), Walker is holding a perfectly linearized target. I am trying to understand why I am not getting anywhere near as good results when I linearize (see attachment 2).

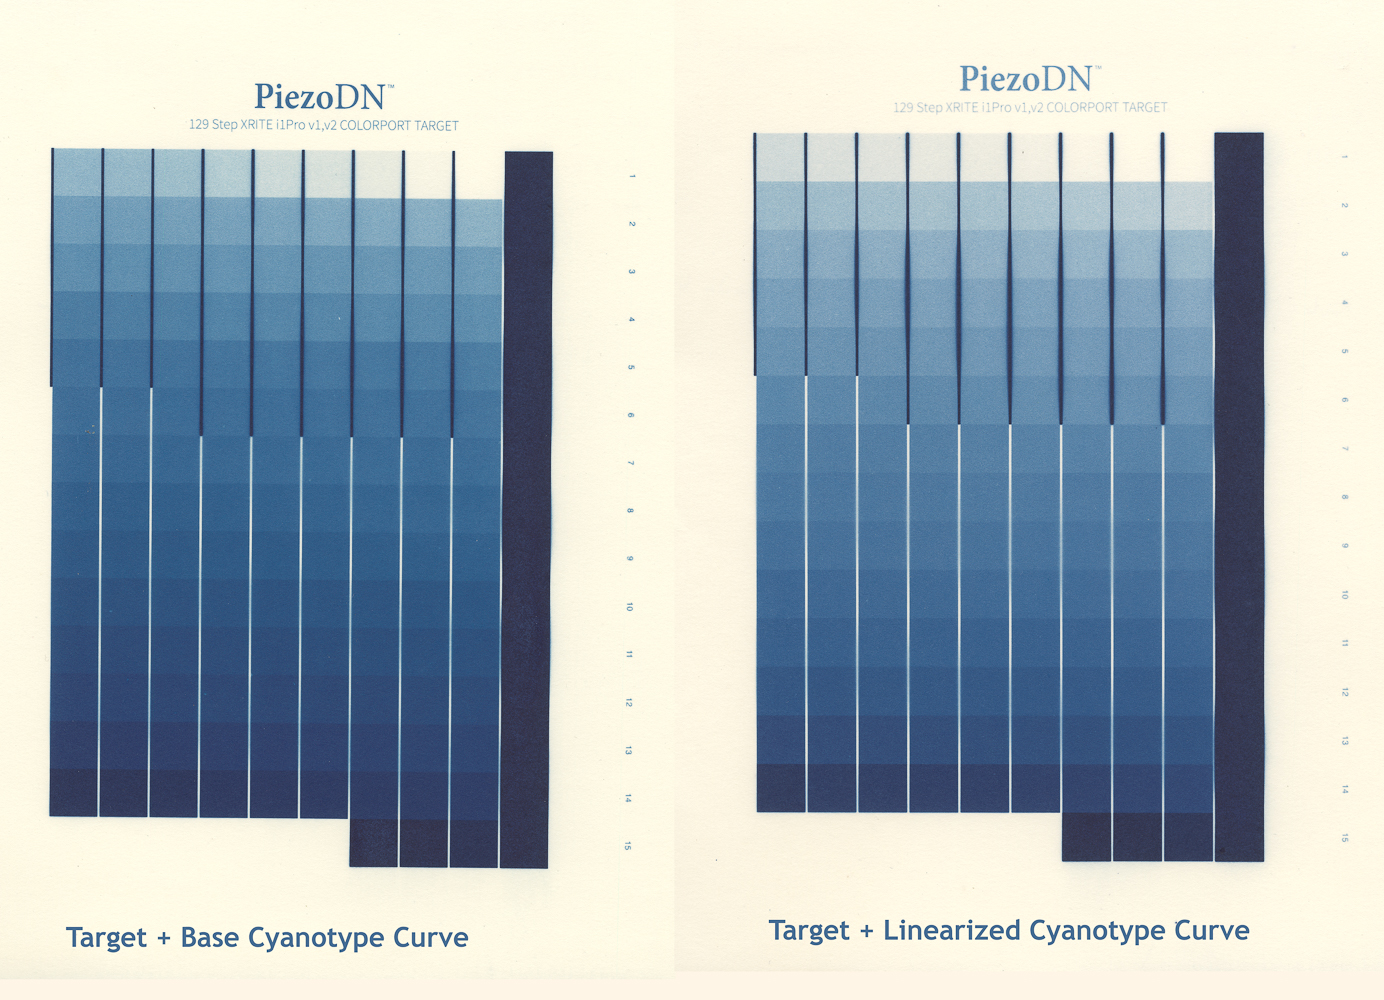
Compared with Walker’s target, mine has high contrast in the highlights and shadows and low contrast in the midtones. My question is: What factors might have contributed to such results?

As you can see, I am making negatives for cyanotype.

□ I am printing negatives on a P400 printer with Piezography2 / PiezoDN, Selenium tone ink on Pictorico Ultra.

□ The target file is PiezoDN-129step-i1 Pro.tif.

□ I printed the initial target negative using the base PiezoDN calibration curve for cyanotype, namely R2000-P2-PiezoDN-Cyanotype.quad. I am using the R2000 curve rather than the P400 curve because there no printer descriptor (PPD file) for the P400. I was advised to use R2000 as the printer model because it is substantially the same printer as the P400. This forces me to use R2000 curves. I hope that’s not the problem!

□ I did not perform the linearization myself because I don’t have a photospectrometer yet. Instead, a friend volunteered to do it for me. He is someone with top-notch equipment and lots of experience calibrating PiezoDN.

□ I named the linearized quad R2000-P2-PiezoDN-Cyanotype-LIN.quad and used it to make the linearized target negative which is printed in attachment 2.

□ Paper, chemistry, exposure times, and development times were identical for both prints.

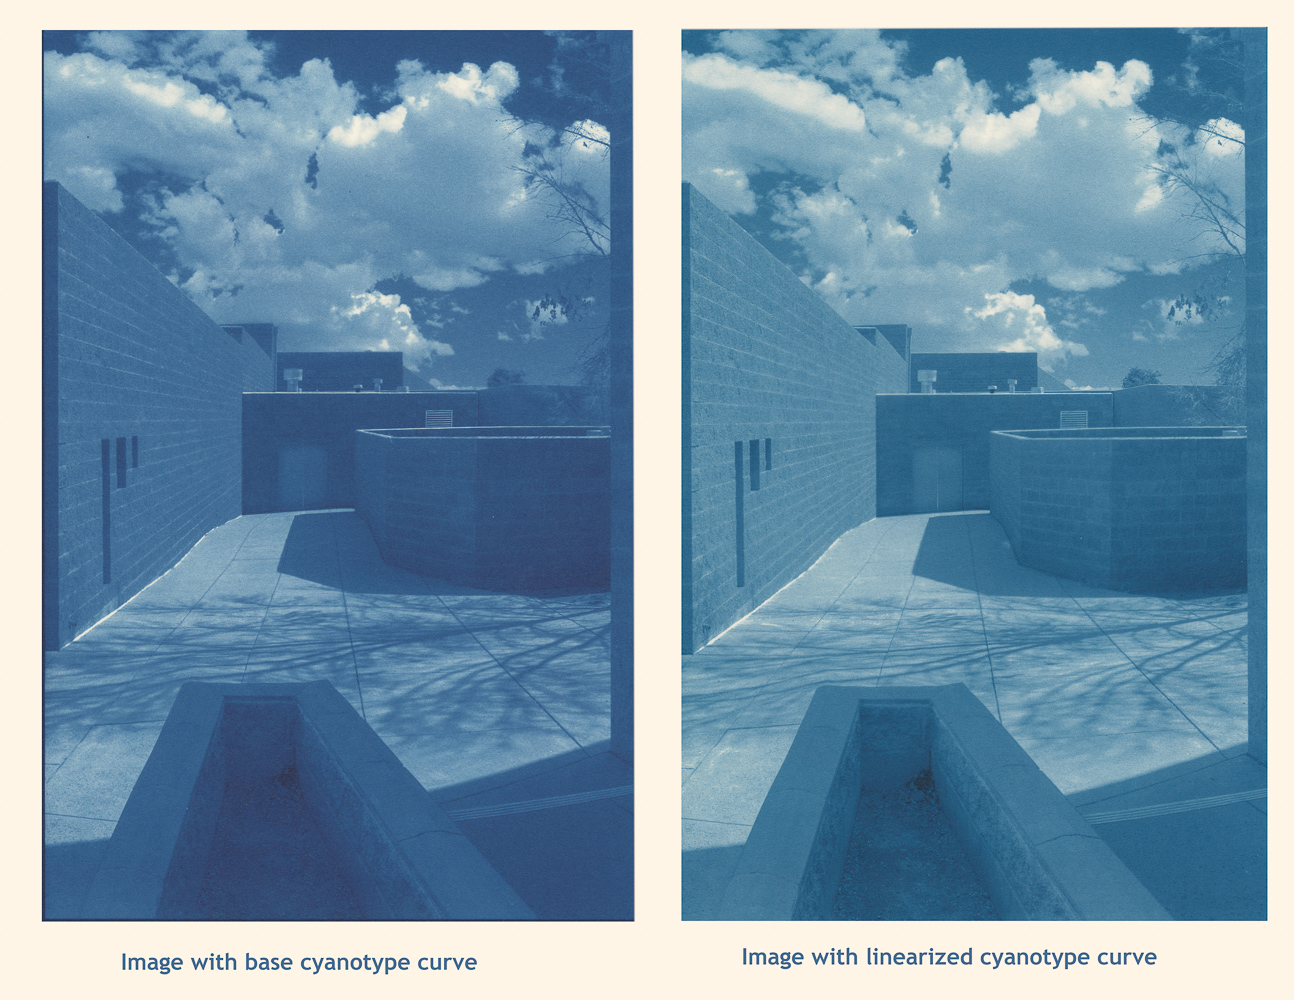
I also made two prints of a full tonal-range, contrasty image: one using the base curve for cyanotype, and one using the linearized curve (attachment 3). The print made using the linearized curve is only marginally better. Both prints have abrupt tonal shifts in the highlights and shadows, which (I think) is a characteristic of poor linearization. The midtones are drab and lacking in contrast.

I have ordered a SpyderPrint, so I will be able to do my own linearization very soon (and also make icc profiles). If you have any suggestions as to what might have gone wrong in this exercise, I will appreciate hearing from you so I don’t make the same mitsakes next time!


The color differences in these two photos indicate a difference in any or all of these:


  1. HO amount or freshness.

  2. Paper humidity.

  3. Tween or surfactant.

  4. Temperature.


Also, you have some bleeding in the ink. Are you using OHP Ultra Premium?

I also suggest starting on a very stable paper (HPR) if you are not. I’ve seen some papers just go all over the place with Cyanotypes while others are fine (aka HPR).


best,

Walker


Walker,

The color issue is not a priority. I’m asking about the quality of linearization and why it’s not as good as yours!

I mentioned in the post that I am printing on Ultra. I followed the manual as closely as possible.

John

In my few times with cyanotype I’ve found that it needs to iterate at least twice generally. That “perfect” one was twice . . . that was maybe the first one but it still had a few iterations to get actually linear as I recall.

This system requires ready access to a spectro as often a darkroom condition needs multiple iterations to get right.

-Walker

Hi Walker,

I need to understand exactly what you mean by “iterations.” One interpretation would be: repeatedly plugging the result back in until the process produces a linear curve. For example:

  1. print a target using the base curve
  2. use a spectro to read the target and produce a linearized curve
  3. print a new target using the linearized curve
  4. use a spectro to read the target from step 3 and produce a linearized curve
  5. print a target using the linearized curve from step 4
  6. ... etc. until the process produces a linear curve
Is that what you mean?

I ordered a SpyderPrint. It should be here tomorrow!


Yes you are correct. Generally with cyanotype it’s good to iterate (aka, refine with more than one step)


PiezoDN is iterative. It is designed that way.


all the best,

Walker

Great! Thanks a million.

Is that photo at Pima College?

And in case you haven’t seen this yet …

https://jkschreiber.wordpress.com/2016/12/06/using-a-spyderprint-to-read-calibration-target-prints-for-digital-negatives/

No, the photo is not PCC. It’s Ventana Vista, an elementary school on the far east side of town. It has some of the most interesting architecture in Tucson. I have been photographing there during school holidays. Here are two more that I scanned.

I did read your article on the SpyderPrint. It helped me decide to buy one.

Then the architect is Antoine Predock. He designed the ASU art museum too, and he did something for PCC but I don’t remember what. There is a striking resemblance in your photo to the corridor just west of the Photo area at PCC. I did many Pt/Pd demo sessions there from the mid-'90s until a few years ago.

Apologies for the digression. :wink:

Cyanotype is not my main focus by a long shot, but I did spend a good month or so doing it with a student last fall. Couldn’t get anything I felt was worth printing images with using the classic formula (FAC), but did get some lovely results with the Ware formula (FAO) especially on Platine. I made a successful linearization for Platine, but still found it to wander a bit in actual practice. It’s very sensitive to slight changes in process, even mundane things like wash time, and I suspect temperature as well. Recently, Christina Anderson has mentioned a variation on the concentration of part A of the classic formula that she has found to produce superior results. Normally, it uses a 20-25% solution of FAC, but Chris has reduced it to a 10% solution, which she says lengthens the tonal range significantly and also improves smoothness, both characteristics where classic cyanotype has always been lacking. The Ware formula is also superior in that regard, but is a bit more complicated.

I guess the gist of all this is that you really need to have all parameters pinned down before linearizing, because any change you make will require relinearizing.

Sorry if I’m just saying things you are aware of already.

When I calibrated Maine media I actually made 3 curves. One was “linear” one was “low-contrast” (tuned that way from Linear with the piezography curve adjustment tool) and (my memory is foggy) one was semi-high-conrast.


At any given point in time if the student/darkroom/water/brush/etc conditions changed the students could sorta dial in by “eyeball” an acceptable print. All the curves produced shadow and highlight detail. It was mostly to do with the middle.


This is an approach . . . .


best,

Walker

I made quite a few beautiful cyanotypes using the Ware formula calibrated by old-fashioned Photoshop curves. But they didn’t work as a series because of variations in coloration, texture, and tonality. I was hoping that with piezoDN calibration and ICC profiles I would be able to achieve consistency. But as you and Walker both suggest, the variations may be caused by minor differences in temperature, wash time, humidity, etc. which fall outside the scope of calibration. For example, humidity may account for the color differences in the two images in the original post. For the one using the base curve, the paper was coated and dried in a dry room. The one using the linearized curve was made after I installed a humidifier and raised the humidity to 45%.

I will re-linearize in the next couple of days. My SpyderPrint arrives today!

I’ve seen very consistent cyanotype printing nearly equivalent to PtPd. I just think the darkroom variables are really important. Because it’s a printed out process, humidity is also a huge factor. Yeah, that would certainly change your print from the first target to the second.


-Walker

I read manual section on the curve adjustment tool. The instructions are pretty straightforward, even though I’m on Windows and the instructions are written for Mac users. But when I tried to use the tool, the eight cells where you enter the (x,y) values from the Photoshop curve appear to be locked. Actually, cell B5 is initially selected, and I can type a new value into the cell, causing the corresponding point to change its x-coordinate. However I cannot select any of the other cells for input, or for that matter any other cell in the spreadsheet, either by clicking the cell or using the arrow keys. Maybe this is because I opened the xslb file in LibreOffice (although LibreOffice is supposed to handle xslb files). Yes, I have macros enabled.

curve-adjustment-tool.jpg

Only works in Excel because it uses Visual Basic code.


best,

Walker

As I understand it, the curve adjustment tool contains Visual Basic (VBA) macros. LibreOffice runs Basic macros, but not VBA macros.

Do all the PiezoDN tools contain VBA macros, or only the curve adjustment tool?

I can get excel for Windows if that will solve the problem.


Most of the tools use VBA to do their magic. The smoother does not (intentionally).


best,

Walker

Another unanticipated expense! Microsoft’s pricing model for a standalone copy of Excel 2016 for Windows is $80. For that you can install it on one PC. You can’t install it on a PC and a laptop (for traveling), in which case it would be reasonable for them to restrict you to one copy running at a time. The Netflix model :slight_smile:

Do you know what’s the earliest version of excel that will run the tools? I might be able to buy an old copy on eBay.

Let me add that water can be a huge factor. I have a buddy who tells a story of teaching in Ireland, for 3 days things dialed perfectly. It rained the third night and nothing worked the next day. As it turned out the mineral content of the water changed with the rain. I use deionized water for everything except the final wash on Alt processes to avoid this variable. Even if you are using municipal water they are only staying within a range of standards not a single targeted standard. I probably spend up to $200/year on water at $0.40/gal and never question the value of the expense. It is my most common chemical. Here in the SW, our water has so many minerals, it is really worth hauling pure water.

I am at the very last step of linearization, having measured a target with my SpyderPrint, smoothed it, and saved the GCATS text file. Now I’m running into a problem with QTR-Linearize-Quad.exe (in the QTR EyeOne directory).

Following directions in Section 9 of the Manual, I selected both the GCATS text file and the quad file I want to linearize (R2000-P2-PiezoDN-Cyanotype.quad) and dragged them onto QTR-Linearize-Quad.exe

I expected to see a new file created: R2000-P2-PiezoDN-Cyanotype-lin.quad

But instead, a file called GCATS-out.txt was created. Its contents look interesting (see attachment), but it’s not a quad file!

FYI I’m using QTR-Linearize-Quad version 2.7.6.0


GCATS-out.txt (11.9 KB)