[I’ve done quite a bit of Pt-Pd printing with Jon’s earlier curves, so am familiar with his prior process of a few years ago, but now am trying this new system]
Can I please get some clarification on a few items from the “PiezoDN Instructions for the 1430 printer”? These items are from the second section on Printing…
#3 - “The tones do not have to be inverted! The PiezoDN system takes care of that!” The image visible in the Print Tool before hitting print still is not inverted. Does the inversion occur while printing?
#9 - “select ICC profile in Print-Tool window…”. The only profile that shows up in the Print Tool box is the one chosen in Photoshop before the image is saved; therefore, I need to select a profile in PS first. And the only profile available is “PiezoDN_PtPd-Default”. In PS there is no option to select a profile specific to the paper + process. Do I save the image in PS and embed the “PiezoDN_PtPd-Default” profile?
#14 - “under curve 1, select appropriate curve” - I’m using Arches Platine paper. The introduction said there was a curve for that paper, but the only curves are the “Master” and “Ox-IJM” which according to the Data Sheet is for a Berger paper. Is there a curve for Arches Platine?
#18 - “set the Black Ink to Photo” - this box is empty and greyed out. Does this matter?
#3 Yes the printer will convert if using the Quad1430-PiezoDN driver.
#9 Are you print negatives or positive on paper?, the Quad1430-PeizoDN driver only shows the Pt /Pd curve because your making a negative but if you select the Quad1430-PiezoK6 you get the paper curves.
Yes, I’m printing DN’s on Pictorico, and then Pt-Pd process printing them onto Arches Platine. So, do I interpret your answer to #14 to mean if I’m printing a DN on Pictorico the “PiezoDN_PtPd-Default” driver shown in the Print Tool is OK?
#3 - You do not need to invert the image, the PiezoDN software does that. Be sure you have selected Quad1430-PiezoDN as the printer in Print-Tool, not Quad1430-K6 which is for normal prints on paper. Keep in mind that you do need to expand the canvas size to you film size filling the canvas with black in order to prevent the printer from trying to print a solid black border all the way to the film edge. This will make a mess in the printer - been there, done that! If you want a masking border for a clean edge you can do that too, but not out to the full page size. The unprintable parts still must be filled with black to avoid making a mess. I can post examples if you want.
#9 - First, your file (document profile) should be in GG2.2 in Grayscale mode. (It can also be Adobe RGB 1998 if you keep your files in RGB mode for some reason.) For Printer Color Management in Print-Tool you have 2 options: 1) No Color Management (I prefer this method) which disables ICC profiles. Whatever you may see grayed-out in the profile field is irrelevant since it is inactive. 2) Print-Tool Managed with an ICC profile and a PiezoDN curve which is set on the next dialog (QTR Setup). Note: Early versions of PiezoDN had some IJM-made ICC profiles for Platine, HPtR, Revere, and COT320. I’m not sure but I think these were eliminated in later revisions because they proved to be too specific to the conditions in which they were made. Everyone’s darkroom practices and conditions are a little different. Best results will be obtained by making your own ICC profiles (if you really want to use them) and QTR quad curves or at least linearizing the provided master curve.
#14 - The best practice is to start with the master curve, print the 129-step target with it, then make a Pt/Pd print of that, read it with a spectro, and use the results to make a custom linearized quad curve tailored to your methods and conditions. The manual describes this process well, but I can help guide you through it if you want. I’ve done so many now it has become second nature. If you want to try the OX-IJM curve just to see how it looks, Berger and Platine are actually quite similar. As long as you are using potassium oxalate developer it might be close. Ammonium citrate tends to be more contrasty but how much varies from paper to paper. A more significant variable is your exposure unit. Different UV exposure lamps can produce very different results.
#18 - Doesn’t matter for the 1430 since only one black is installed. (Be sure it is PK.) This setting is for printers like the 3880 etc. which have 2 blacks installed, in which case it would be set to Photo.
Hope this is helpful and not confusing things further.
Kieth, thank you for the detailed response. I was making Pt-Pd prints with Jon’s Beta curves about a year and a half ago; however, I only put my image on the Pictorico with no masking/extended canvas in my Print Tool image. But, the image was already inverted. I usually print small, 4x6 max, and prefer to have a thin, rough, coating edge vs. a “clean” edge. So putting a black canvas is no problem. You mentioned you could post an example… this would be greatly appreciated as this canvas method prior to printing is not something I’ve ever done as Jon’s Beta curves didn’t invert the image.
I will start out with the the Master and the OX curves to see my results. In prior prints I was using Ammonium Citrate, but I have both developers and can experiment with both. And yes, I will then create a customized linearized quad for my eventual process (I have a Spyder Print S4SR100). In the past I used 50/50 Pd+Pt#3 (not Na2) with Ferric Oxalate equal to the amount of metals, plus a drop of Tween. I ended up getting some beautiful results.
I’ll be printing later this week. Thanks for your help…
Walker, sorry, but your process steps leave me with a few questions.
#3 Flatten image… my B/W conversion occurs in SilverEffectsPro, so when I open the saved TIFF file in PS there are no layers, therefore Flatten is greyed out, which I’m guessing means it’s already flattened. ?
#5 Set sheet to zero margins… as I’m not printing in PS, but in the Print Tool, wouldn’t step #5 be to simply save the image? Not sure where I would set margins in PS if I’m not printing from there.
#6 you say to import and print, but I’m assuming you mean import and print in Print Tool?
I’m pretty sure Walker is assuming that you are printing with Print Tool, but he did leave out one rather important detail:
Save the file using Save As … either in a different folder (I have a separate folder just for digital neg files) or with a modified name. That is the file you will then print in Print Tool with the PiezoDN curve.
You do have to use Ps to make the necessary Canvas Size adjustment. For example, if your image size is 8 x 12 and you are printing it on 11x17 Pictorico, then open Canvas Size and expand to 11 x 17 filled with black. (You can offset it if desired or necessary by doing this in 2 steps.)
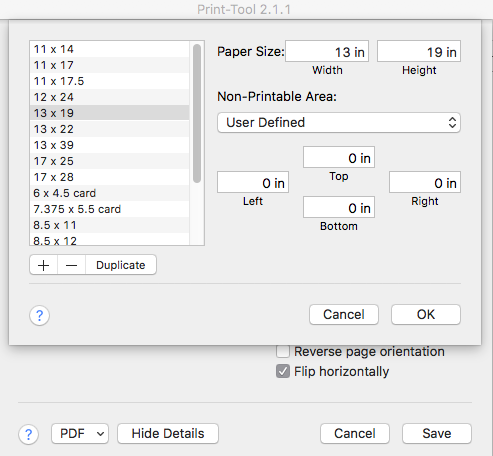
Margins refers to the Page Setup in Print Tool. You need to create a custom Page Setup with all margins set at zero. Paper Size > Manage Custom Sizes… > + > [add your custom settings: Sheet size (don’t forget width is the short dimension), and under Non-Printable Area set all margins to zero], then save with a new name. Note: It will be at the bottom of the list until you name and save it.
In the attached examples, the first will print a with a clear border around the negative, the second with a 1/2 inch wide black border. Both are positioned such that the leading 1/2 inch of the sheet is not printed at all due to the particular handling characteristics of the 3880.
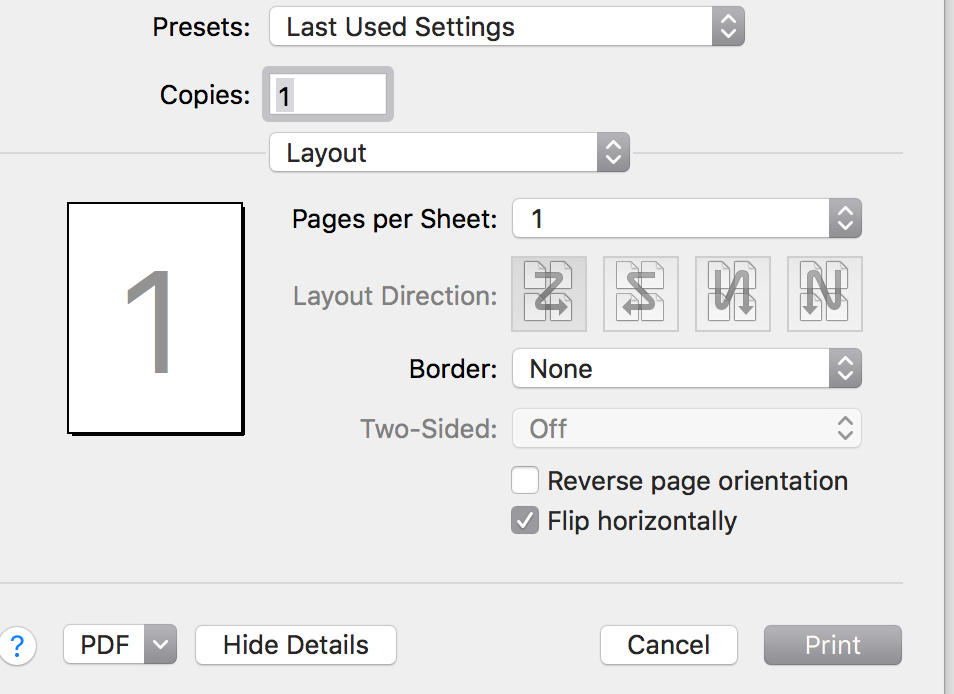
Notice in the screenshot of the Custom Page dialog that the window in the background has Flip Horizontally checked. This is saved as part of my PiezoDN preset (which includes all of the relevant QTR settings) so that it is not necessary to flip the image in Photoshop.
PS - I’m confused about your comment regarding the beta curves. I began beta testing in April of last year and the curves I was sent did the inversion internally. Were you testing before that?
I think he meant the previous Piezography Digital Negative system. These were the “Meth3, Meth1” curves. They were not beta at the time . . and they required different half-shades of ink.
Yes, Walker is correct, I was using the Meth1 and Meth3 curves (winter 2015/16) and incorrectly referred to them as “beta”… “earlier version” would have been more accurate. I’ll be printing this weekend and will provide an update. Kieth and Walker… thank’s very much for your help.
When printing the 129 step target, do I need to embed the same profiles in PS as noted above for printing an image? If I just open the step target in the Print Tool, the Embedded profile is “untagged”.
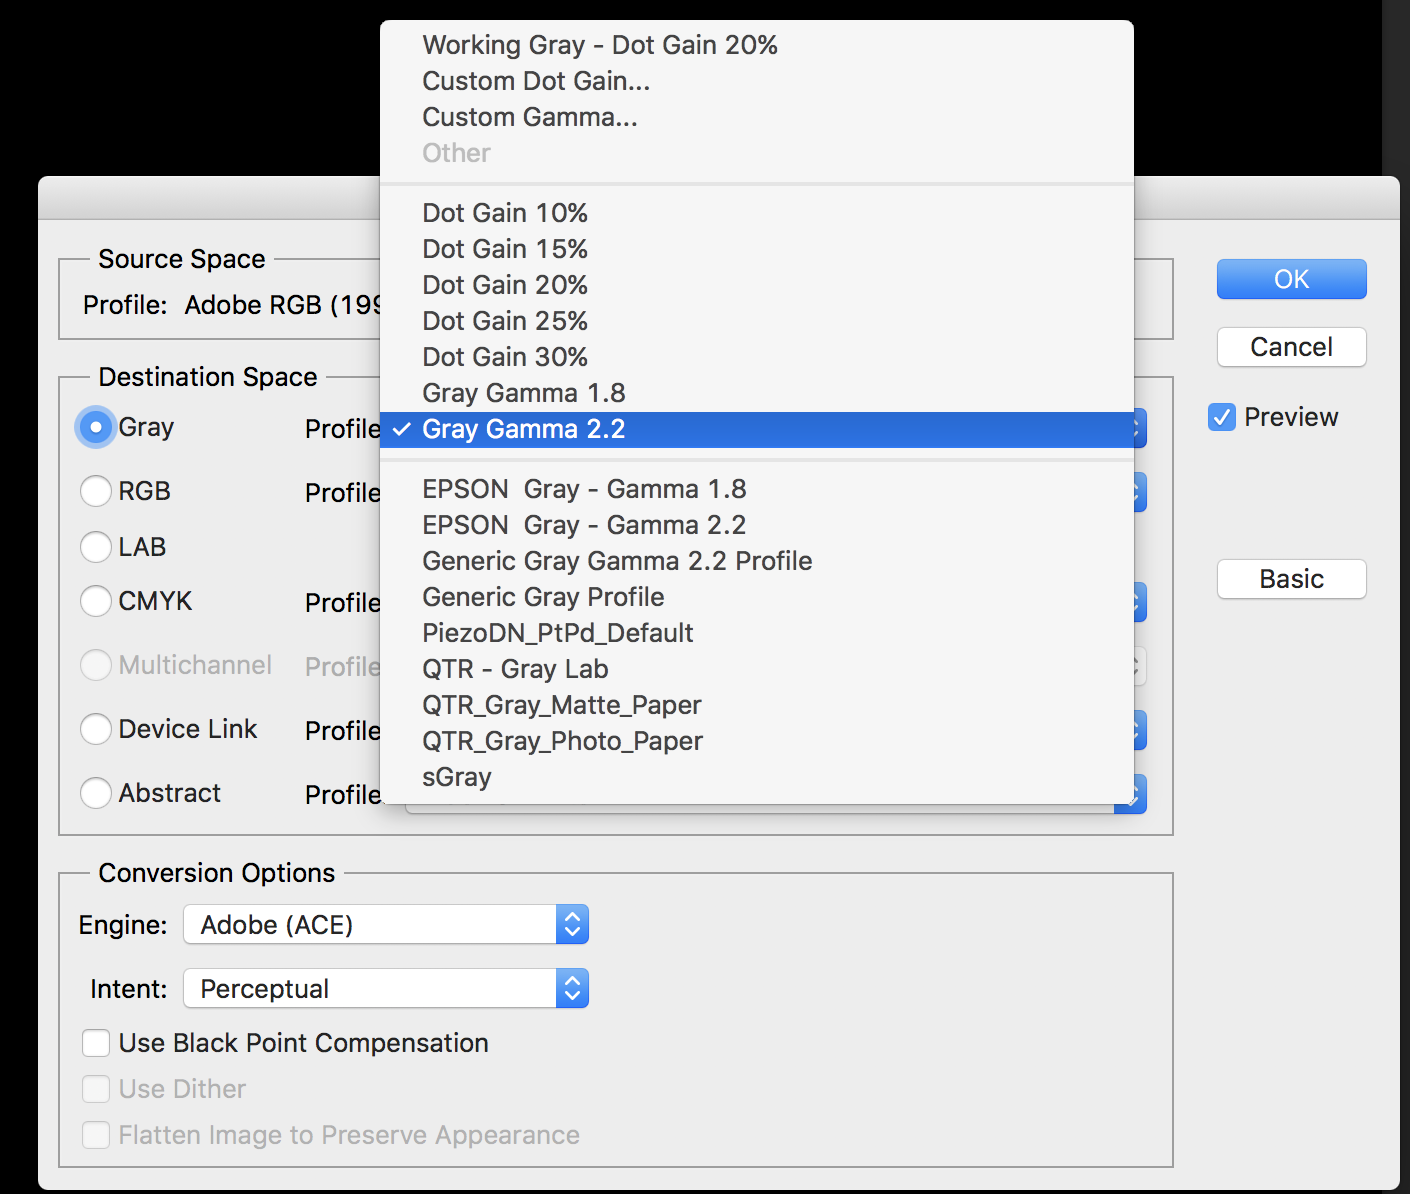
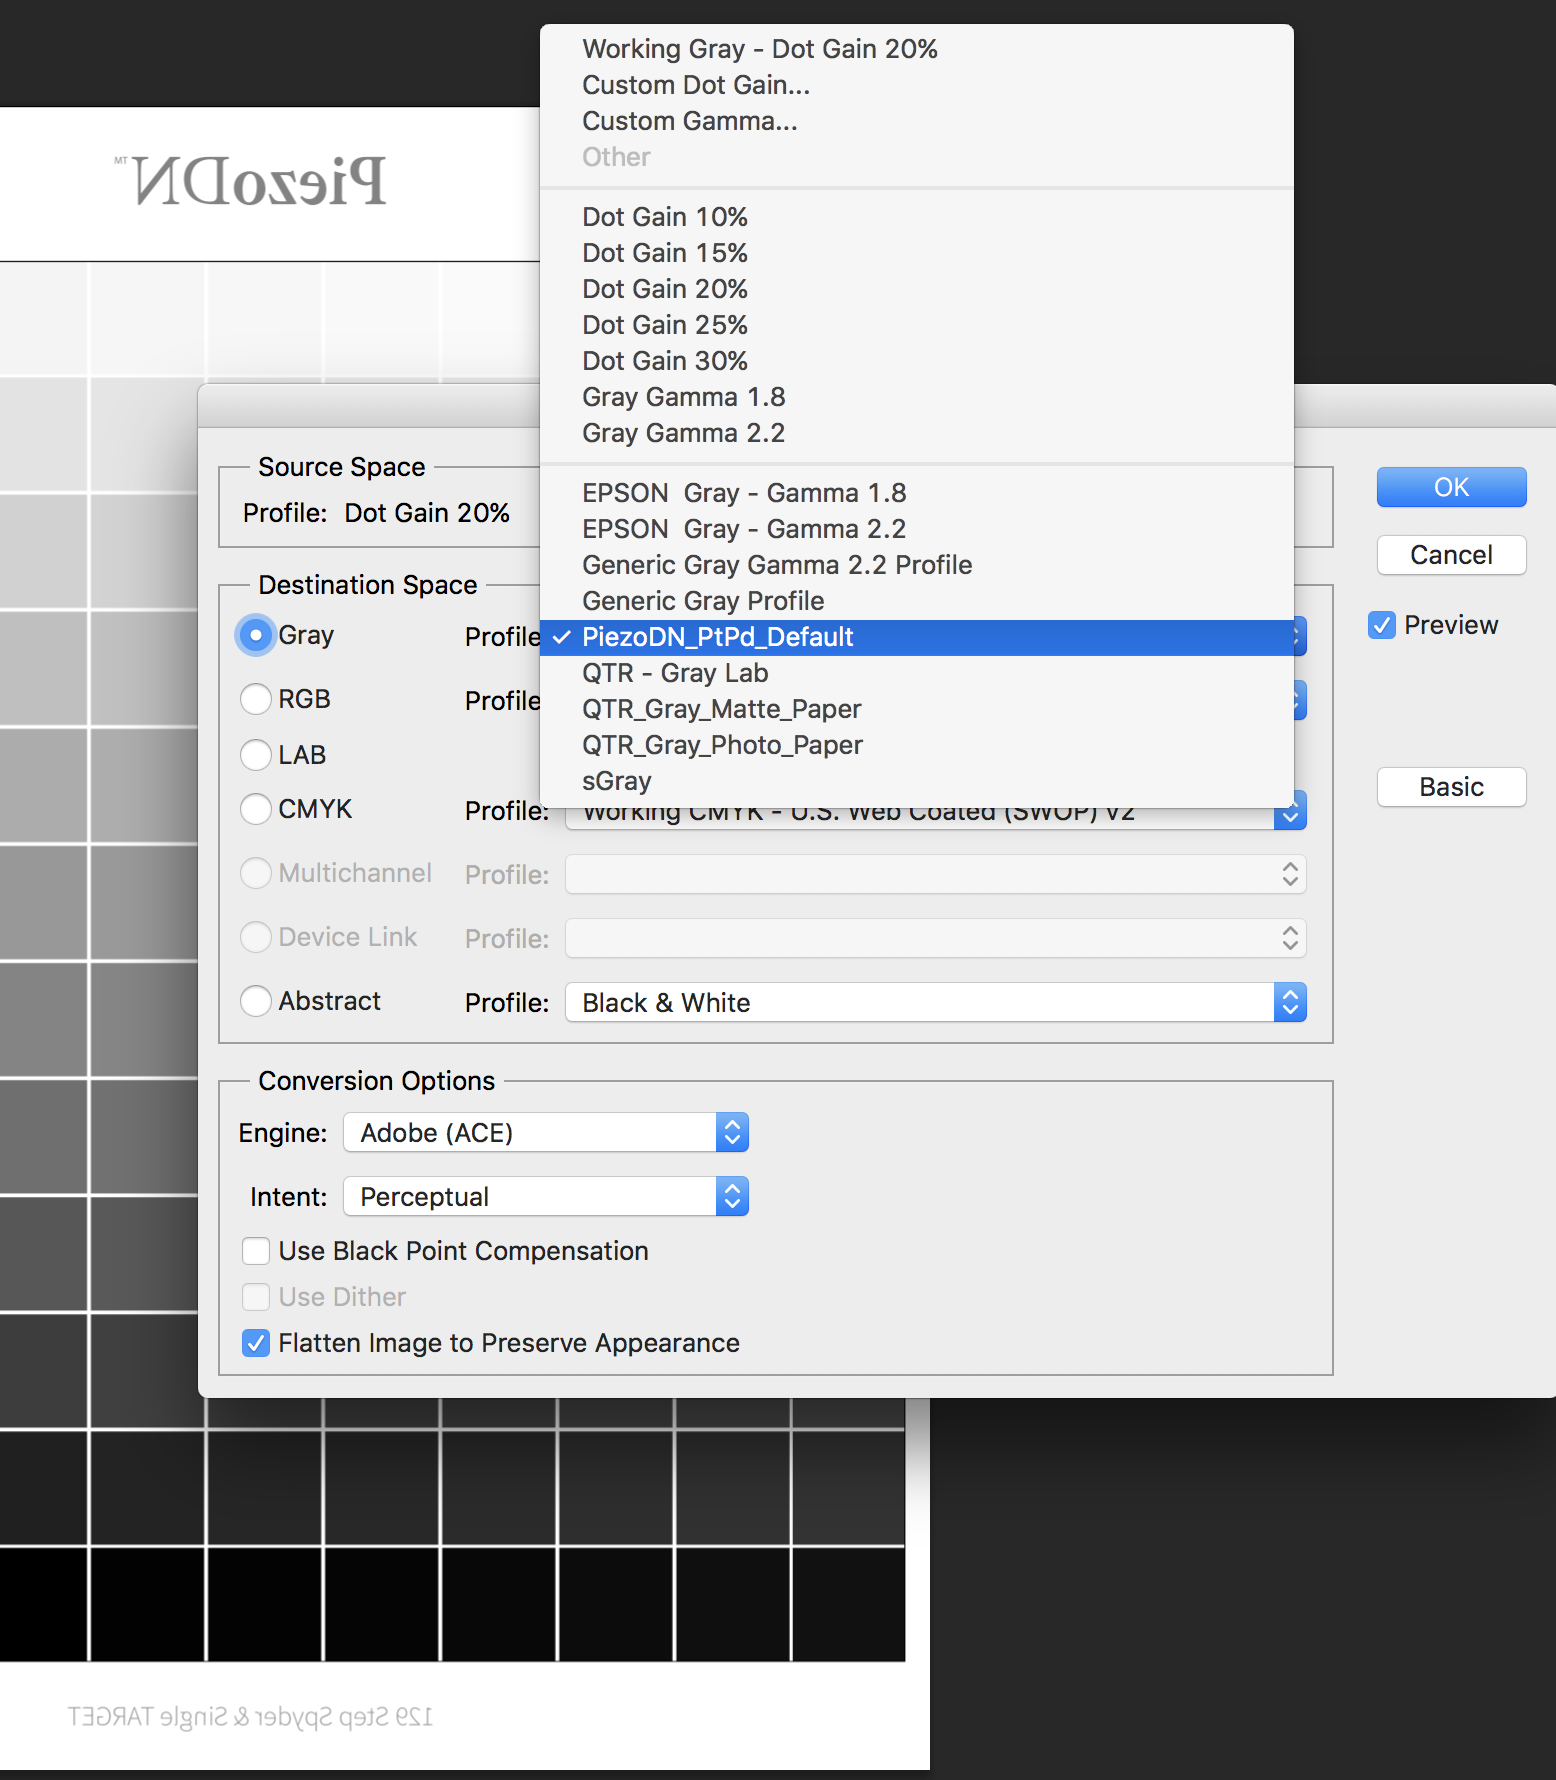
When I open the step target in PS and go Edit>Convert to Profile, under Destination Space the Grey pull down menu gives me several options. For an image print, based on your comments above, I would choose Grey Gamma 2.2 (screen shot attached). For the step do I choose the same or the PiezoDN-PtPd_Default (screen shot attached)?
Hmmm… that was very odd… I printed my first DN using the new Cone system. It looked right. I dried it, coated my paper with 100% Pd per the Data Sheet and exposed for 2 minutes as instructed using fresh Potassium Oxalate developer. There was no image… not a hint. (remember, I’ve had a lot of success the past).
Any ideas what might be wrong?
(I’ve always combined Ferric Oxalate (solution #1) with my Metals. I was under the impression that it not only helped with contrast but was required for the Palladium / Platinum to become light sensitive. Not required?)
Dear Robert. Where did you see 2 minutes? First you have to determine the minimum exposure time to get maximum black. This exposure amount entirely different for every single darkroom/method. So first figure this out and then exposure your target.
Ok. So the “development” time was 2 minutes. Not the exposure time. As the data sheet shows, the exposure time was 180 Units of UV using a specific bulb on a specific exposure booth with specific chemicals in the coating on a specific paper. Your conditions are certain to be different. This data sheet is simply showing the conditions at the time of the initial calibration.
You need to still get your basic exposure time set (the same way as if you were printing a large-format analogue negative made from your camera) before printing the target.
My first DN printed well. I printed the same image with the same settings, with the same DN curve selected in the Print Tool. All settings the same, but the image was not inverted this time. Any ideas why that might happen?
There is no issue with the image being flipped horizontally… the problem was the image was not Inverted during the printing process even though the same DN Curve was selected.