Verifying Linearization

Jon,

Is anyone verifying how closely a curve approaches linear after completing the 2 target linearization process? I was vastly disappointed to discover that the first curve in some instances was closer to being linear than the “linearized” versions.

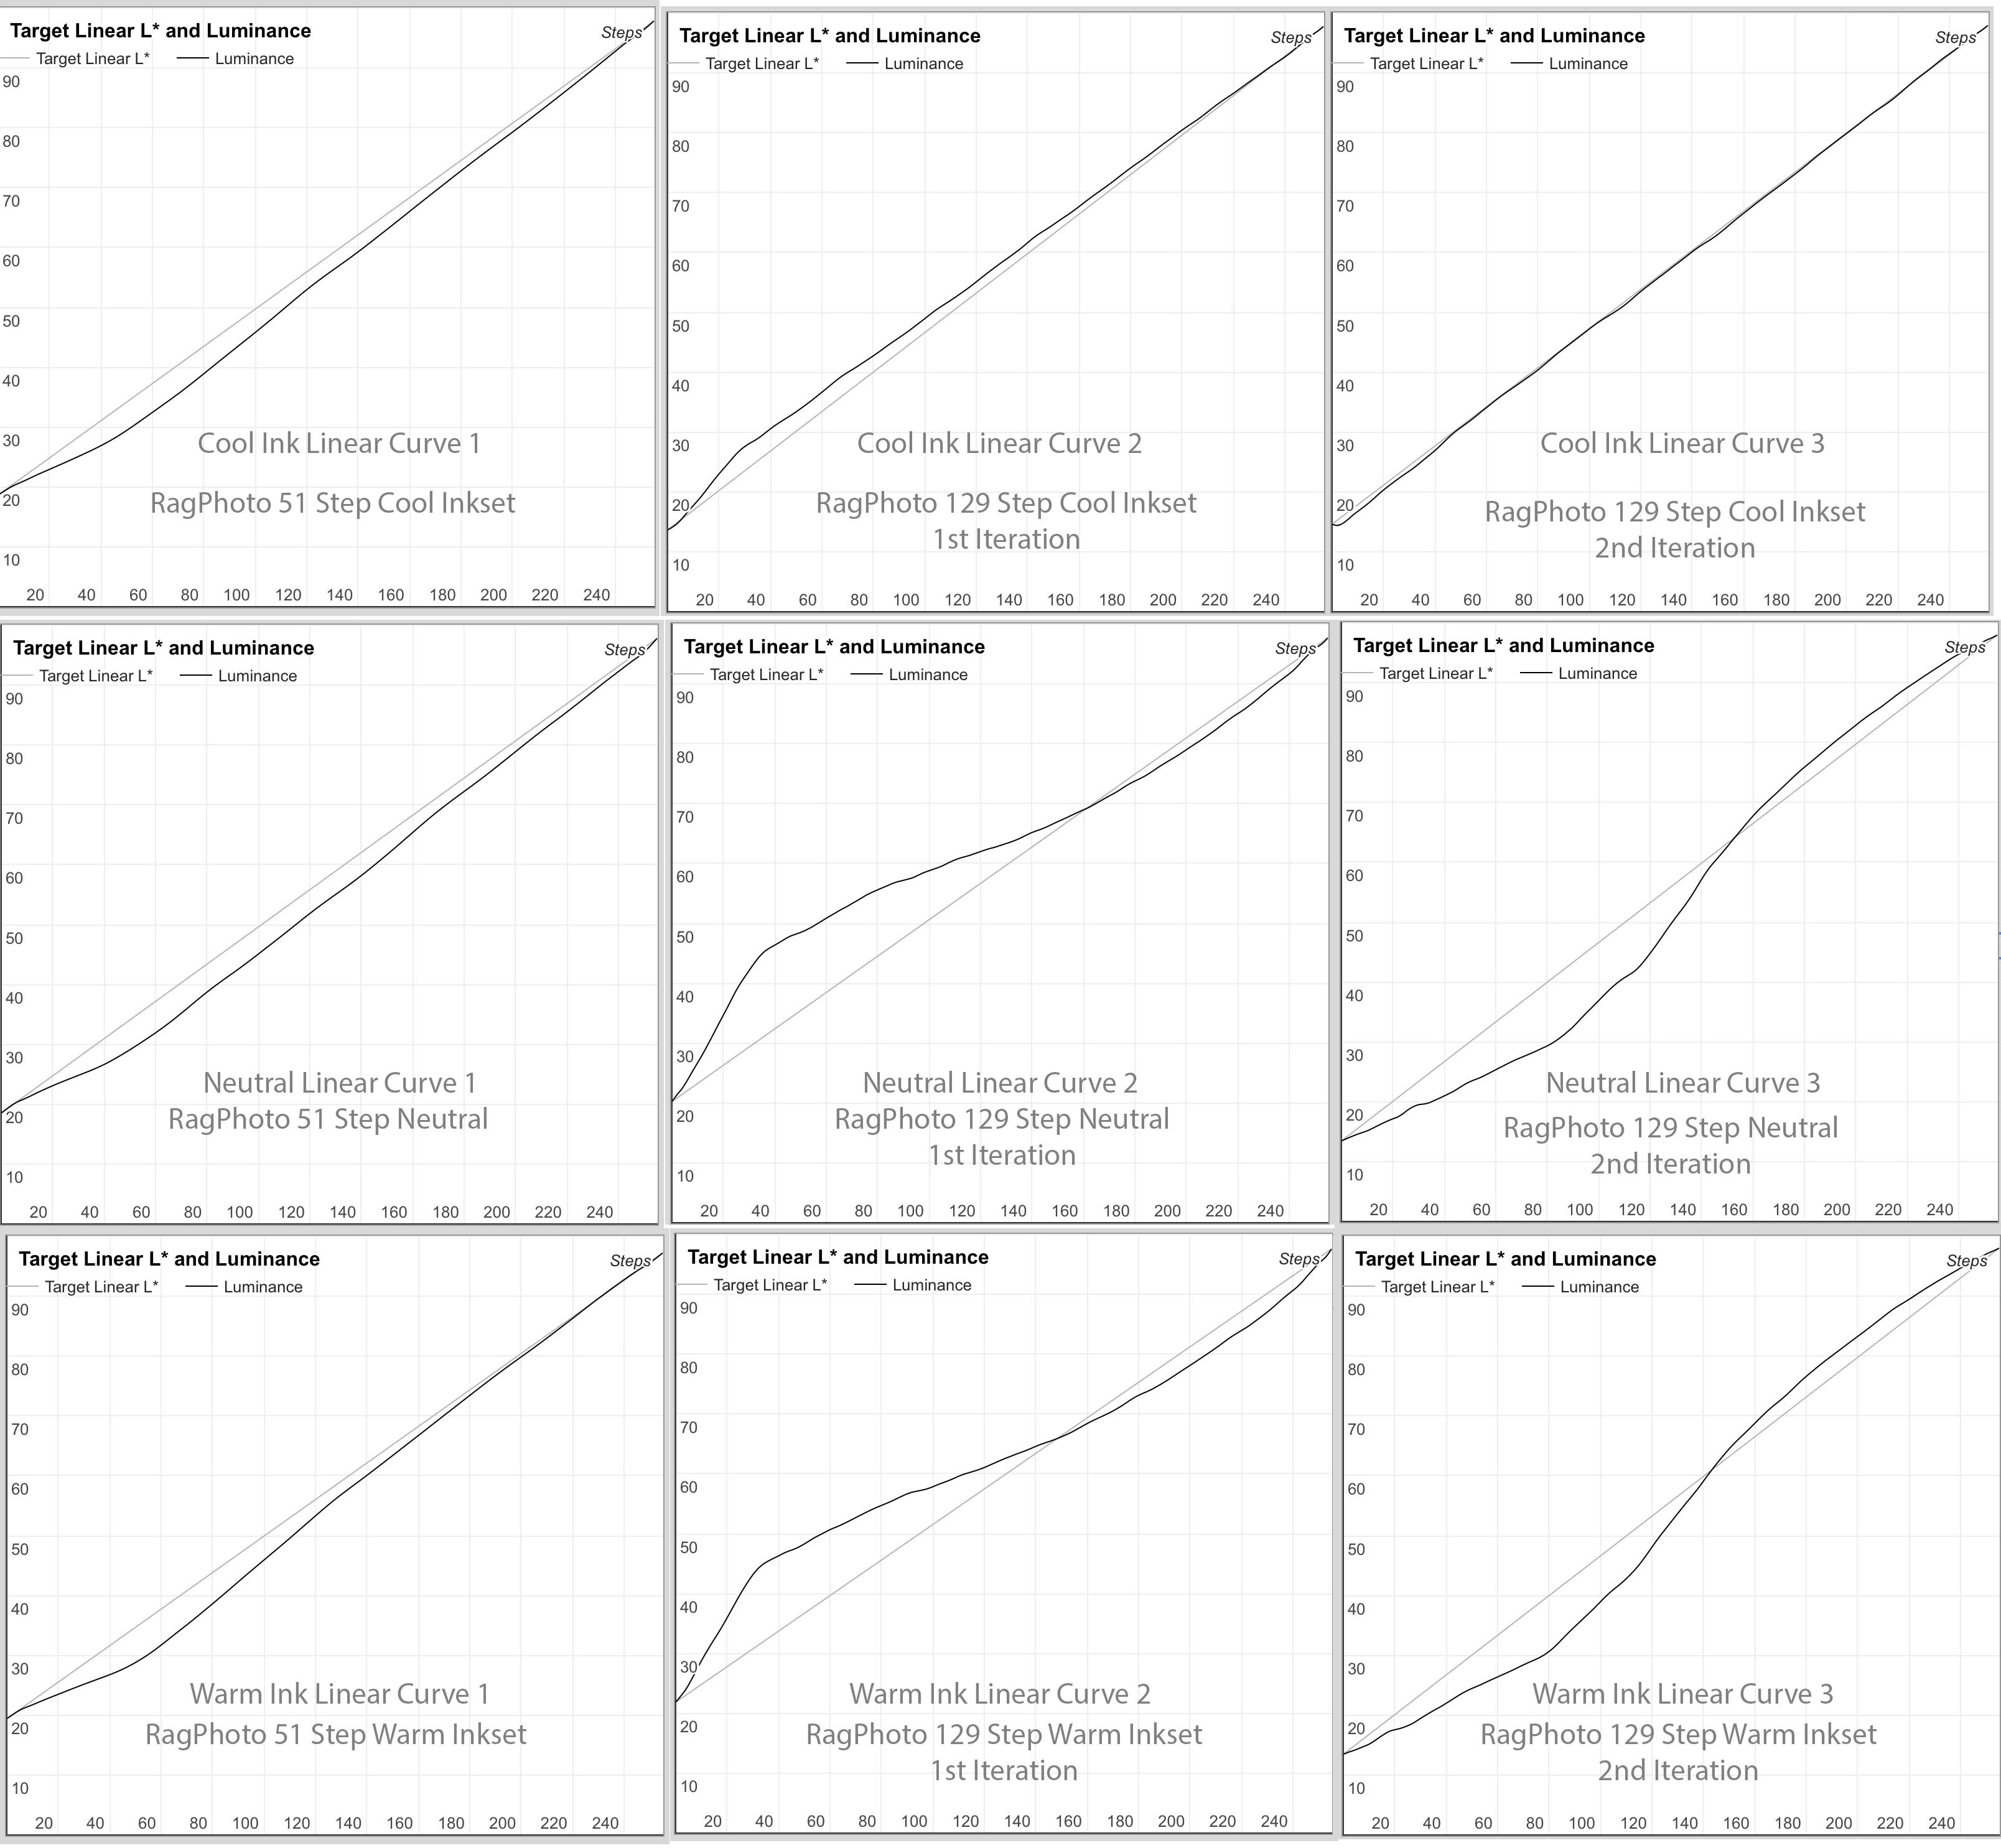
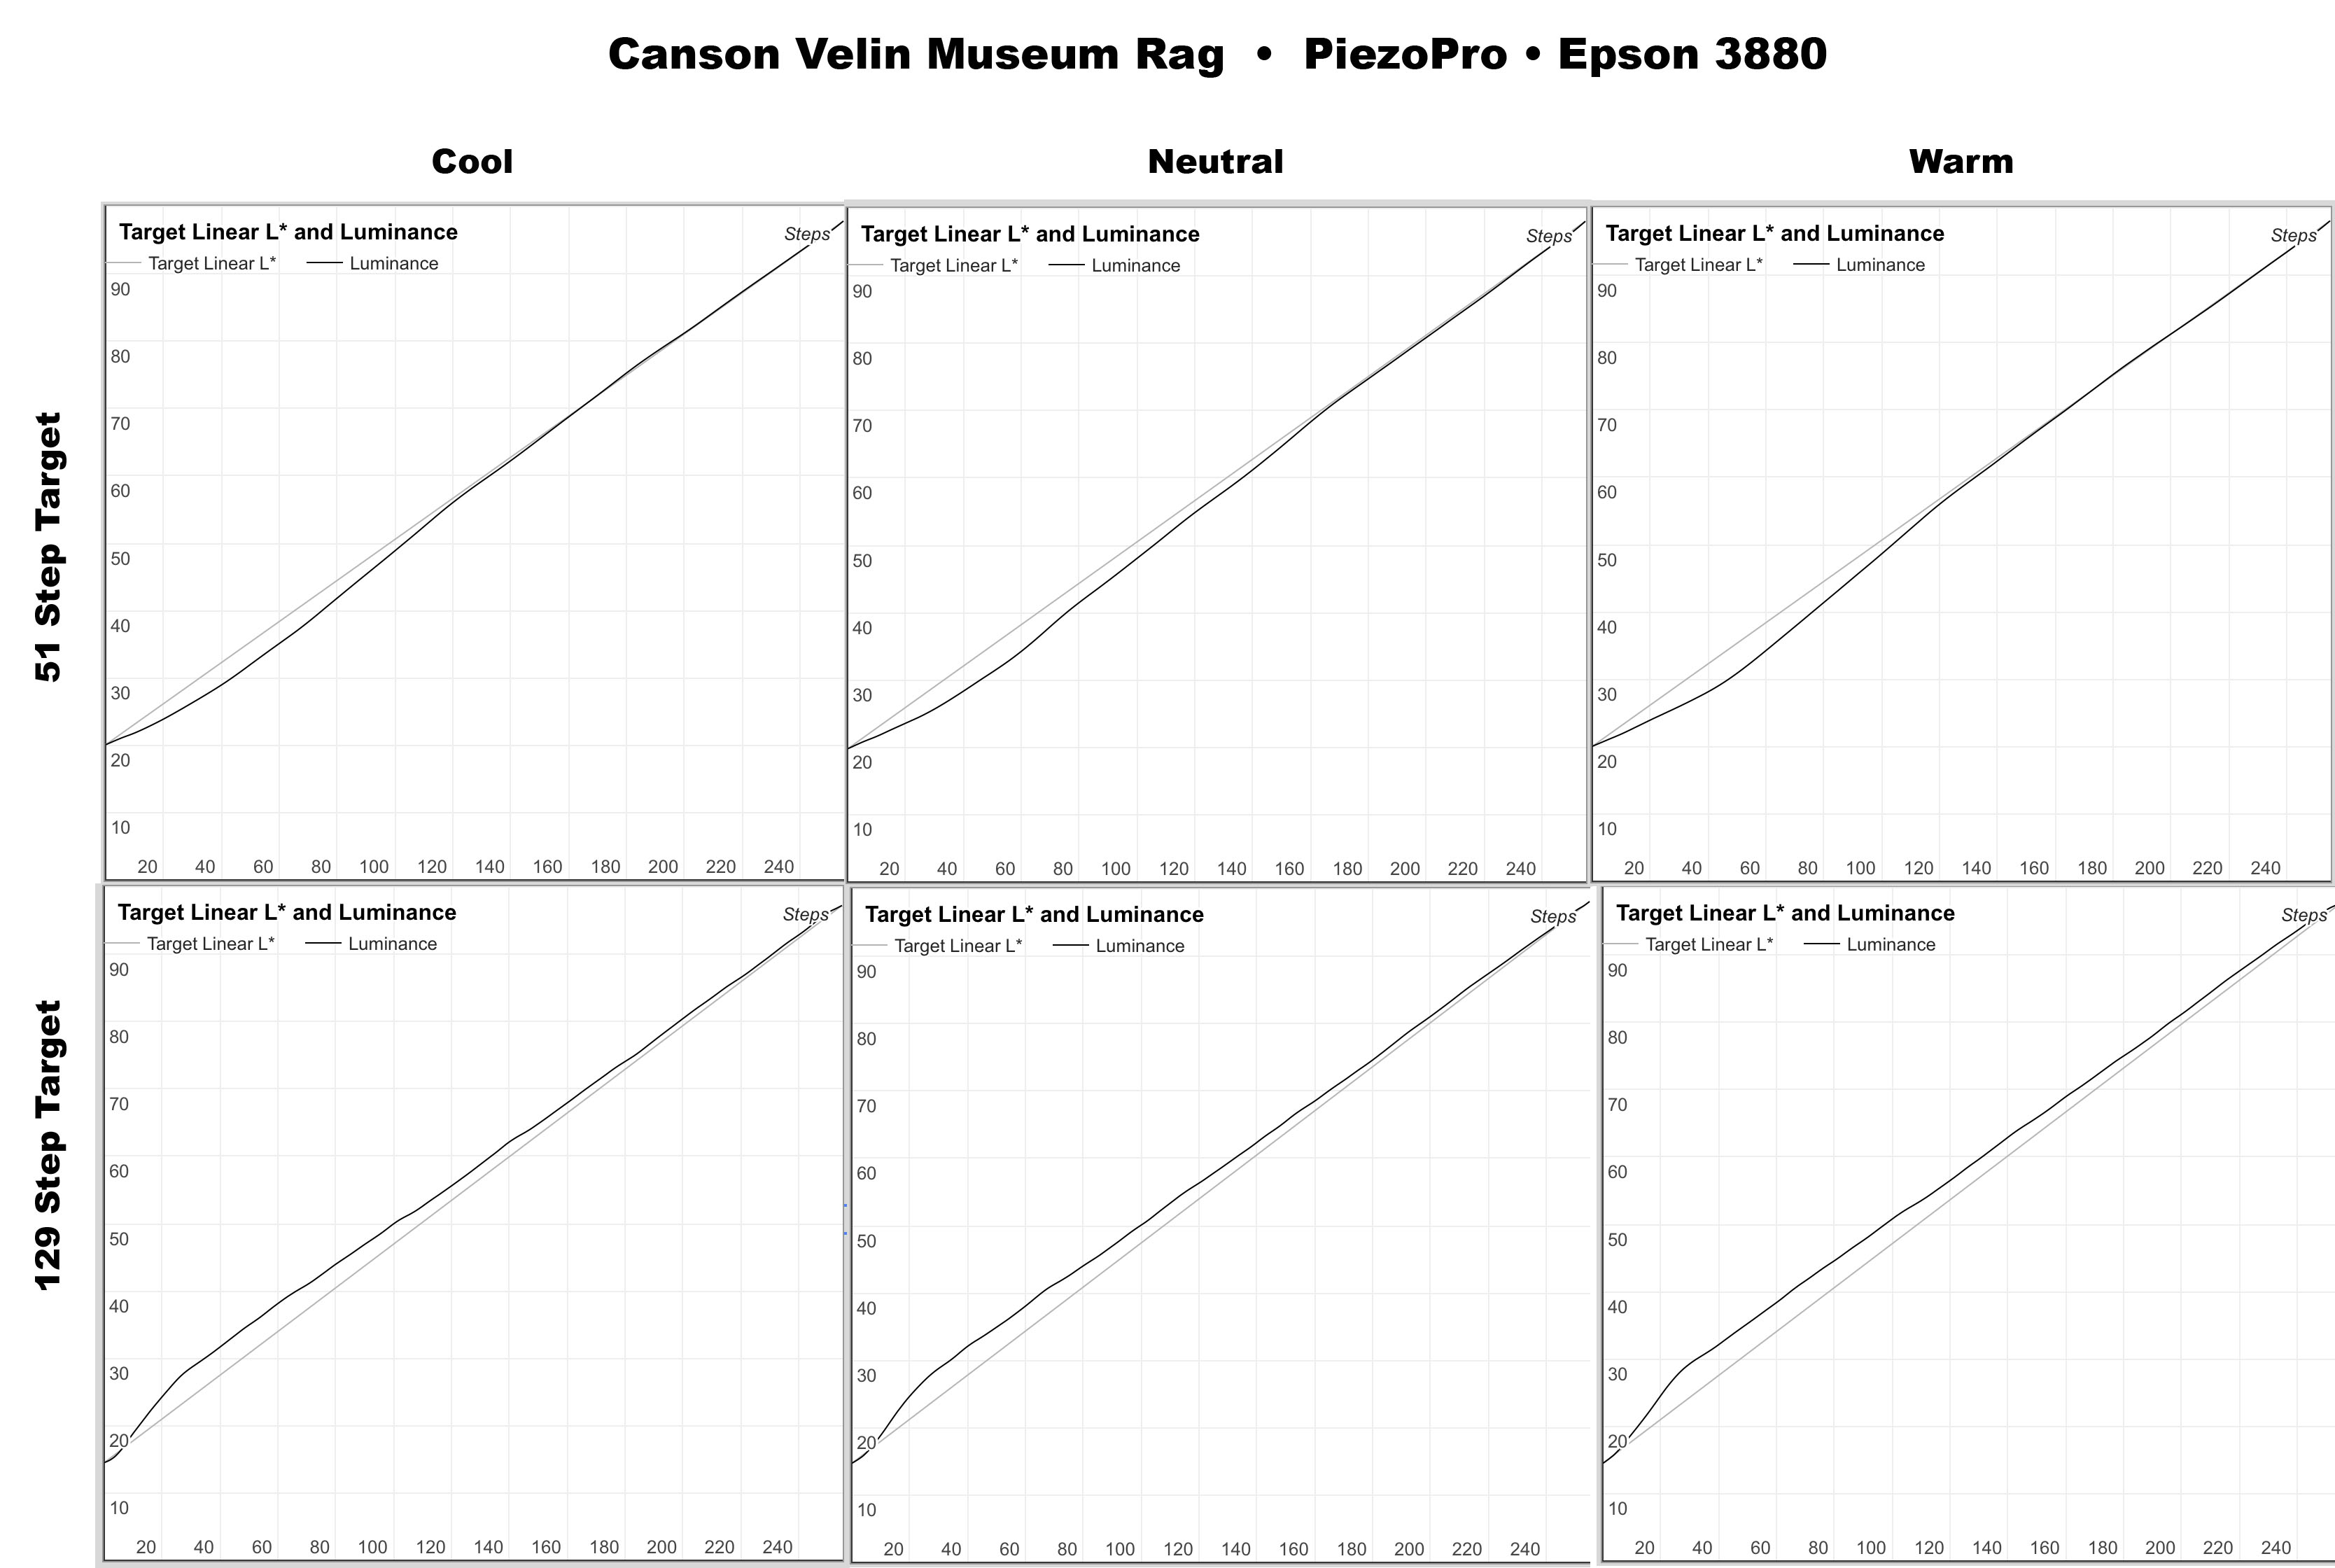
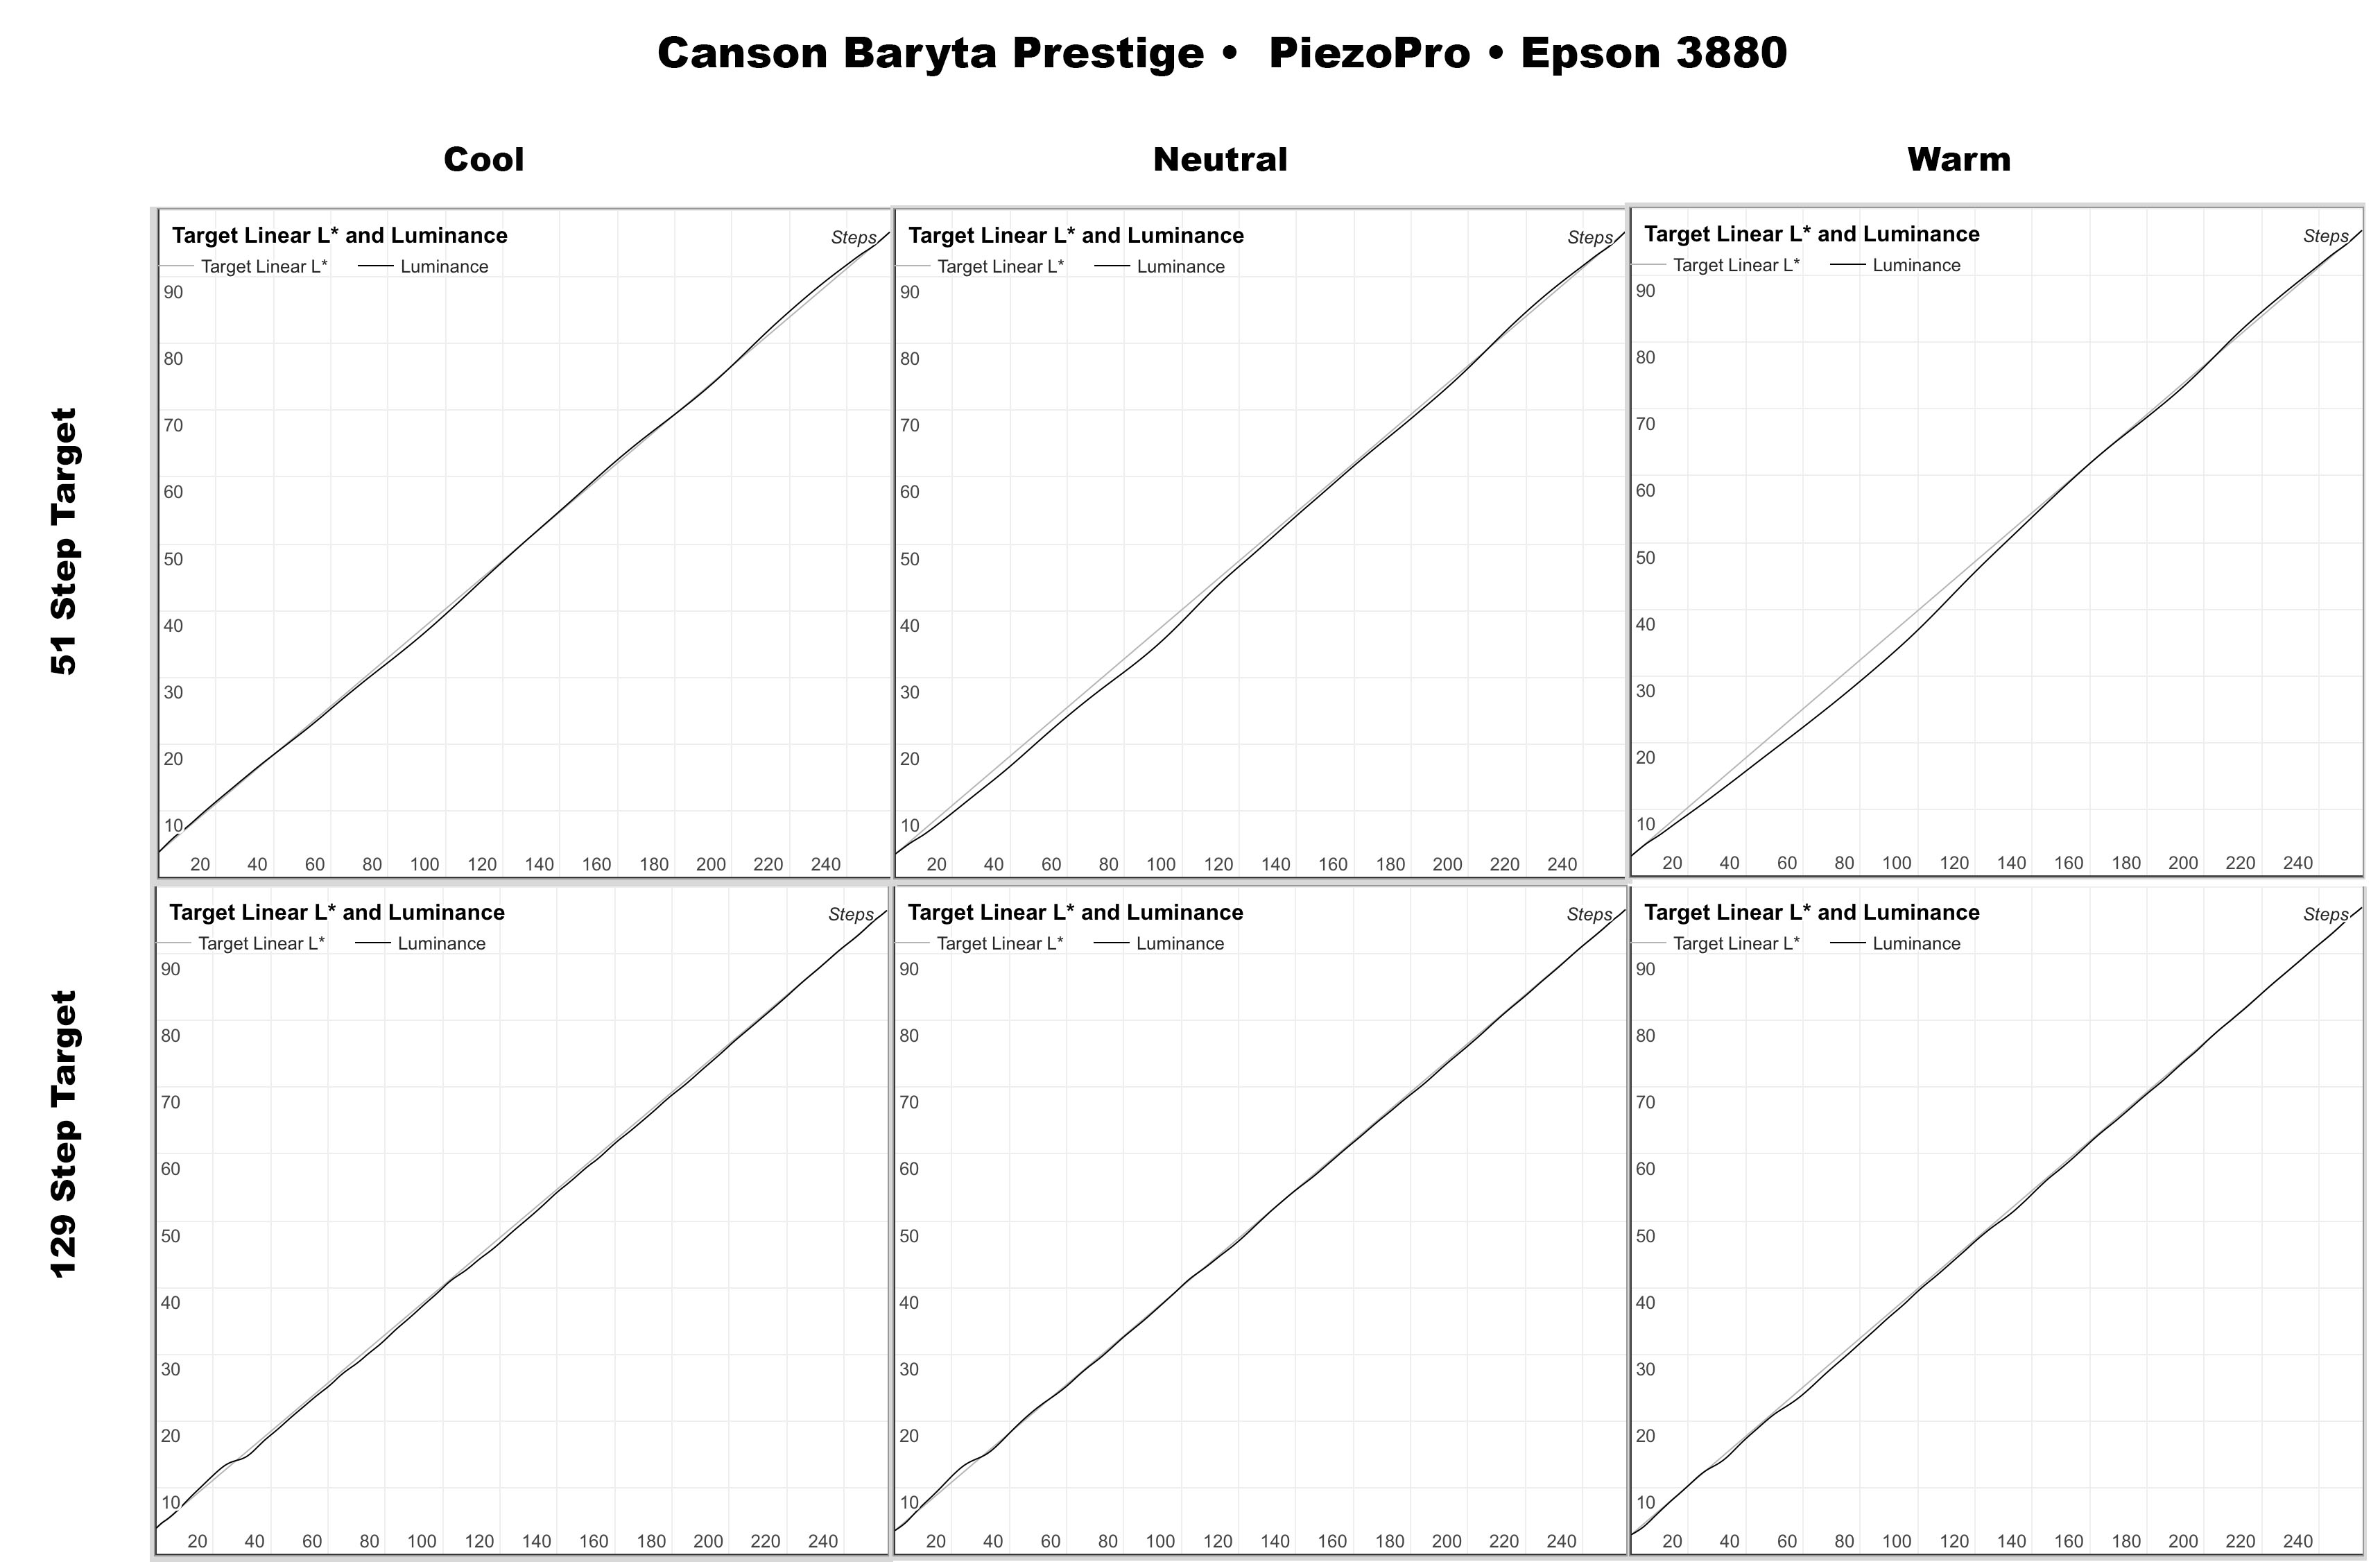
Here are the results I got with one paper and the PiezoPro inkset. After reading the 51 step target (for cool, neutral, and warm) and adjusting the curve for error correction gave fairly close results. However, after using that result on the 129 target (except for cool ink) the curves were made more non-linear.

So I decided to undergo one additional iteration using the 129 target. The cool ink curve got much closer. But the other two were made even worse.

I thought I might have mad a measurement error or an error in choosing which L* to correct for false L*'s. I went back and re-read the entire target with virtually identical results. I measured four or five patches surrounding the false L, and averaged 7 readings, only to get the same number of false L’s, and an almost identical linearized curve as a result.

When I get time I’ll check the other papers I optimized. I seem to recall that one of the others gave very good results for all three curves.

Do you find that some printers are more suited to a specific paper,and that some papers are not as good for certain printers.

Is there some other error that I might be overlooking including user error.?


Please let us know exactly what model printer and curve (name) you are using for PhotoRag. It should be no-where near that out of linear to start!

And also, the second linearization should be way way closer than what you are getting. Something is entirely off with either the curve being selected, ink being used, and lin workflow applied.

best,

Walker

Also, if this is Pro ink and Photo Rag paper the L* value should be closer to 12.8 and no 20 so are you printing with the wrong black ink perhaps? I would verify that. It should be the UltraHD Matte Black ink that you are printing with on the matte paper.


best,

Walker

I am printing on an Epson 3880 with Piezo Pro Inks. I verified I have UltraHD Matte Black in the cartridge in ink bay #1. I started with your curve set for RagPhotographique.

I’m also attaching the curves for Canson Velin Museum Rag. I got better results running the measured targets throughout the Linearization Software, but still not as good as I’d expect. I did not run a 2nd iteration with the 129 target b/c I am out of this paper. The 51 target black measured out at 20, while the 129 dropped it to 14+.


Here’s the curves.

can you please verify your printer is in Matte Black mode?

It looks like your first prints were done with PhotoBlack (or PiezoFlush) in the K channel and your second charts where done with full Matte Black in the K channel (the proper black).

The different in dMax between first and second prints and the attendant difference in the shadow slope (where the K ink gets printed) makes that pretty clear.

Now that you have MK ink going through your print-head, re-linearize from scratch and you should be a’ok.

best,

Walker

I’m using PiezoPro inks in an Epson 3880. I started with your original curve for RagPhoto and VelinMuseum. For Baryta Prestige, I started with Baryta Photo.

My printer is definitely in Matte Black Mode for the Rag Photographique and the Velin Museum Rag. It was definitely in Photo Black Mode for the Baryta.

This printer was never charged with ink until I did so with PiezoPro inks. This printer has never had PiezoFlush used in it. I find it improbable that the black line did not adequately clear when switching form PK to MK. In less than two weeks, I did 3 nozzle cleanings, printed four 17x22 PK on Baryta, 9 PK Linearization Targets, and 3 MK targets. I switched from PK to MK to PK to MK. At this point I got the Waste Tank full error and my printer shut down. It seems I’m dumping a lot of ink somehow.

If the black line didn’t purge on the switch from PK to MK, would it not have purged after printing one test target. I always printed cool, neutral, warm — in that order. But I do see that the 129 target curves are down 20 to 14.5 in the blacks.

I’ll order more paper and repeat for the matte.

I observed a couple of differences in what I did verses what is stated in the Deluxe Manual Section 9:

In Print Tool, Under “Embedded Profile”, the manual says “Generic Gray Gamma”. But the targets open in my PS with no embedded profile. Gray Gamma 2.2 is my working space.

Not mentioned in the manual: Under “Paper & Print Settings …”, Choosing “Printer Features”>Photo Paper was selected. I scrapped those targets printed with this setting and changed it to Matte Paper when printing on Rag, and to Photo Paper when printing on Baryta.

Just to confirm, Under “Paper & Print Settings …”, Choosing “QuadtoneRIP”>“Black Ink”> I’m on “-installed-”.

Here is the progression for BarytaPrestige. Again, the Cool 51 target curve is more linear in the shadows than the 129 target curve, but I see a very very slight improvement in the highs.

Here’s why I believe there’s something else happening with my dMax values. I run a nozzle check minutes before printing the step targets. My print order was:

Velin Museum 51 Step Cool, Neutral, Warm (Black values approx. 20, 20, 20)

RagPhoto 51 step Cool, Neutral, Warm (Black values approx. 20, 20, 20)

Velin Museum 129 Step Cool, Neutral, Warm (Black values approx. 18, 17, 17

RagPhoto 129 step Cool, Neutral, Warm (Black values approx. 15, 20, 22)

RagPhoto 2nd iteration 129 Step Cool, Neutral, Warm (Black values approx. 18, 15, 15)


Any L* value above 15 is an aberration. If these were printing one right after another, than something is funky in your PK/MK switching damper where somehow PK is getting into your MK.

I suggest printing a few purge print of the black channel with MK ink to make sure you don’t see bands of PK coming in there.

-Walker