After several successful tests on Awagami Editioning papers and other uncoated papers, I get the same “strange effect” on two papers including the Hakuho Select (45% Kozo | 55% cotton):
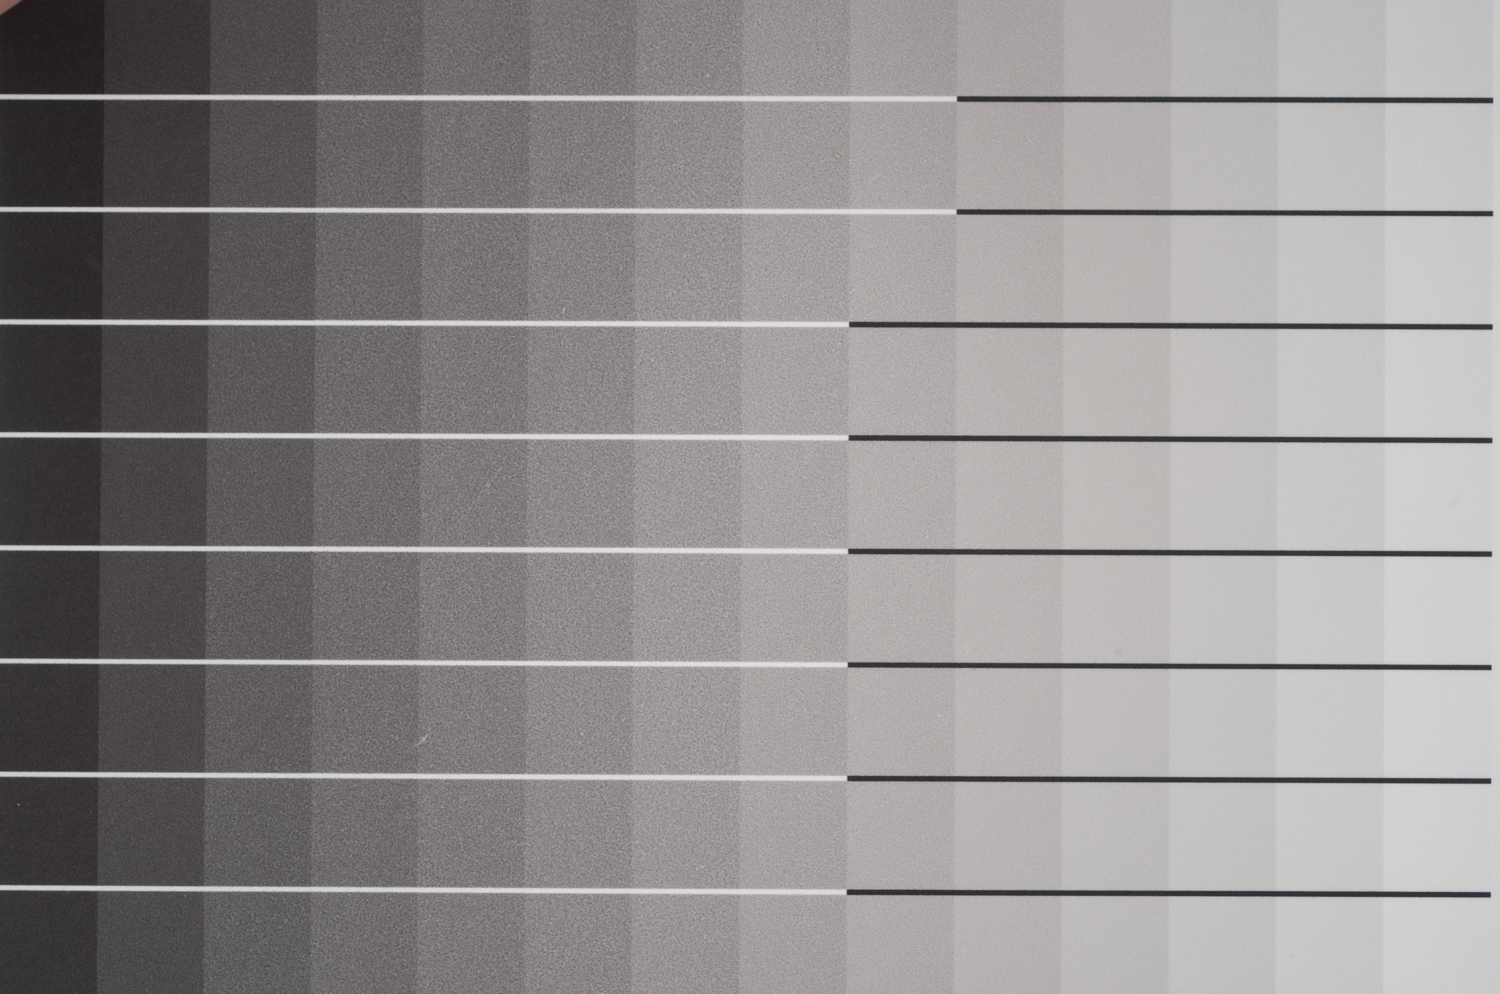
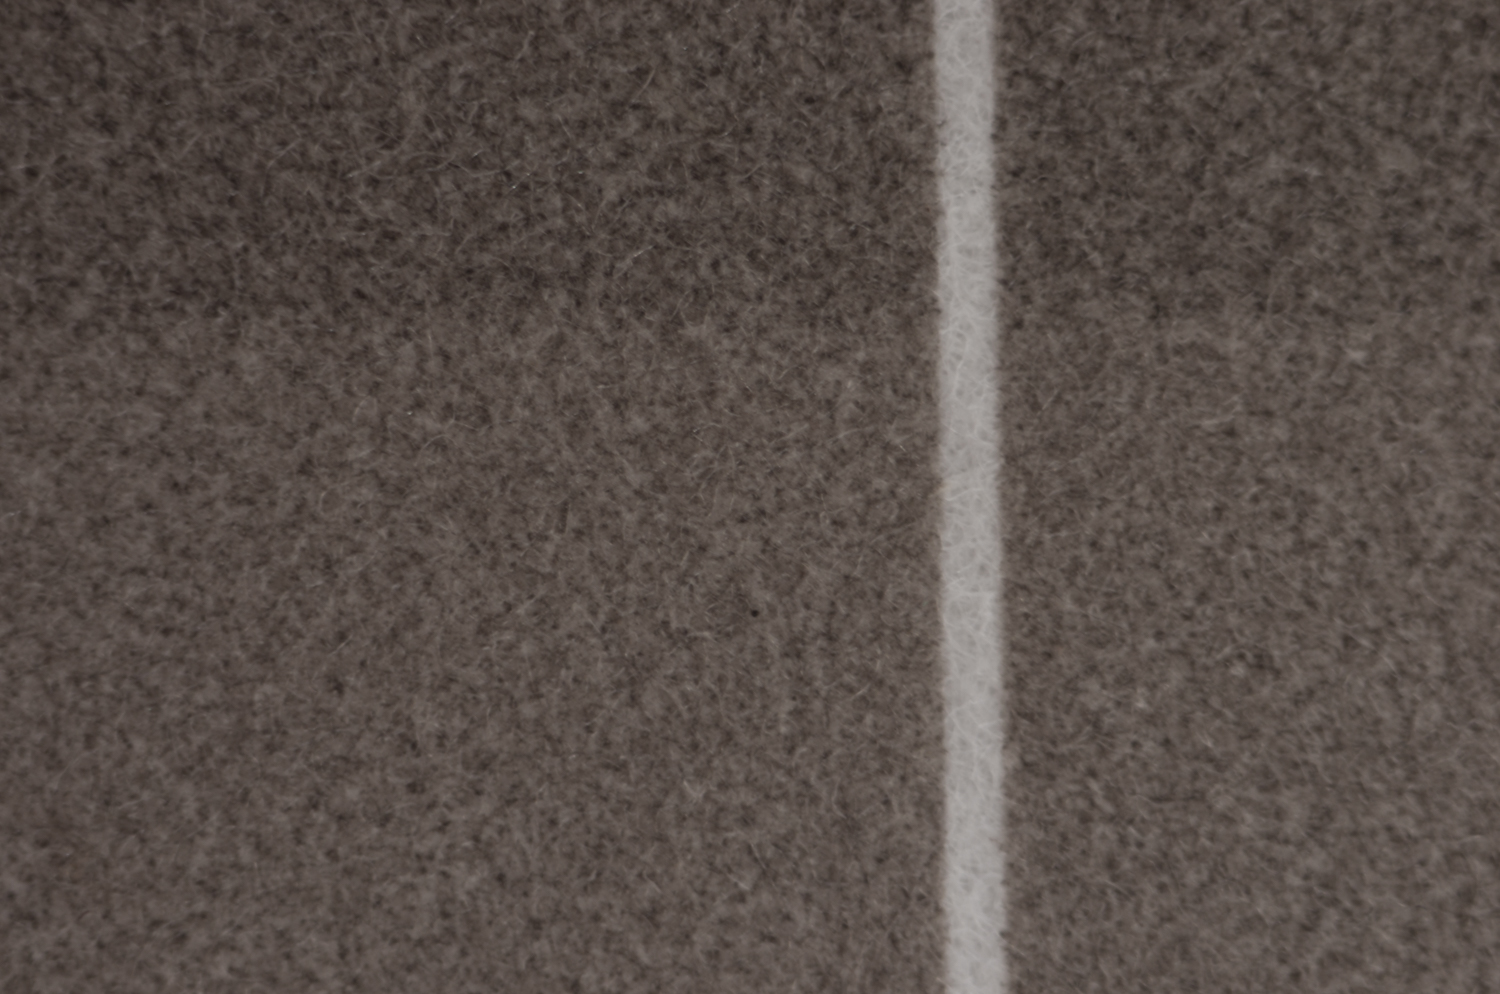
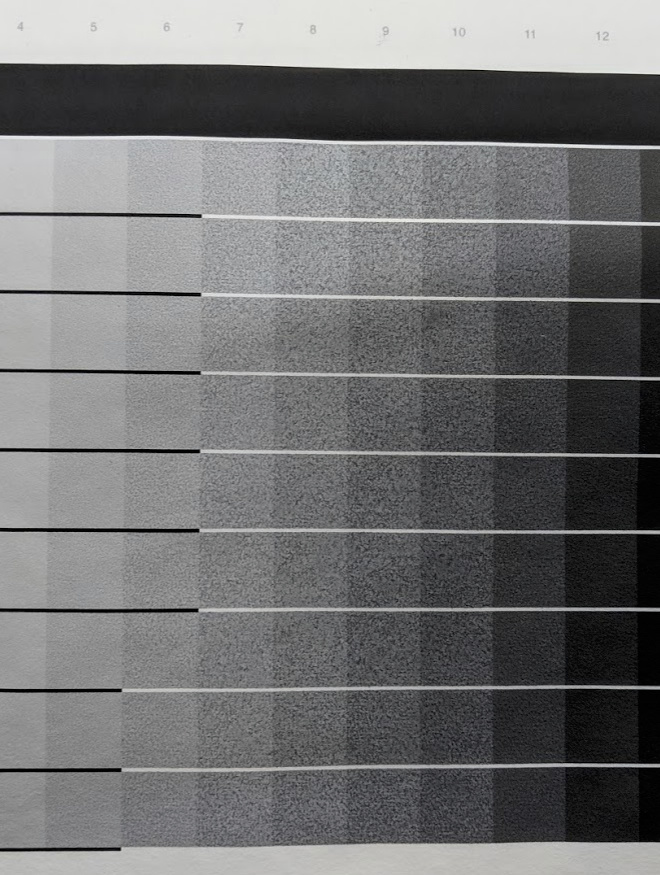
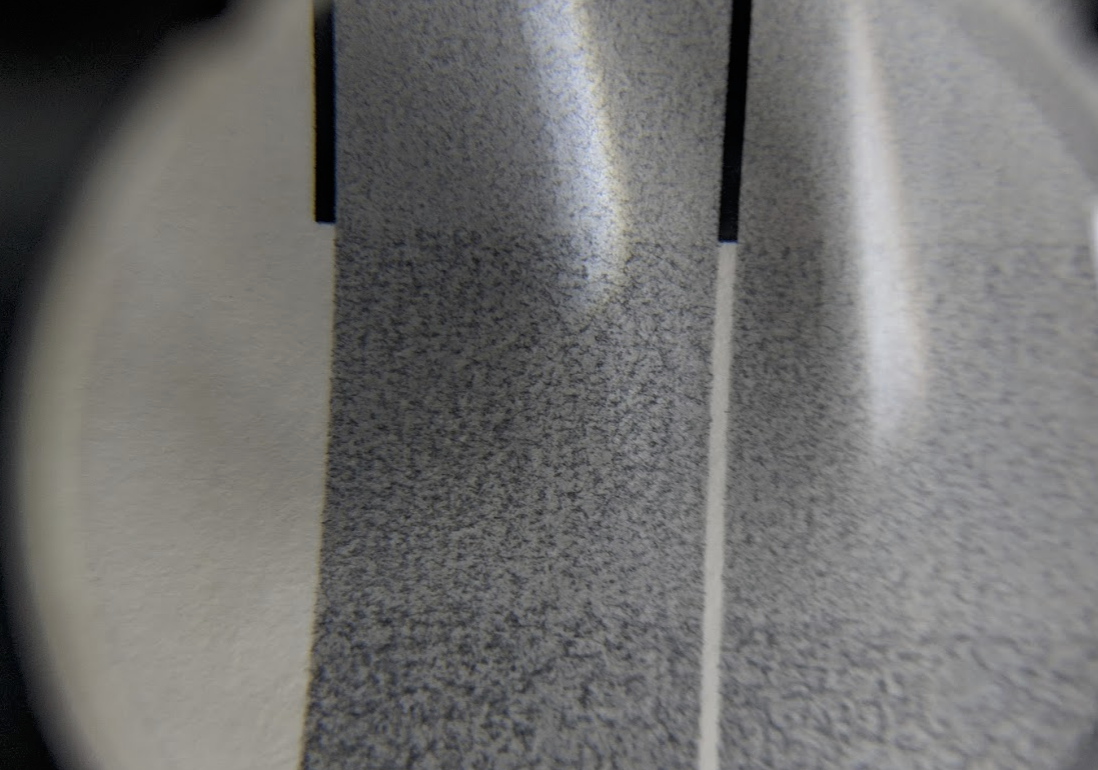
On the 129 steps (warm / Cool & Neutral), the tone is completely uniform lines 1->6 and lines 13->15 but is not in lines 7 -> 11. On other papers whose structure is quite similar (Arches Velin for example) I do not have this result. Testing on papers that are not intended for inkjet printing remains hazardous, but I was curious and I was wondering if anyone here had ever had this type of result or knew what could be the reason.
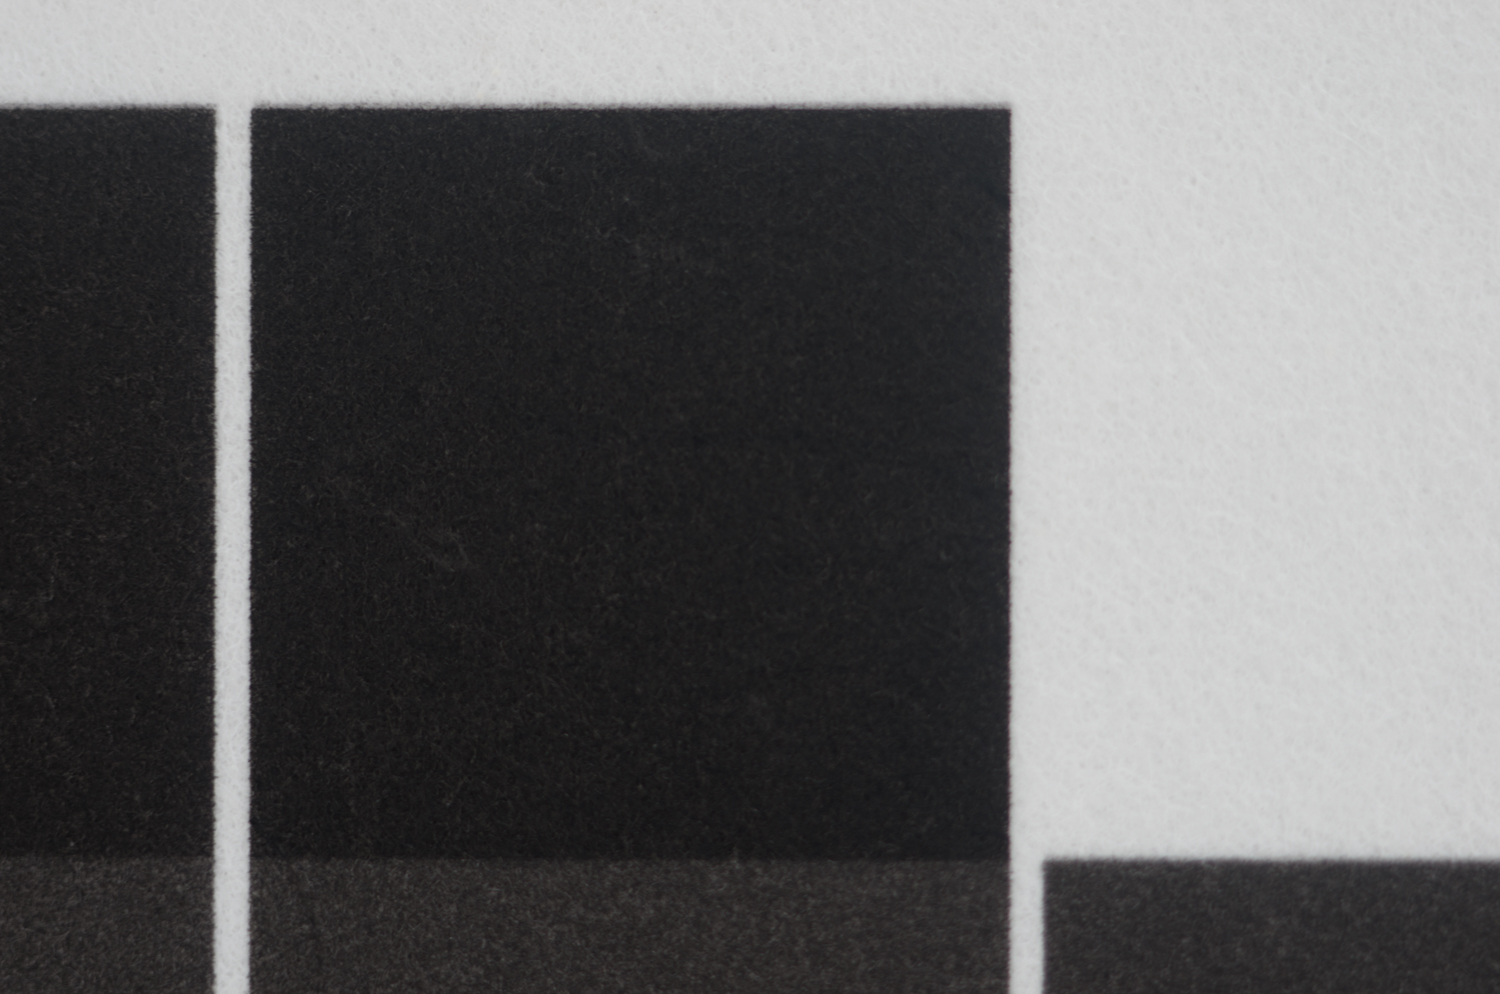

This looks like an over-ink problem.
Can you upload the .quad(s) you are using to print this target with? I will look.
The curve blender tool can be used to limit the .quad down in select areas by adding the main curve to COOL side and then zeroing out the entire WARM side. Then set the “Neutral Warm %” to 50 and start with setting cool to 100% all the way down. This will start out with no change to the curve.
Changing the cool % to a lower amount in the tonal areas that are printing grainy will limit the .quad in those areas by a corresponding %. Then copy and paste the “blended” curve into a new .quad and test that.
best,
Walker
The upcoming Piezography driver (still a ways away for Pro ink on paper but soon for PiezoDN Pro) will have thin paper options (limited ink) btw.
[attachment file=28464]
Thank you!
Dear Walker,
I hope you’re doing well.
Today I find myself with this problem again on a somewhat exotic paper but not so strange compared to the ones I have already printed. I started from a kozo curve that I had and that works well. I haven’t loaded the last drivers anymore, I’m still on PiezoPro V13.
Best,
Anthony
This is an over-inking of that area.
You can use the piezography professional tool to limit the ink down so it doesn’t spread in those areas. Then re-linearize.
-Walker
Ok. found it again. Thx
Your system is the best way to keep the brain on alert every year. I’m already sweating just thinking about moving to version 2. Can I keep the same gmail account as V.1? B, Anthony
yep no problem.
best
Walker
Hi Walker,
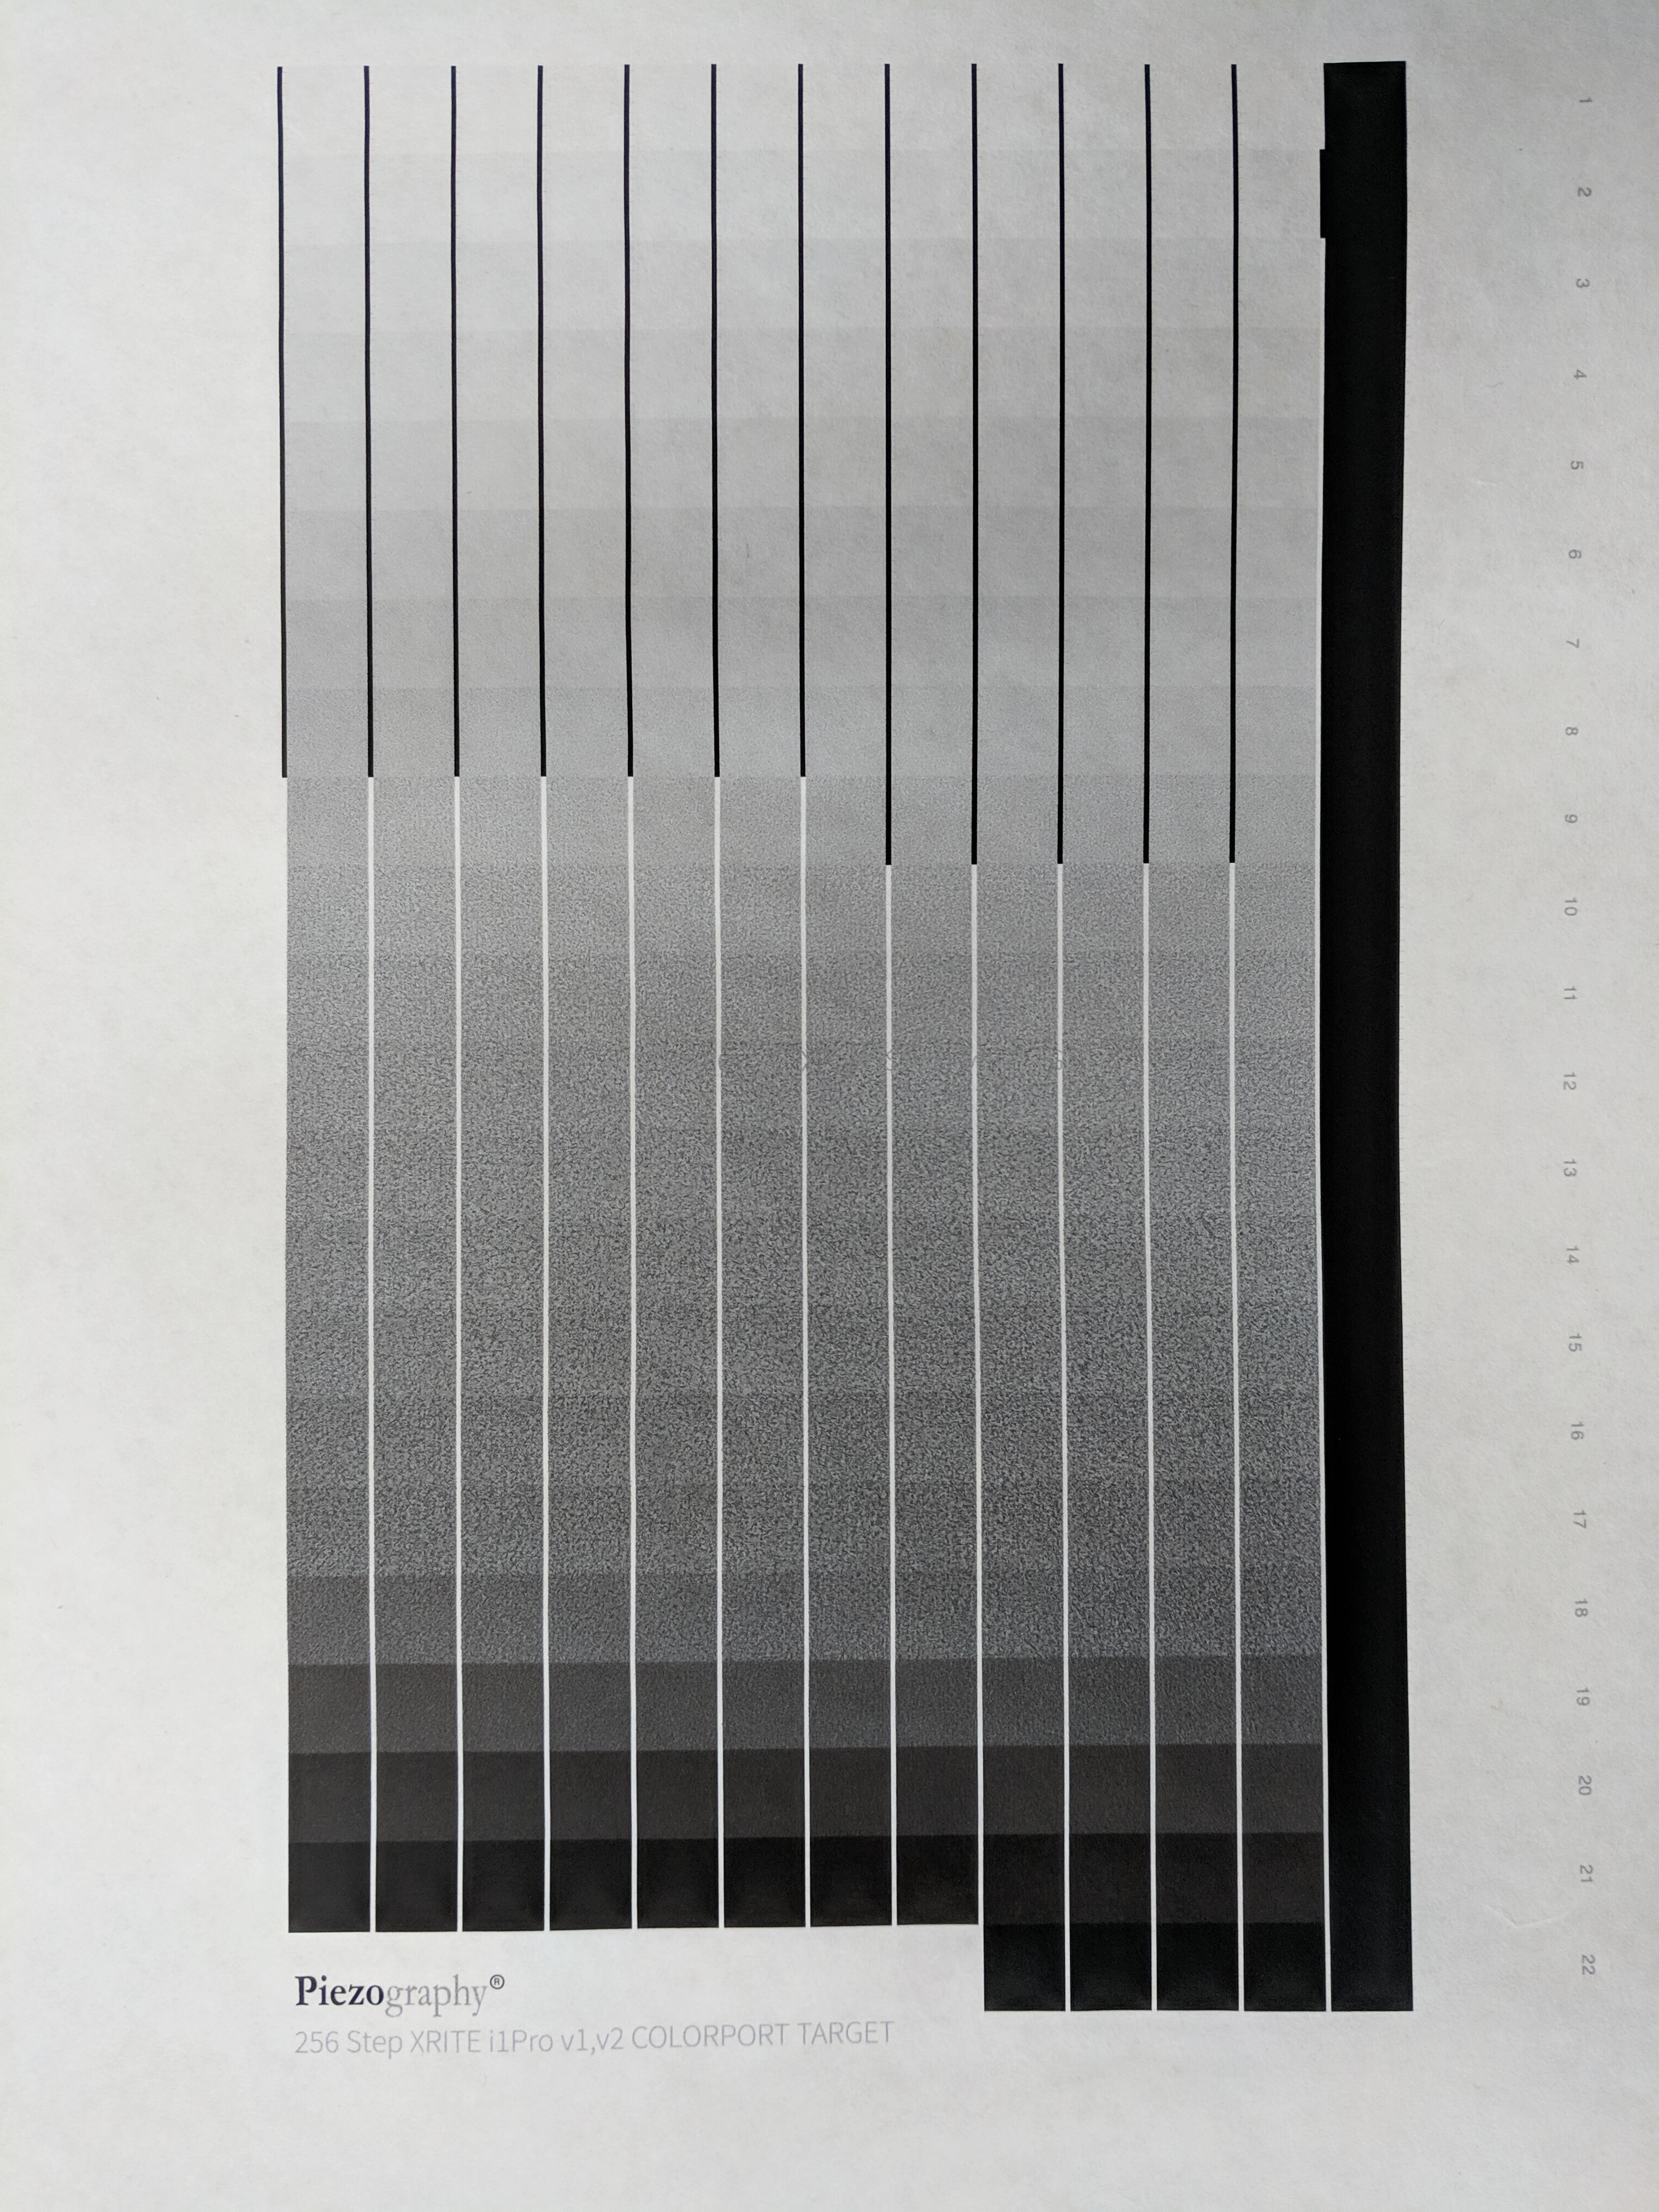
By printing a 256 target with the x900.Hahn-PhotoRag-x.quad I get the same result.
The over-ink is visible between line 9 and 19, which seems to corresponds to the axis points 85/170. Is there a “rule” or is it only with experience, to avoid printing and measuring these targets several times before getting the right result and find the good % ink amount?
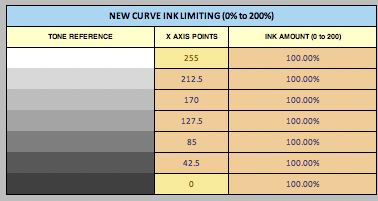
But you did not decrease the ink amount at all. In the ink amount cells bring these down.
-Walker
No, not at all, I just printed the 256 target with the quad. The screenshot “new curve ink limiting” is just here to see if I understand what I need to change in this table based on my over-ink between line 9 and 19. I just printed the target for now.
I saw your video about “limiting ink”, but How can I understand/decide the % on ink amount I have to decrease for each tone reference with over-ink (50% 80%…)? Do I have to test, and every time reprint the target and remeasure until I get the result that suits me?
Start with 50% on all, print, increase until to see over-inking, and then you know.
best,
Walker
Ok perfect, thanks!
best,
Anthony