Hello Walker,
I would like to limit the inkload for printing a negative for a customer. It is for a silver gelatin darkroom workflow.
The first negative was printed using the MasterPiezoDN.quad ( PiezoPro inks on a Epson 9800, Pictorico Ultra OHP )
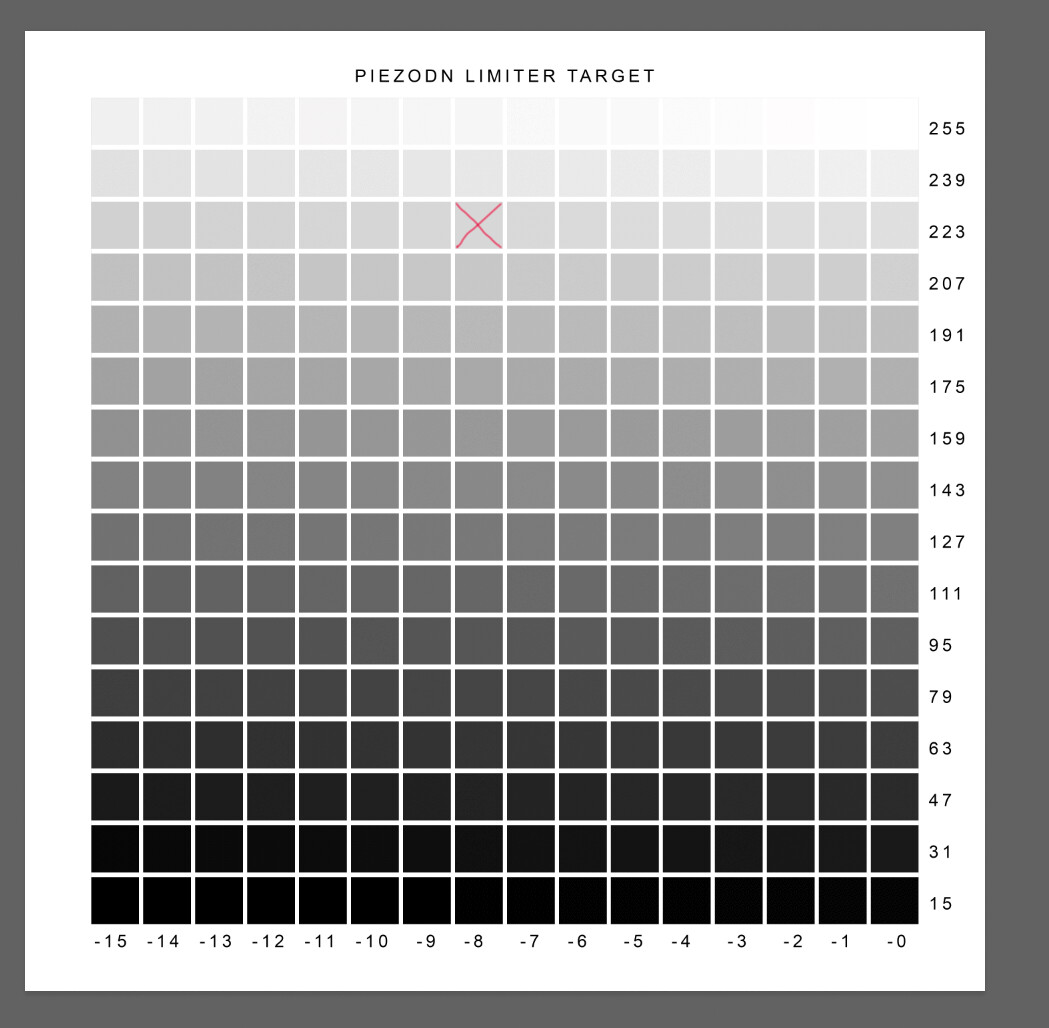
The sivergelatin print has no detail in the highlights, the rows 255 and 239 are completely white, the Luminocity values measure around 96….( colorport i1Pro)
I marked the first patch red where the Luminocity-numbers start to lower.
We did determine minimum exposure time to achieve black at 9 seconds, the limiter file was made with the same exposure time.
(For this mail I flipped the limiter target horizontaly)
![Schermafbeelding 2022-01-24 om 13.12.31.png]()
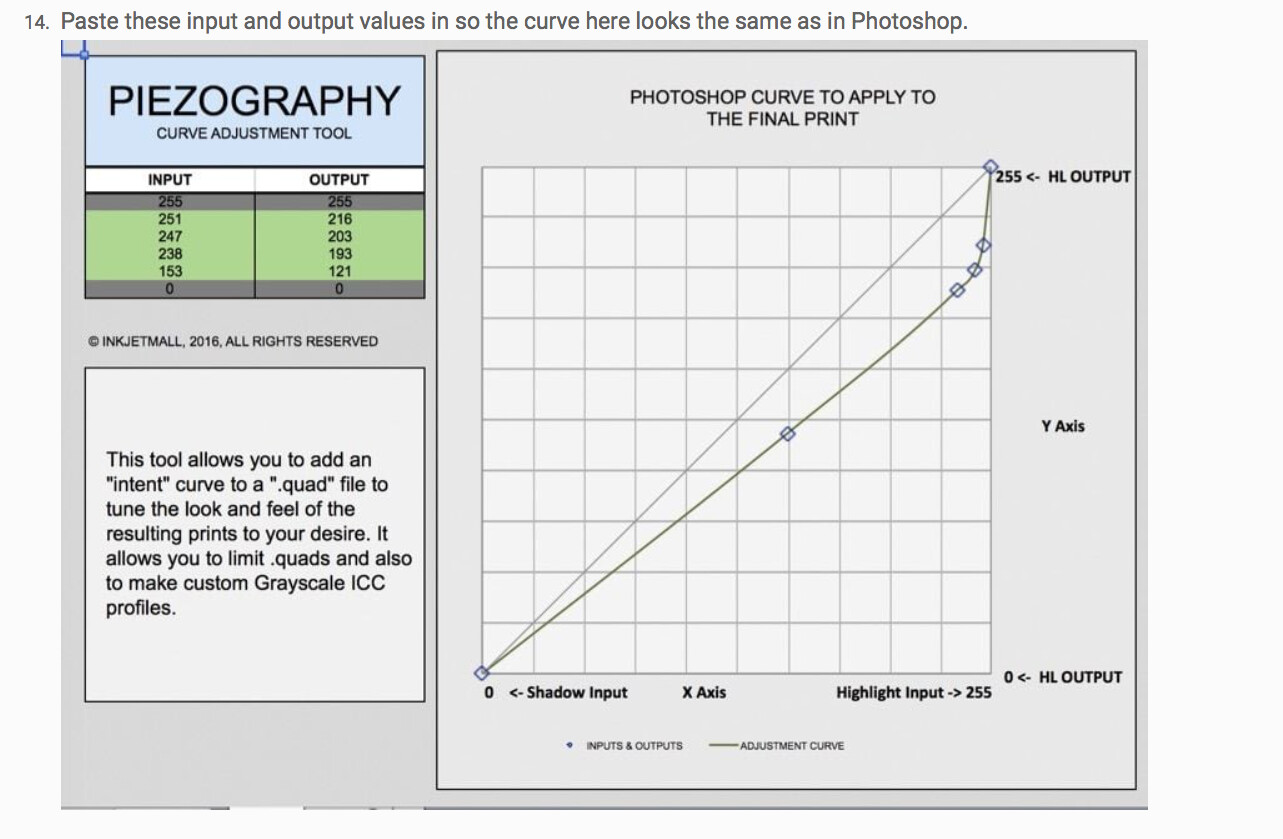
What would now be my limit number? And what would then be the first in- and output values in the Piezography curve adjustment tool?
The example in your Piezo DN Manual reads input 251 > output 216
![Schermafbeelding 2022-01-24 om 13.20.32.png]()
Kind Regards,
Luc Brefeld
Dear Luc,
Patch 217 is the first TONE patch so you would limit this to 218 (limit to first specular white patch) in PPEv2.
Right here:
Ideally we would also like to keep the black (spectral highlight 255 at full ink load. So In this case you would do the following.
- Open PPEv2 and delete measurements (you don’t need those).
- Go to your starting curve and copy/paste the starting curve in there.
- Go to Highlight Start Point and set to 218
- Go to New Curve and copy/paste into a new txt doc in Sublime Txt.
- Go to the first number after each of the curve channel headers in your old curve (aka the number just below # C Curve, #M Curve, etc) and copy/paste over the top number in the new curve. This will fully re “mask” the highlight with full density.
- Your new curve is now limited AND has all density in the highlights for good spectral white.
best regards
-Walker
1 Like
Hello Walker,
i am a bit uncertain about step 5…
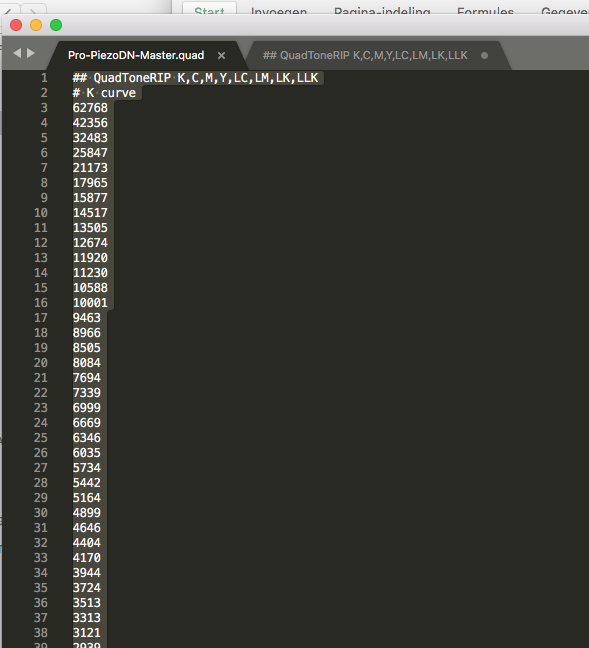
after step 4 I have in Sublime Text 2 curves open.
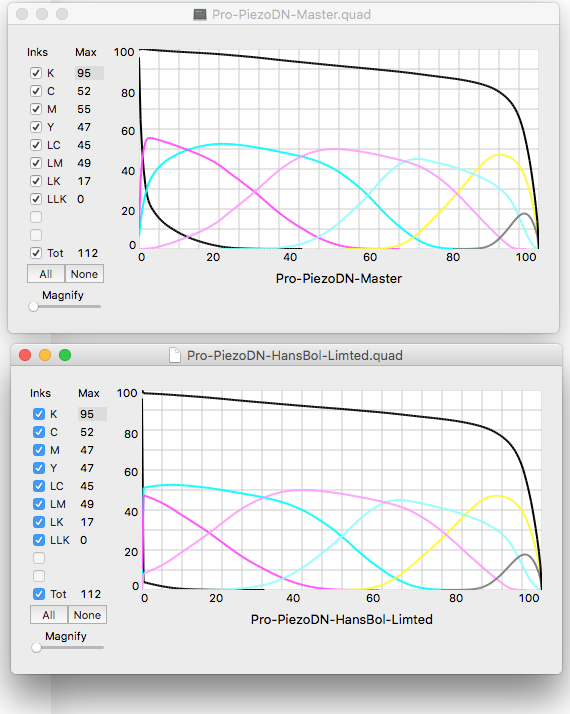
the starting curve, in my case : Pro-PiezoDN-Master.quad
and the new curve with a highlight start point set to 218
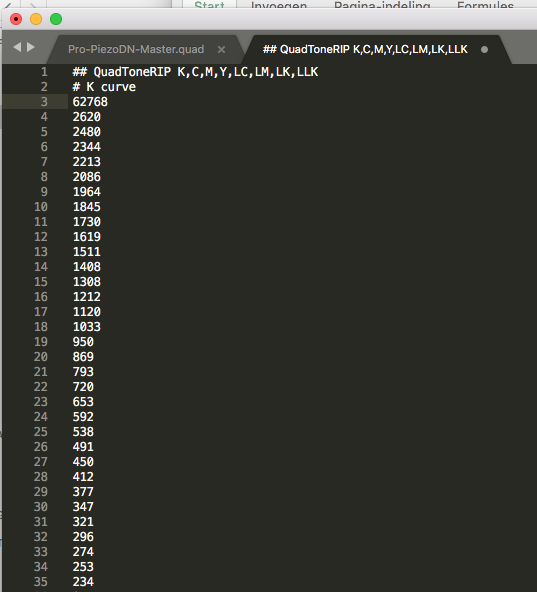
after this I copied number 62768 into the corresponding field of the new curve
![]()
This with all the first numbers under the #channels
Was this the right intention of step 5?
It resulted in a new curve, next to the old Master in Curve view-app.
Hope I was right, gonna print soon with the limited curve
Kind Regards,
Luc
hello Walker,
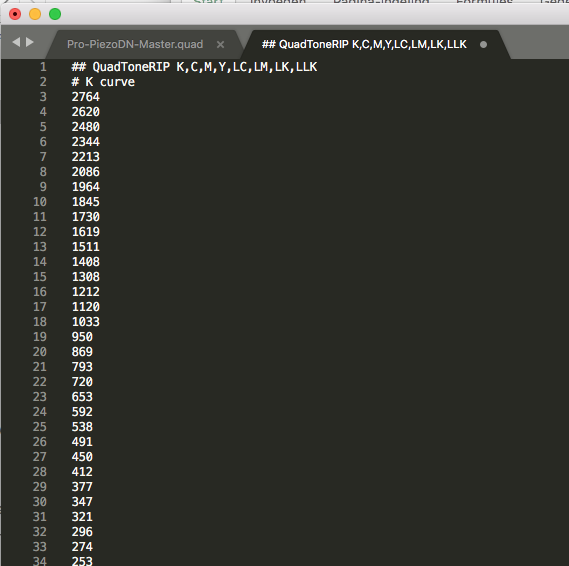
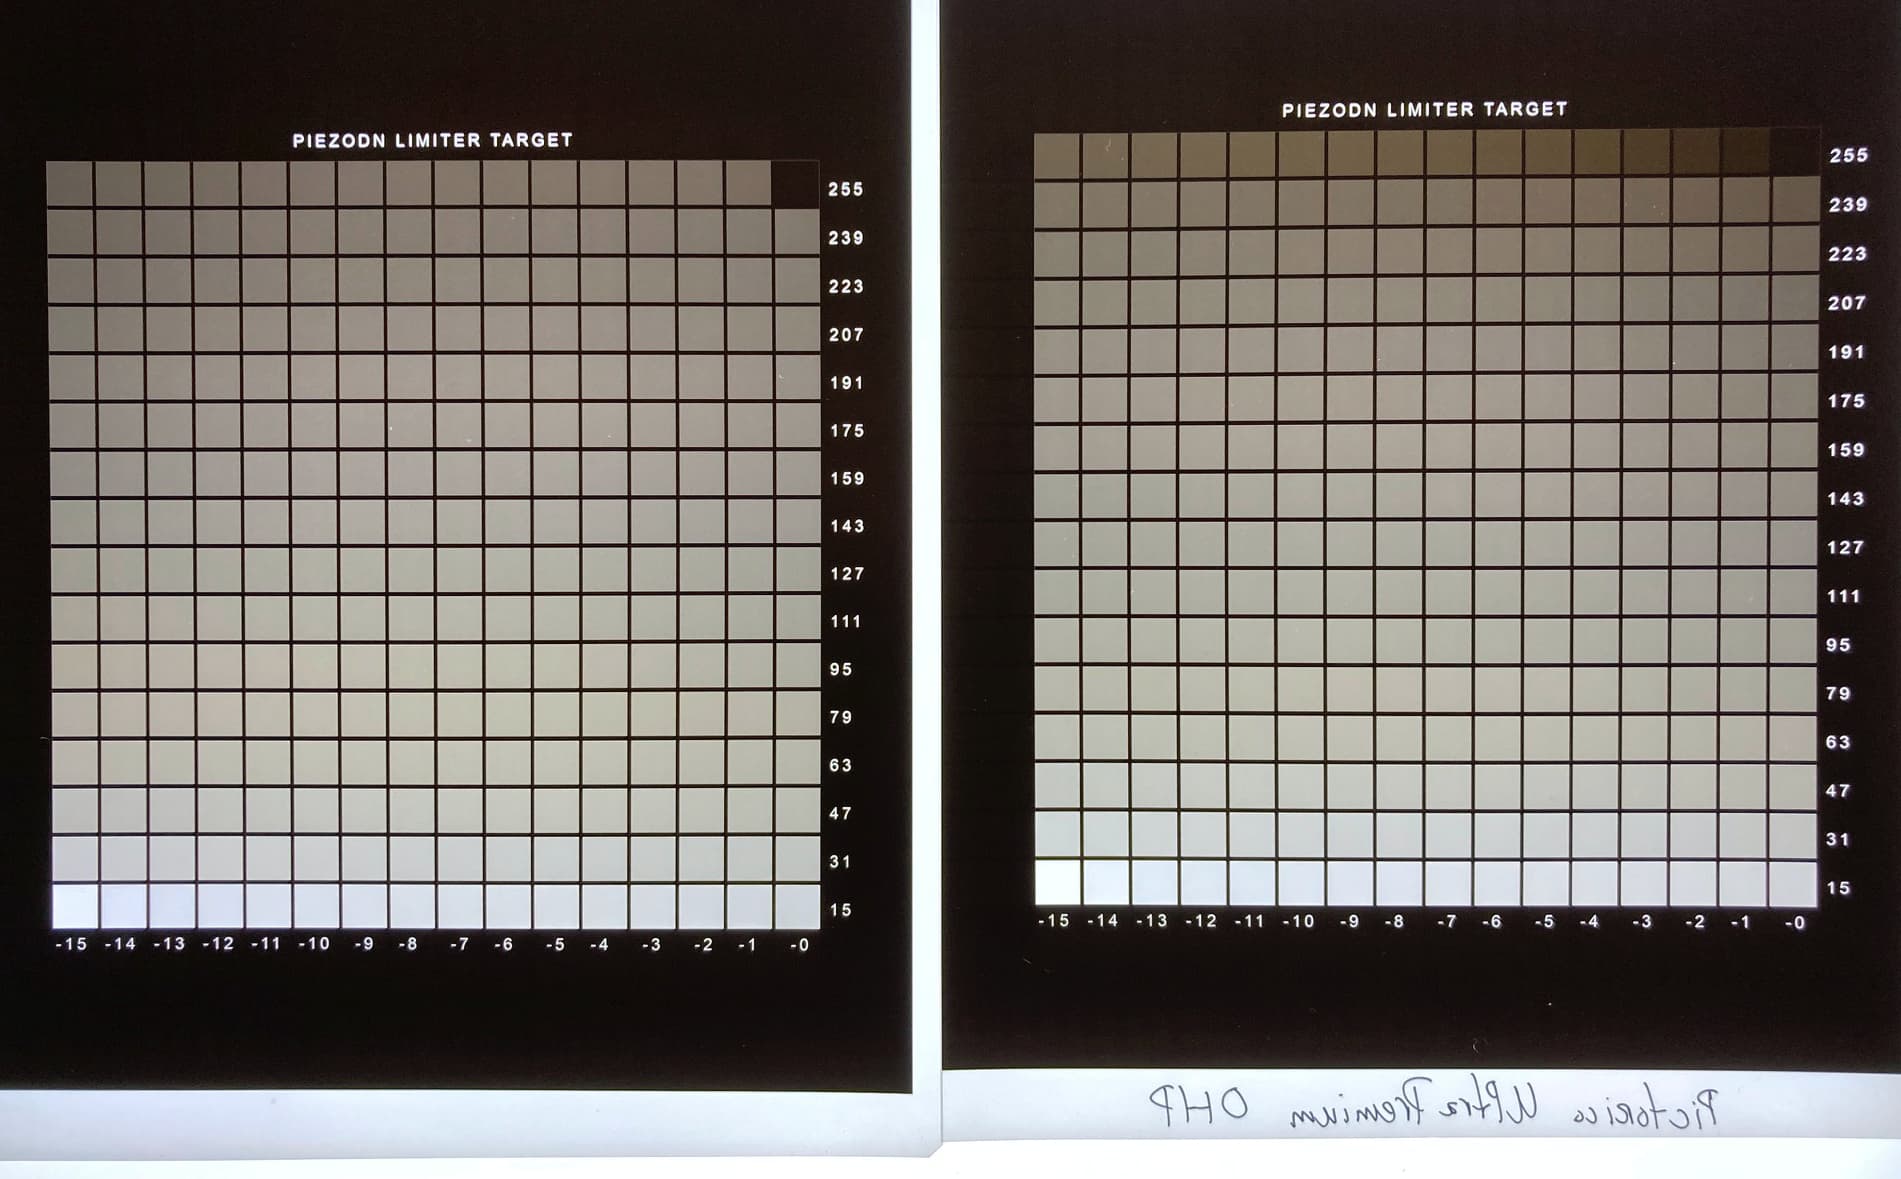
here a picture of the old and new limited file:
the one on the left is the new file after limiting ( setting the highlight startpoint at 218 )
the one on the right is the original limiter file…after patch 218 the there was no more distinction between the different patches (219 up to 255), highlights were blown out in the silver gelatin print.
in the new curve patch 255 is very dark. Is this because of the copying of number 62728 into the new curve in PPEv2?
Just make sure ( when preparing a negative for print) to limit the negative to highlight point 254 in PS?
thanks Walker!