When I print a target using Print-Tool (say 129step-Spyder.tif), how do I prevent the surrounding canvas from being printed in black? I usually trim my negatives (or mask them with Rubylith) before making a contact print, so the black canvas just wastes ink. The Print-Tool “Prefs” button offers white and black backgrounds, but these are ignored unless “Negative” is checked, and I understand that it is never appropriate to check “Negative” when printing with Piezography quads. Is the only alternative to open the target in Photoshop and add a black canvas? Sorry for the elementary question, I’m new to Print-Tool.
I’ve written about this before and in excruciating detail, but I have no idea where to find it. So …
There are basically two ways to approach dealing with the border area regardless of whether you are printing a target or any other kind of image. The one thing that is common to both is that you do not use Print-Tools Negative features with PiezoDN. Not ever!
The Simple Way
- Open the image in Photoshop (or any image editor).
- Using the Canvas Size tool, expand the canvas with black to the full size of the sheet you are printing on. (This may need to be done in 2 steps to create the extra trailing edge required by some printers.)
- Save a copy with the border if you don’t want to have to do this again.
- When you open this image in Print-Tool it will fill the entire page, and what you see as black will be clear and ink-free when printed.
- Note that the image can be right-reading. Flip horizontally can be selected and saved as part of a Preset in Print-Tool.
[center]
[/center]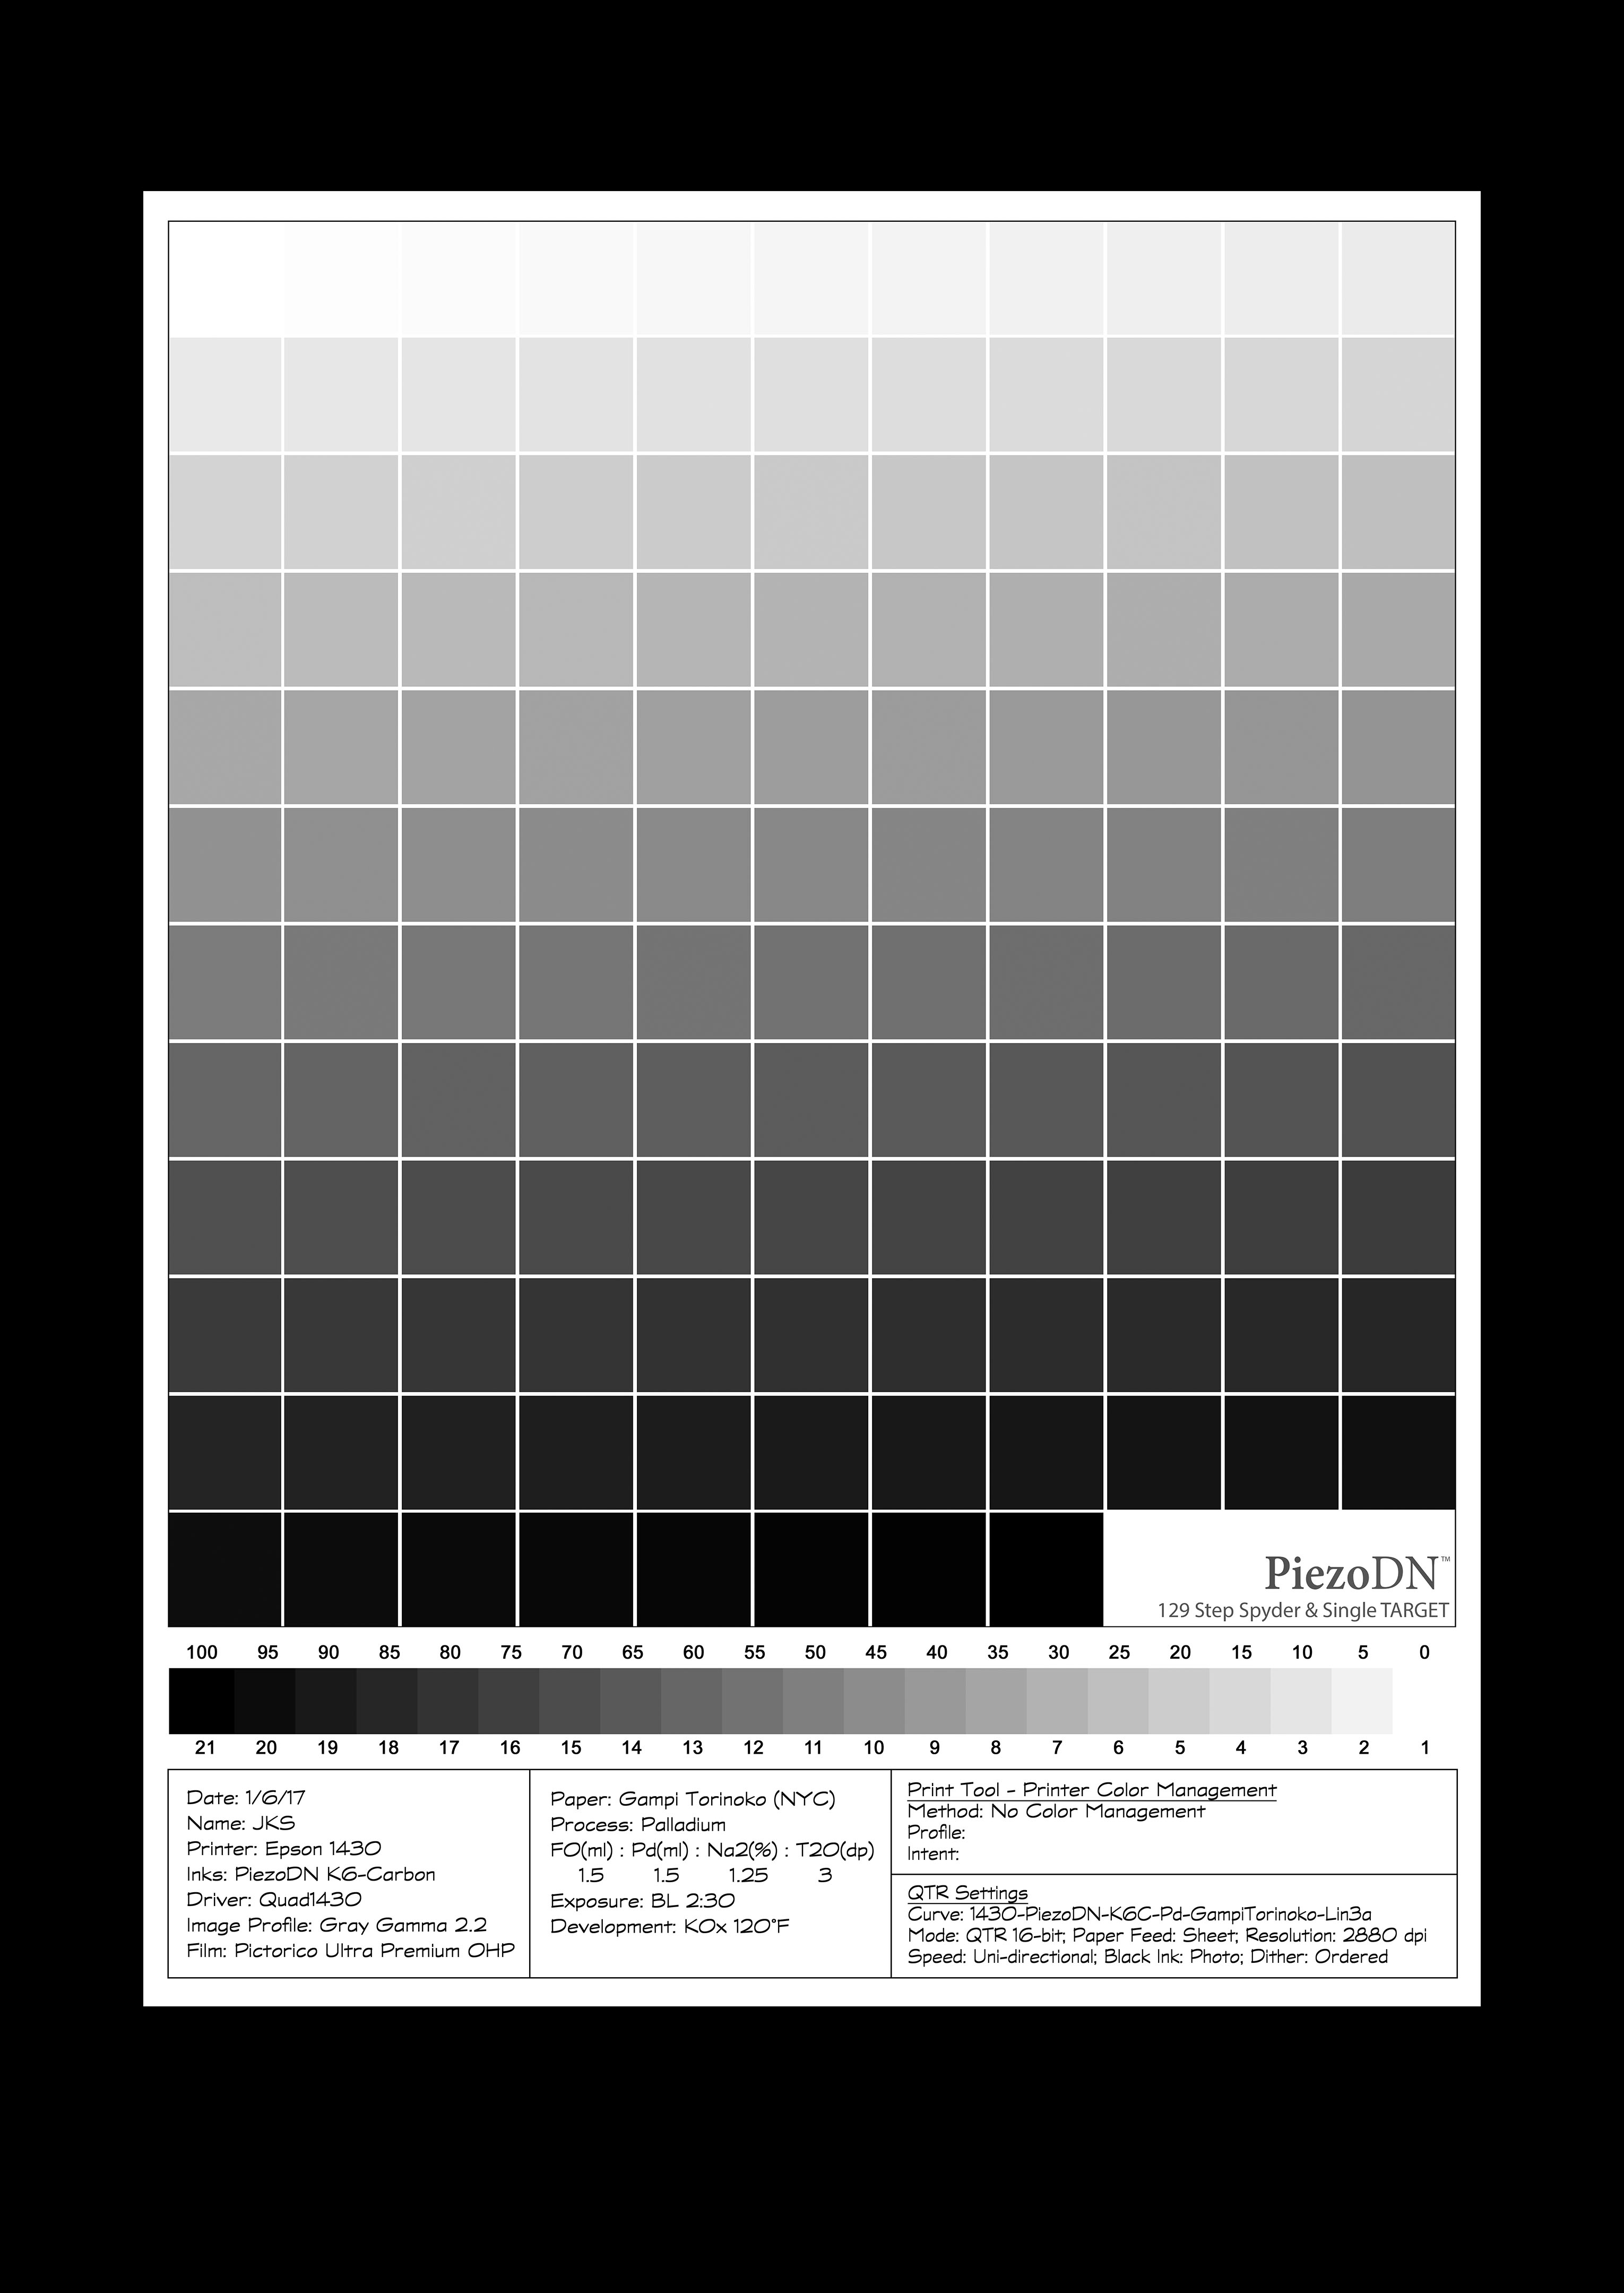
The More Complicated But Also More Flexible Way
You can also accomplish this using the layered layout capabilities of Print-Tool.
- Create a black image the size and orientation of the full sheet and save as a tif file.
- Open this image in Print-Tool.
- Add a white masking layer if desired. This would be smaller than the sheet size but larger than the image and would take into account the necessary top and bottom margins.
- Open the target or other image in Print-Tool.
- Add a 21-step strip if desired.
- Add a text layer if desired.
- Position layers 2-4 as desired.
[center]
[/center]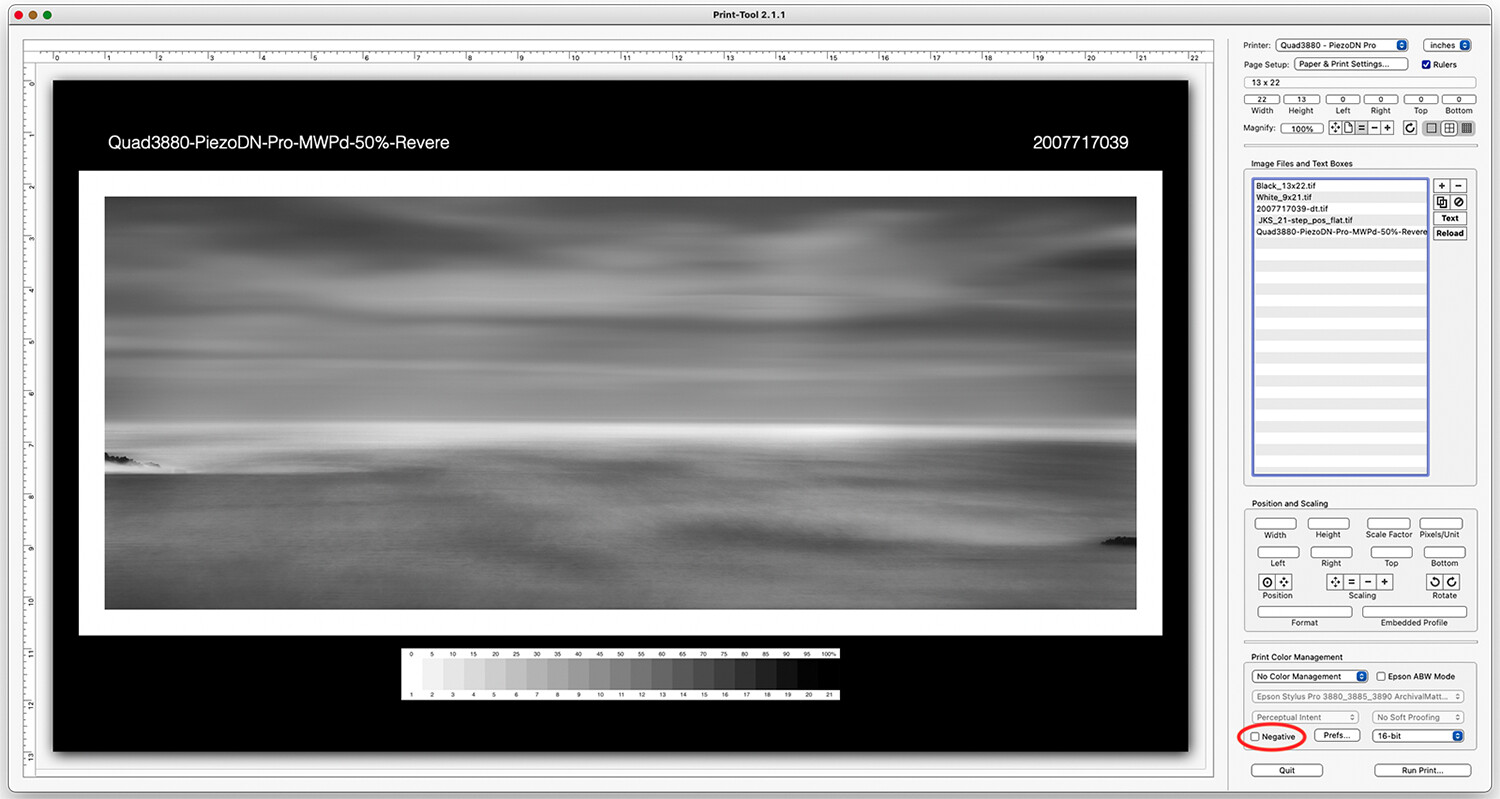
The order of layers is important and unfortunately they can’t be changed in P-T. The black layer must be opened first so that it is on the bottom. Next would be the optional white masking edge. The image goes on top of that. Optional 21-step and text layers go next. Image and text layers can actually be in any order as long as they don’t overlap.
Since you are new to Mac and Print-Tool, I think it bears repeating that you will NOT be using Print-Tool’s Negative feature (circled in red above) when making PiezoDN negatives. This is because the inversion from positive to negative is accomplished by the PiezoDN quad curve itself. In addition, you do not need to flip the canvas in Ps since you can do that by selecting Flip horizontally from the Print Layout dialog and save that option as part of a Preset along with the QuadToneRIP settings.
[center]
[/center]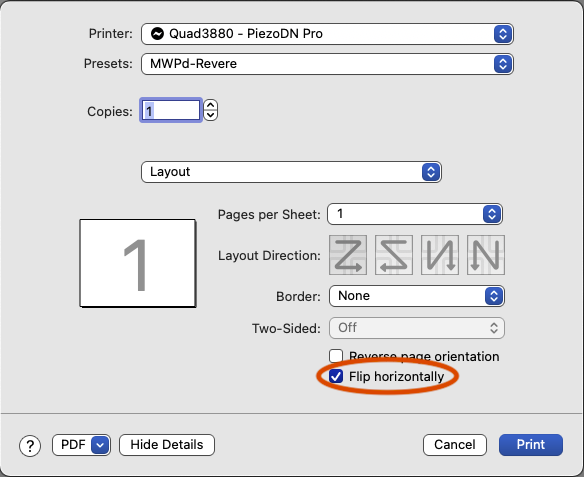
[center]
[/center]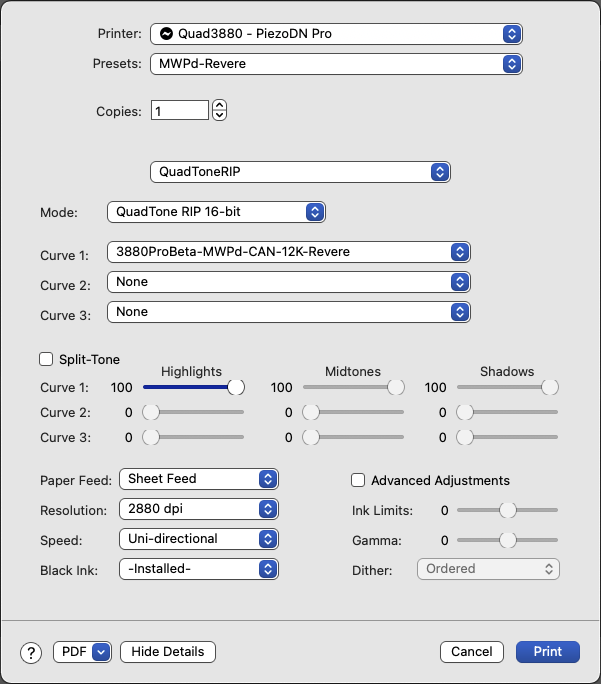
Also worth noting is that individual layers in P-T can be resized independently of each other. So, for instance, you don’t have to resize a 21-step image in Ps before using it in P-T. The main image should be sized in Ps for best quality, but an overly large 21-step can be adjusted down right in P-T. (I just stumbled upon that nifty feature last week.)
Keith
1 Like
Thanks, Keith. I like your second solution. I didn’t realize you could layer images in Print-Tool.
I had hoped to avoid using Photoshop on the Mac if possible, since it would tie up an Adobe License. I will do my image processing on the PC and save a tif to the Mac. So solution 2 is ideal, thanks!