Light Greys Printing Too Dark

I recently replaced all eight dampers on an Epson 7880 filled with PeizographyP2 Selenium inks. In the process, I was careful to label each ink tube in order to reconnect them to the correct damper. Then, I performed a couple of power cleanings to fill the new dampers and the printer nozzle test prints were clean—no missing lines in any channel.

So I printed a landscape photo and to my surprise, the sky was nearly black. The trees and grassy foreground were normal shades of grey. At that point, I printed the attached 51-step Piezography chart. The first dozen steps are clearly too dark while the remaining steps printed normally.

I have taken these 2 steps to figure out what’s gone wrong, but am stymied as to what to try next to solve the problem:

  1. I printed a QTR-channel flush image for each channel to determine if each channel was printing the proper shade. All appeared to correctly match ink samples from the corresponding shade in the bottle.

  2. I traced each ink tube from the print head to the cartridge to determine if I mixed up the lines. All seem to be correct.

Can anyone suggest what I may have done to cause this mysterious problem? And how I could resolve it?

Your suggestions will be most welcome!

In this image, you can see the landscape with the black sky. Beneath that are the channel-flush images for all seven shades of Selenium grey.

This first chart is the one I printed after replacing the dampers.

The second chart is original and how it should have been printed.

It looks like you have the wrong curve and/or photo black is in the Yellow channel. Can you share screenshots?

-Walker

Hi Mark,

I have a question for you regarding your dampers but I’ll get to that later. First a few thoughts about your issue.

Having just finished helping a friend sort out an odd reversal issue that we encountered attempting to make PiezoDN negatives for Carbon Transfer printing, and attempted to overcome for much of the last year or so without it ever occurring to me that the problem might be due to an ink mis-fill that I feel really embarrassed to have missed until about a month ago, I think it is wise to ask if there is any chance of a mis-fill here.

I ask this because the channel/ink notes in your purge page photo indicate that you have MK in the yellow channel and PK in the black channel though I also note that it doesn’t look that way from the prints themselves. I suspect your notes may have the black ink positions reversed. A normal P2 setup has MK in the K channel and PK in the Y channel.

It looks like your purge pages are on plain paper with too high of an ink load as demonstrated by the wrinkling, but regardless of that the MK should be the darkest of the pages though your notes say the darkest is PK. Can you double check and clarify that?

What profile did you use? I’m trying to imagine whether or not a K7 profile could produce a result like that if used with a P2 setup, but I can’t see how since the only difference is shade 7 vs. PK in the yellow position. I think it would have the opposite effect. But this raises the question(s) what paper are you printing on and is it a PK or MK profile?

Are you using a special super-secret “infrared” ink set? :wink:

Now about those dampers: I’ve been trying to rehabilitate a 7880 that I acquired from a friend last summer along with a bunch of spare parts including several sets of dampers. After removing the exterior covers I found the pressure pump and the air lines to and from it had somehow become clogged with ink. I found a replacement pump, removed and cleaned all the lines, even took the old pump apart and cleaned it too so now I have a working spare. My problem now is with the dampers. It came with 2 full sets of new dampers (and a third that turned out to be for some other printer model that I have been unable to identify), and I also bought another set from an ebay seller since I couldn’t find them at Compass or any of the other usual reliable sources. My problem is that the threaded end on all of these sets is slightly smaller in diameter than that of the original set and the nuts don’t fit snugly enough to prevent leakage. It seems to me these dampers should be sold with proper fitting nuts but they are not, and I can’t even find replacement nuts at all. I did find a source for o-rings of many sizes but that didn’t solve the leak problem either. So where did you find your new dampers? Did you need new nuts for them?

Keith

Hi Keith,

Thanks for your detailed response to my ink reversal problem. No, I’m not using any any special “infrared” ink set. Though I admit the effect is quite like infrared b+w film and it’s other-worldliness.

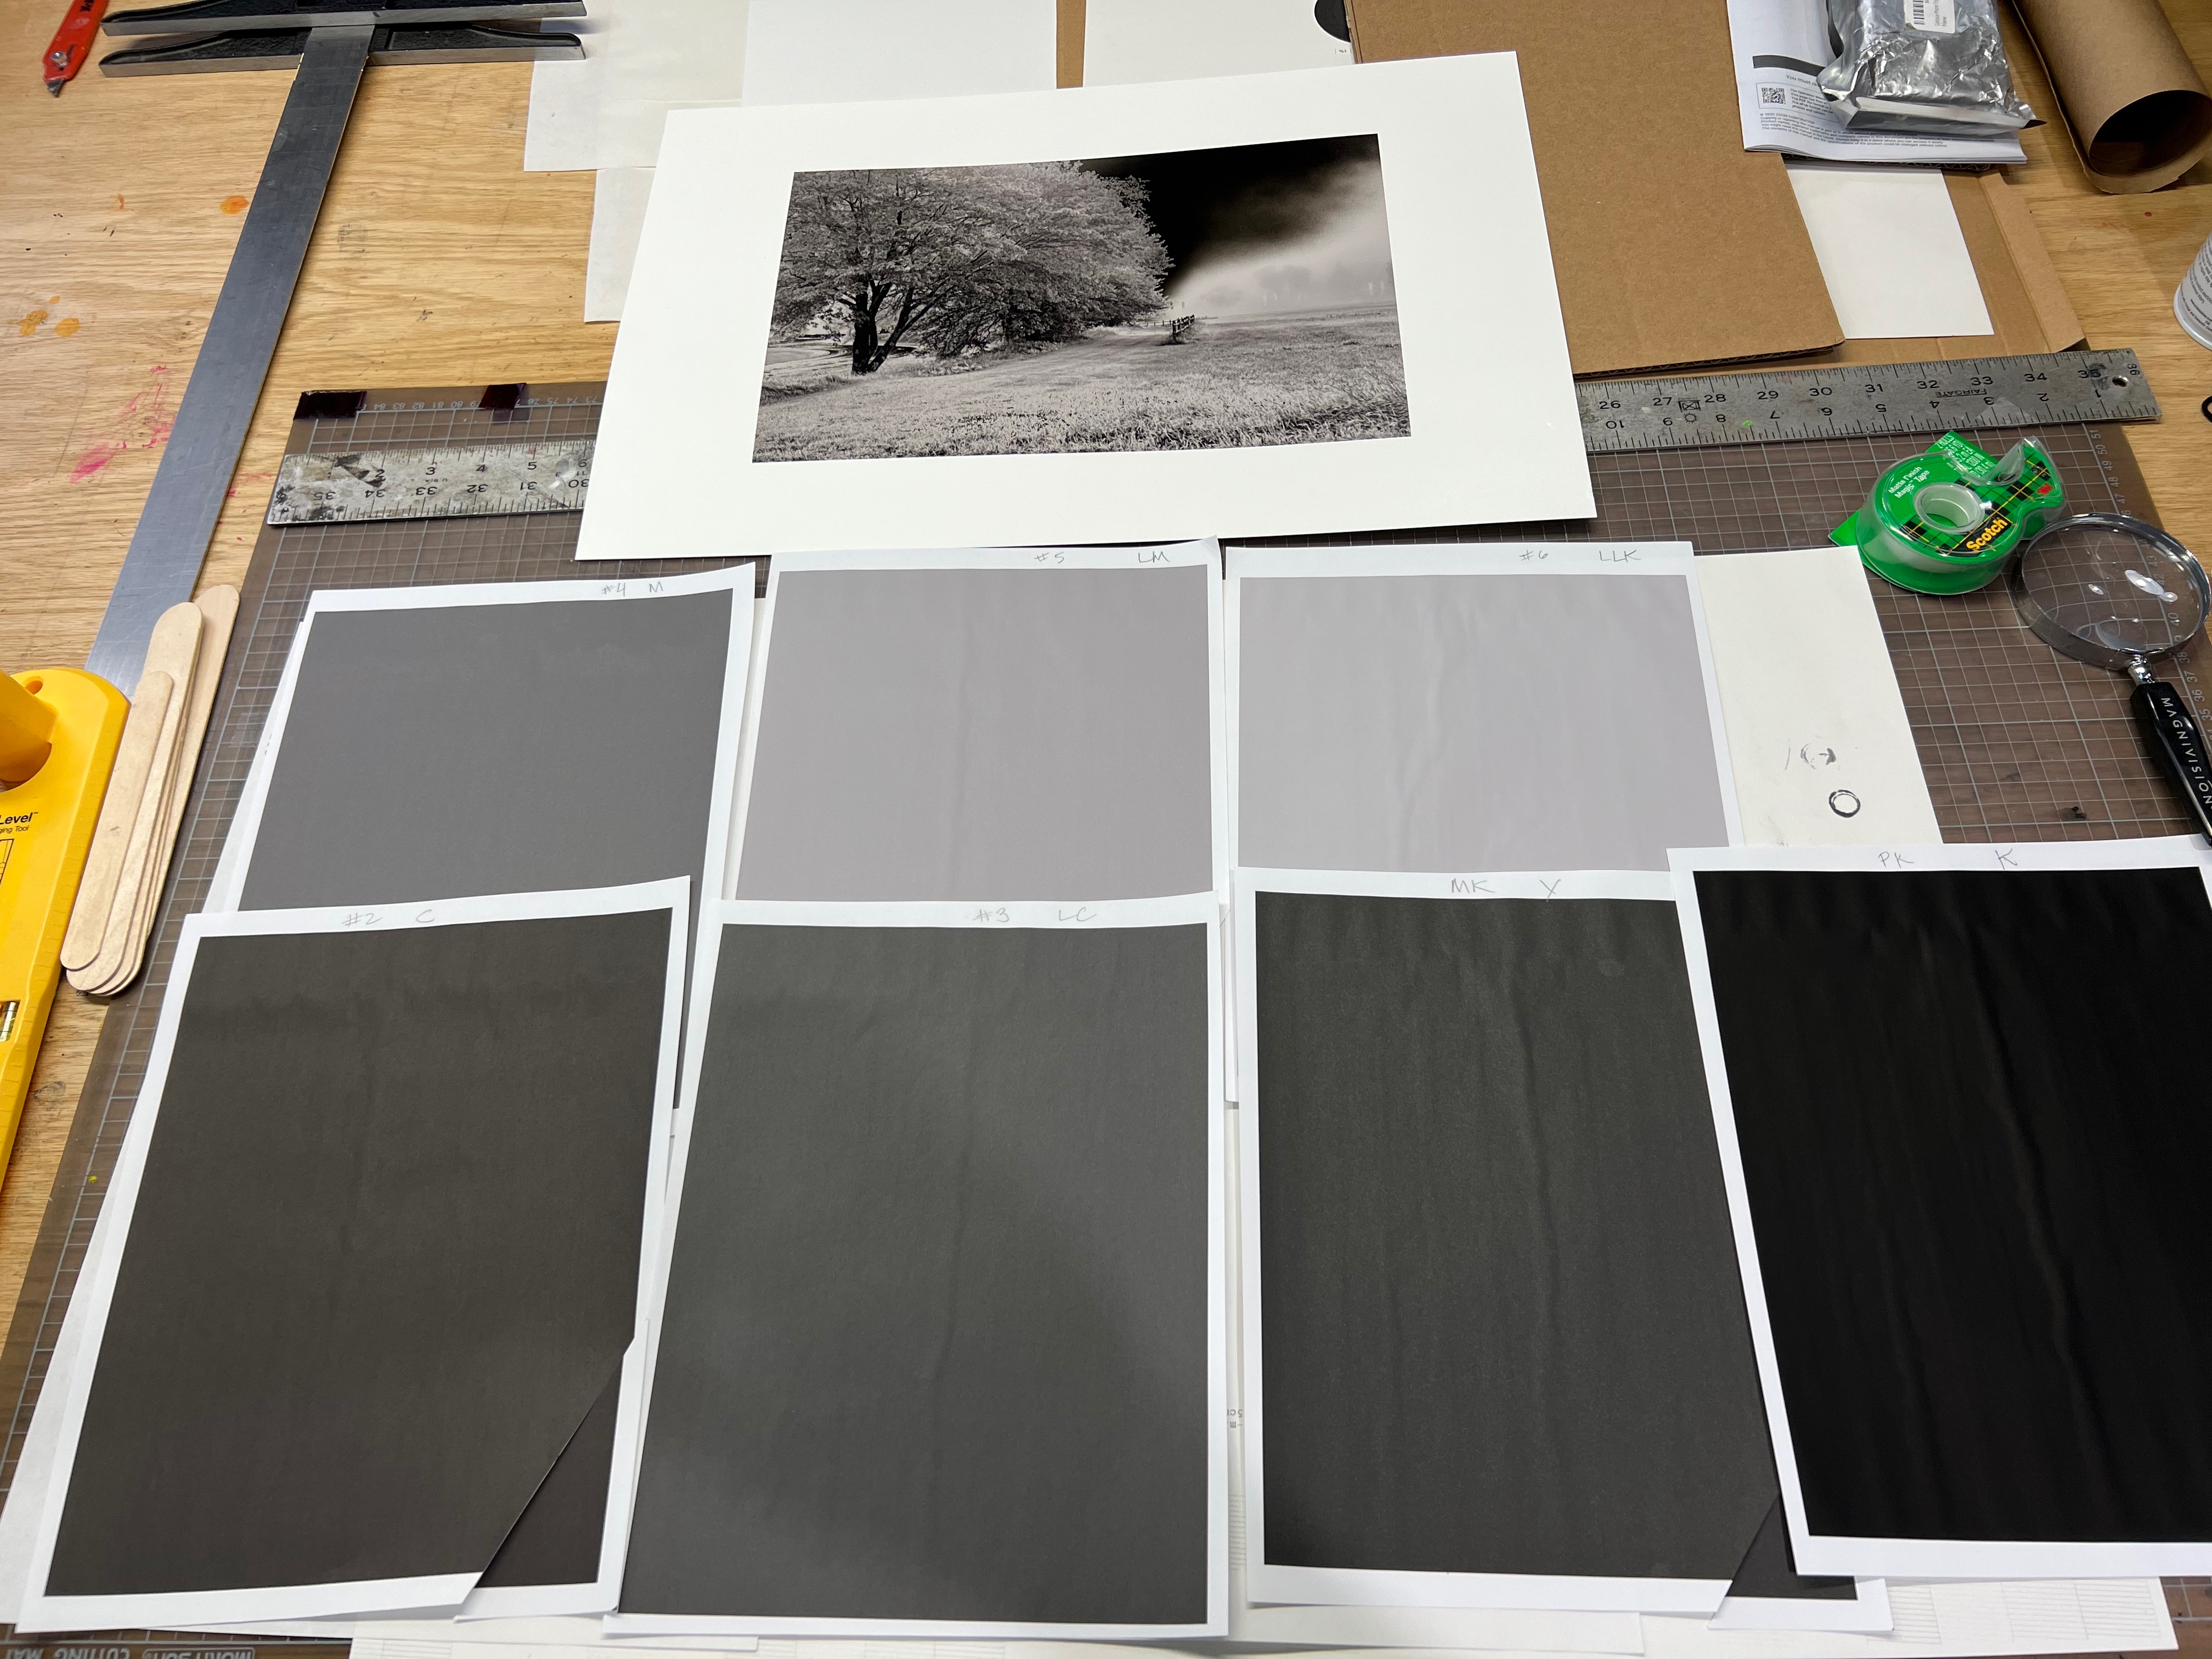
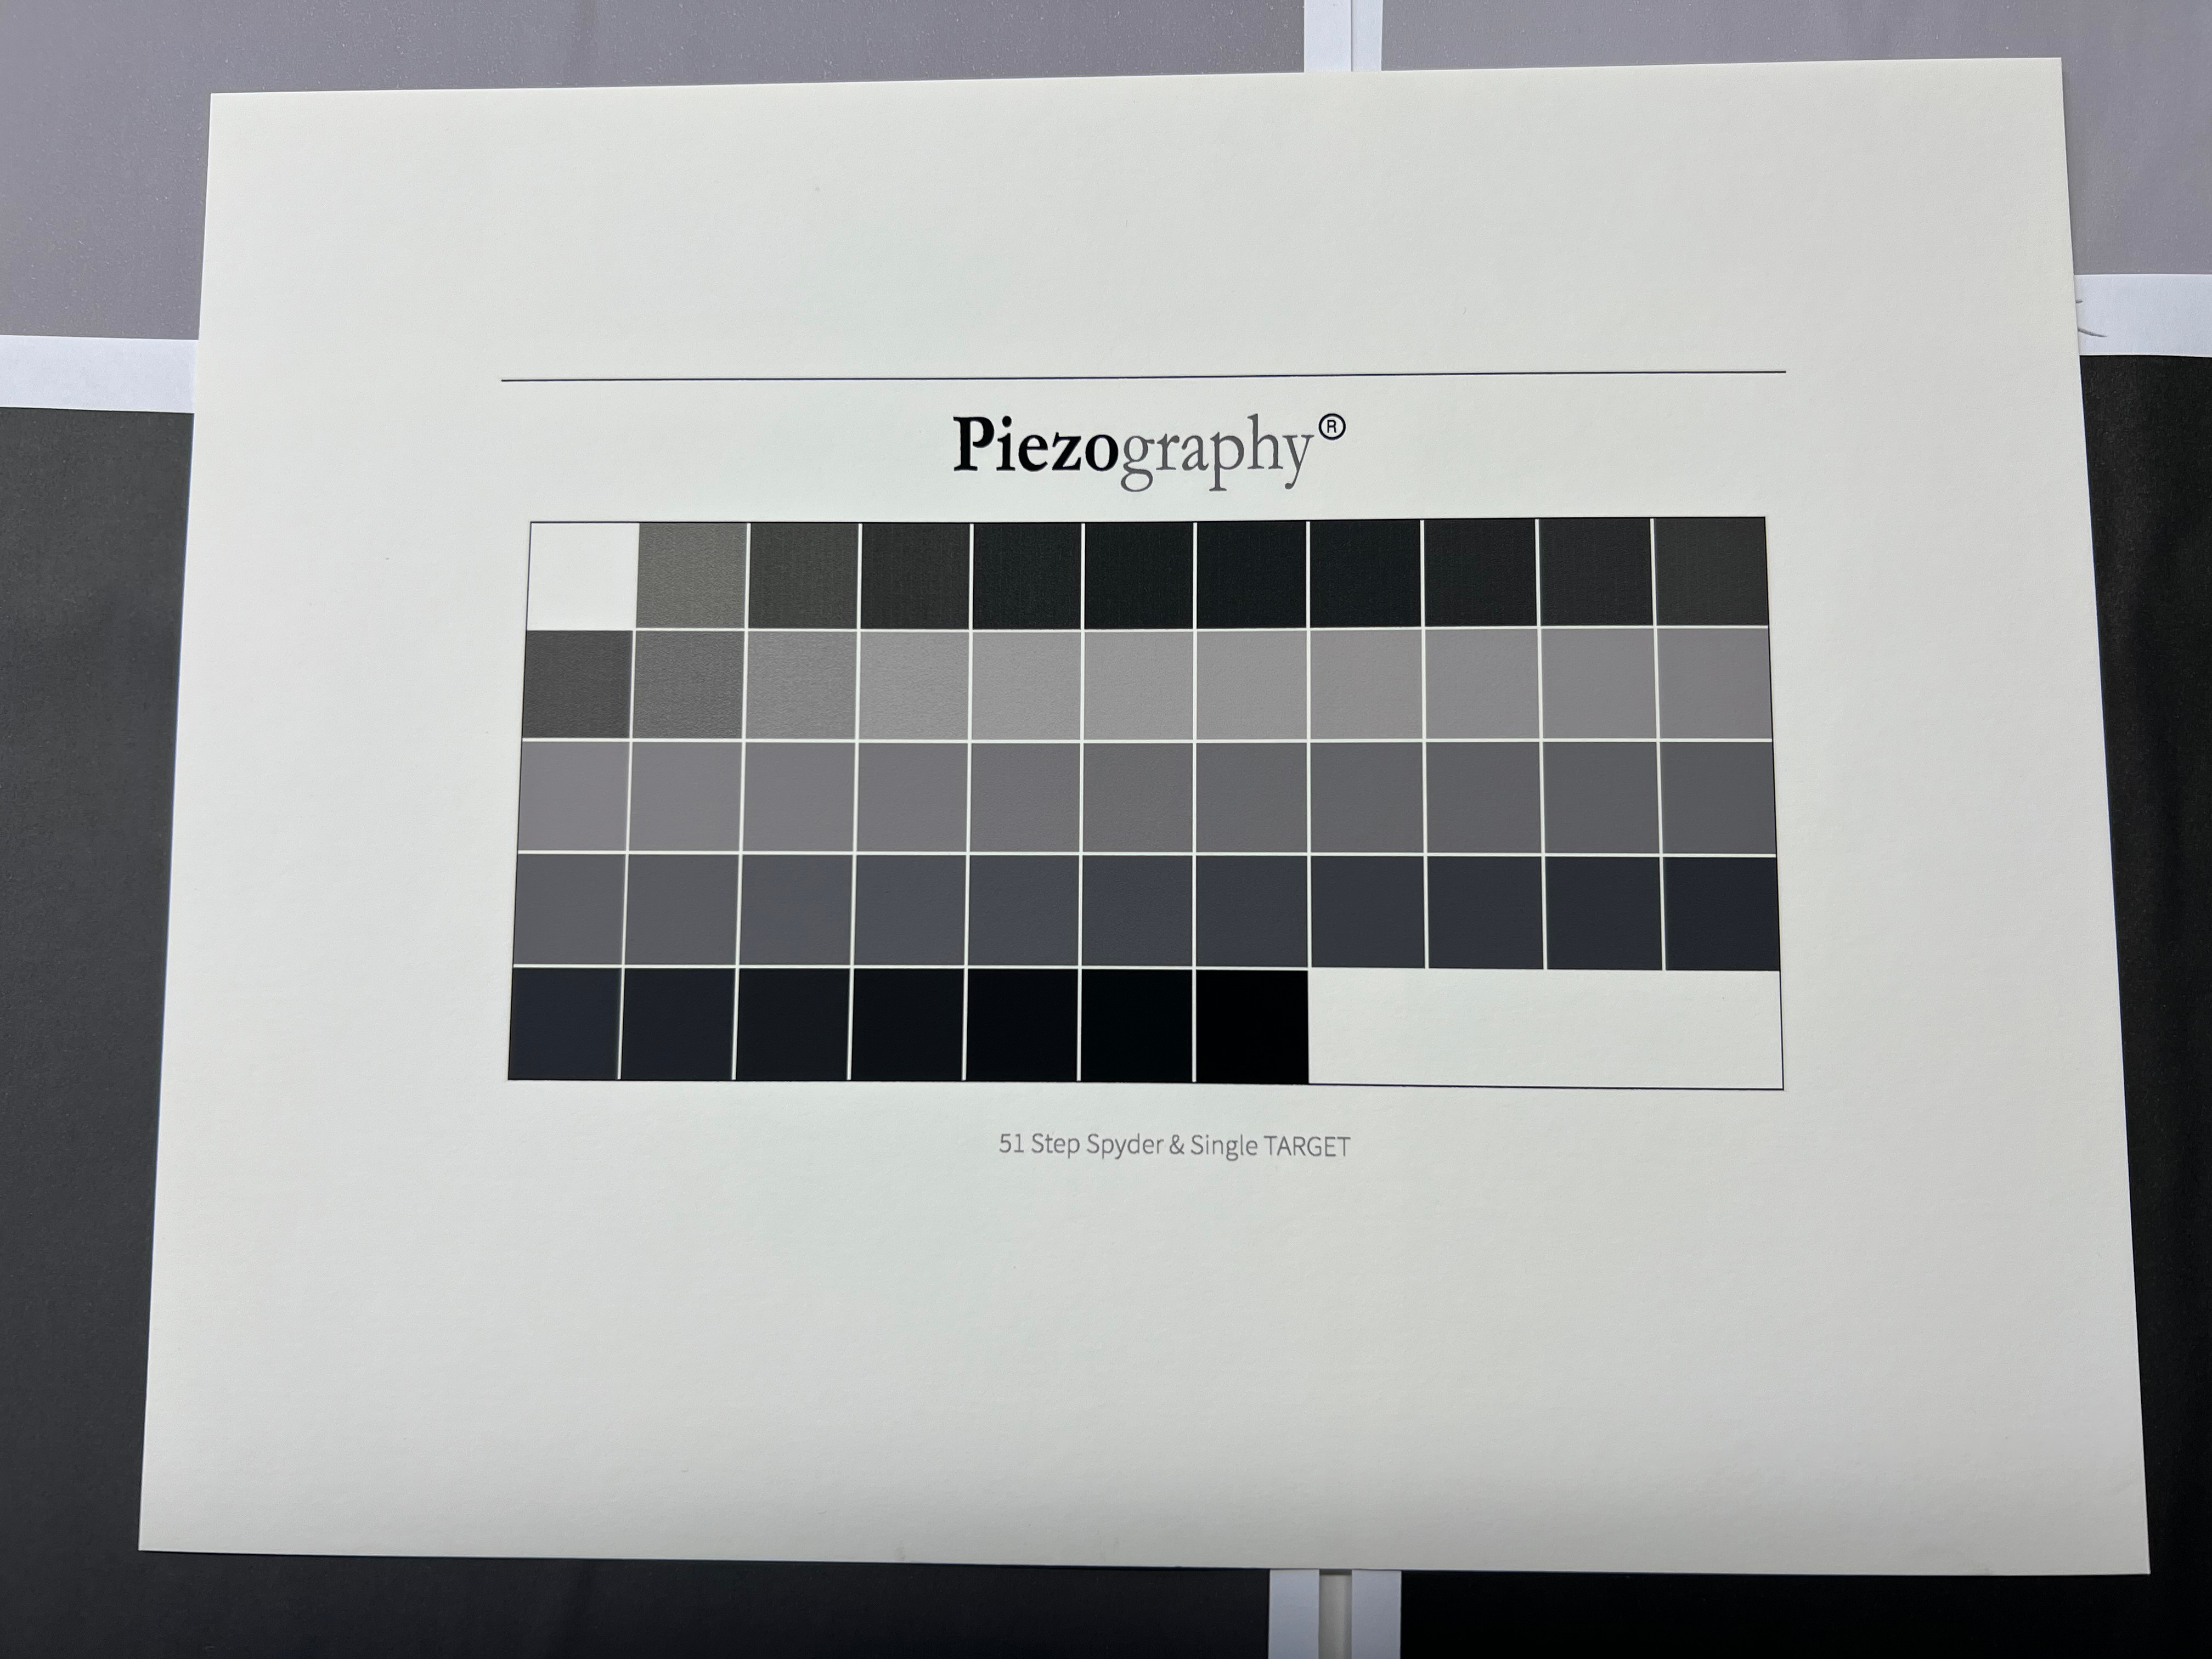
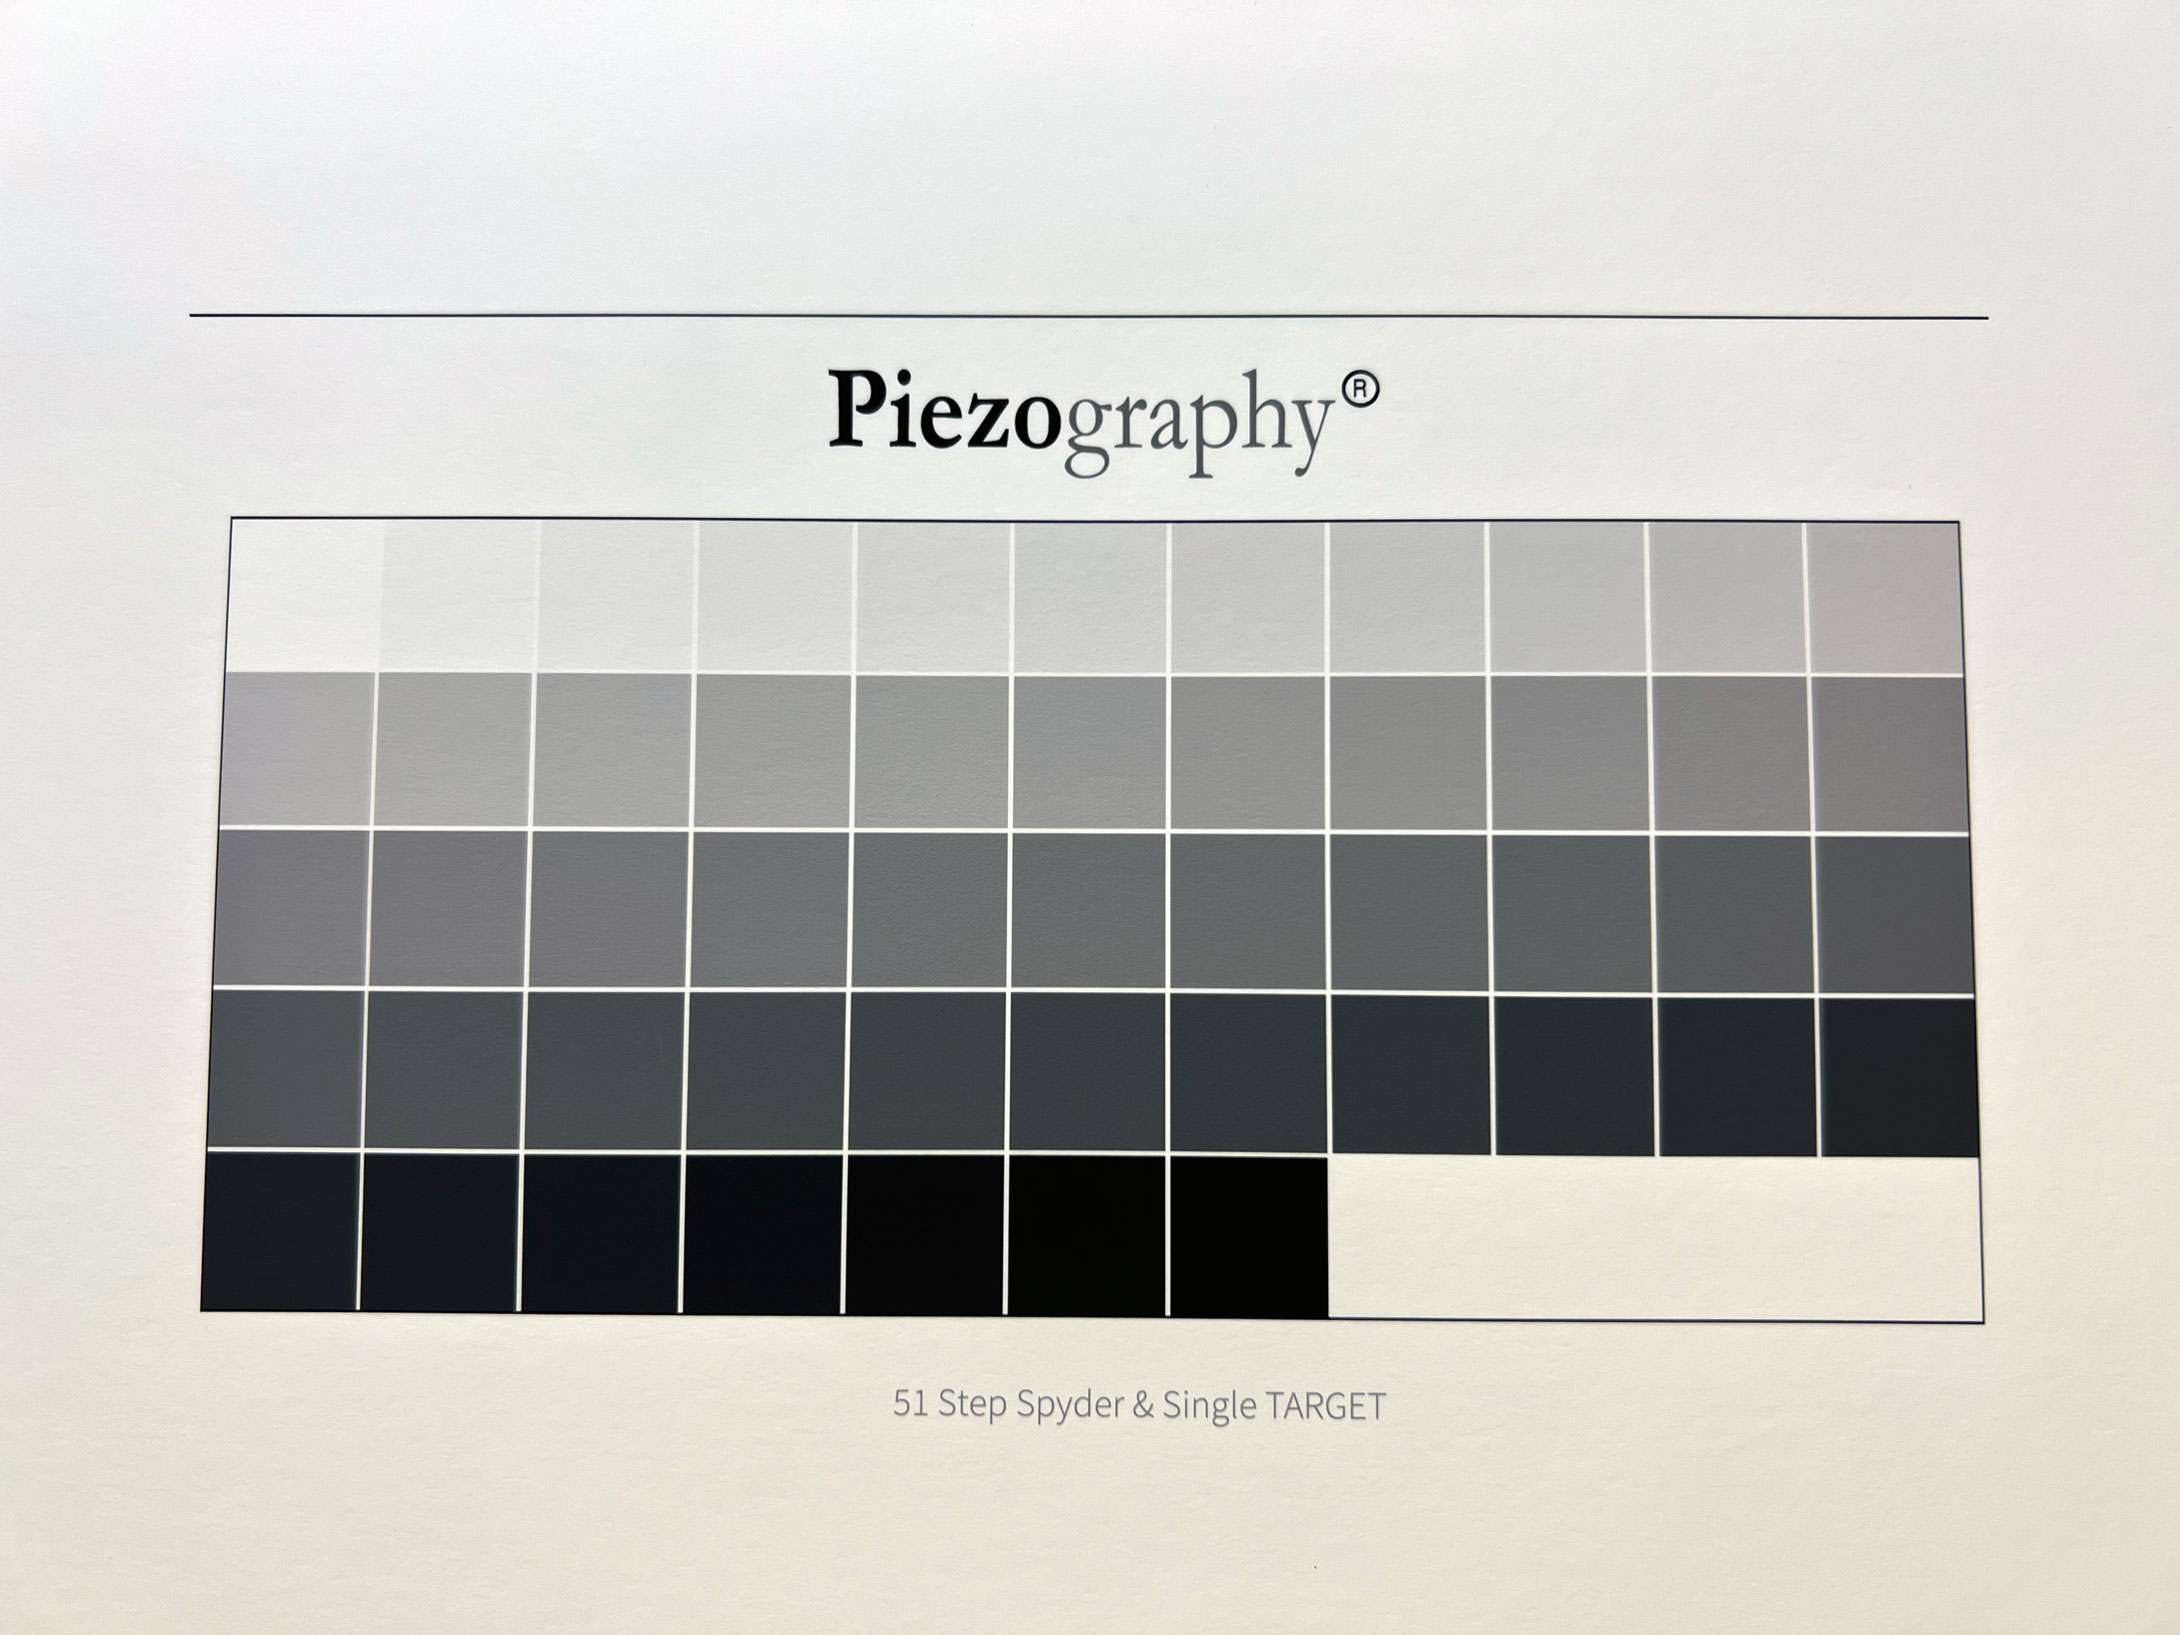
You’re right about the purge images. I printed them on single weight (cheap) Epson paper that wrinkled. I intended to discard them once I proved to myself that I hadn’t mixed up the ink cartridges and polluted the ink lines.

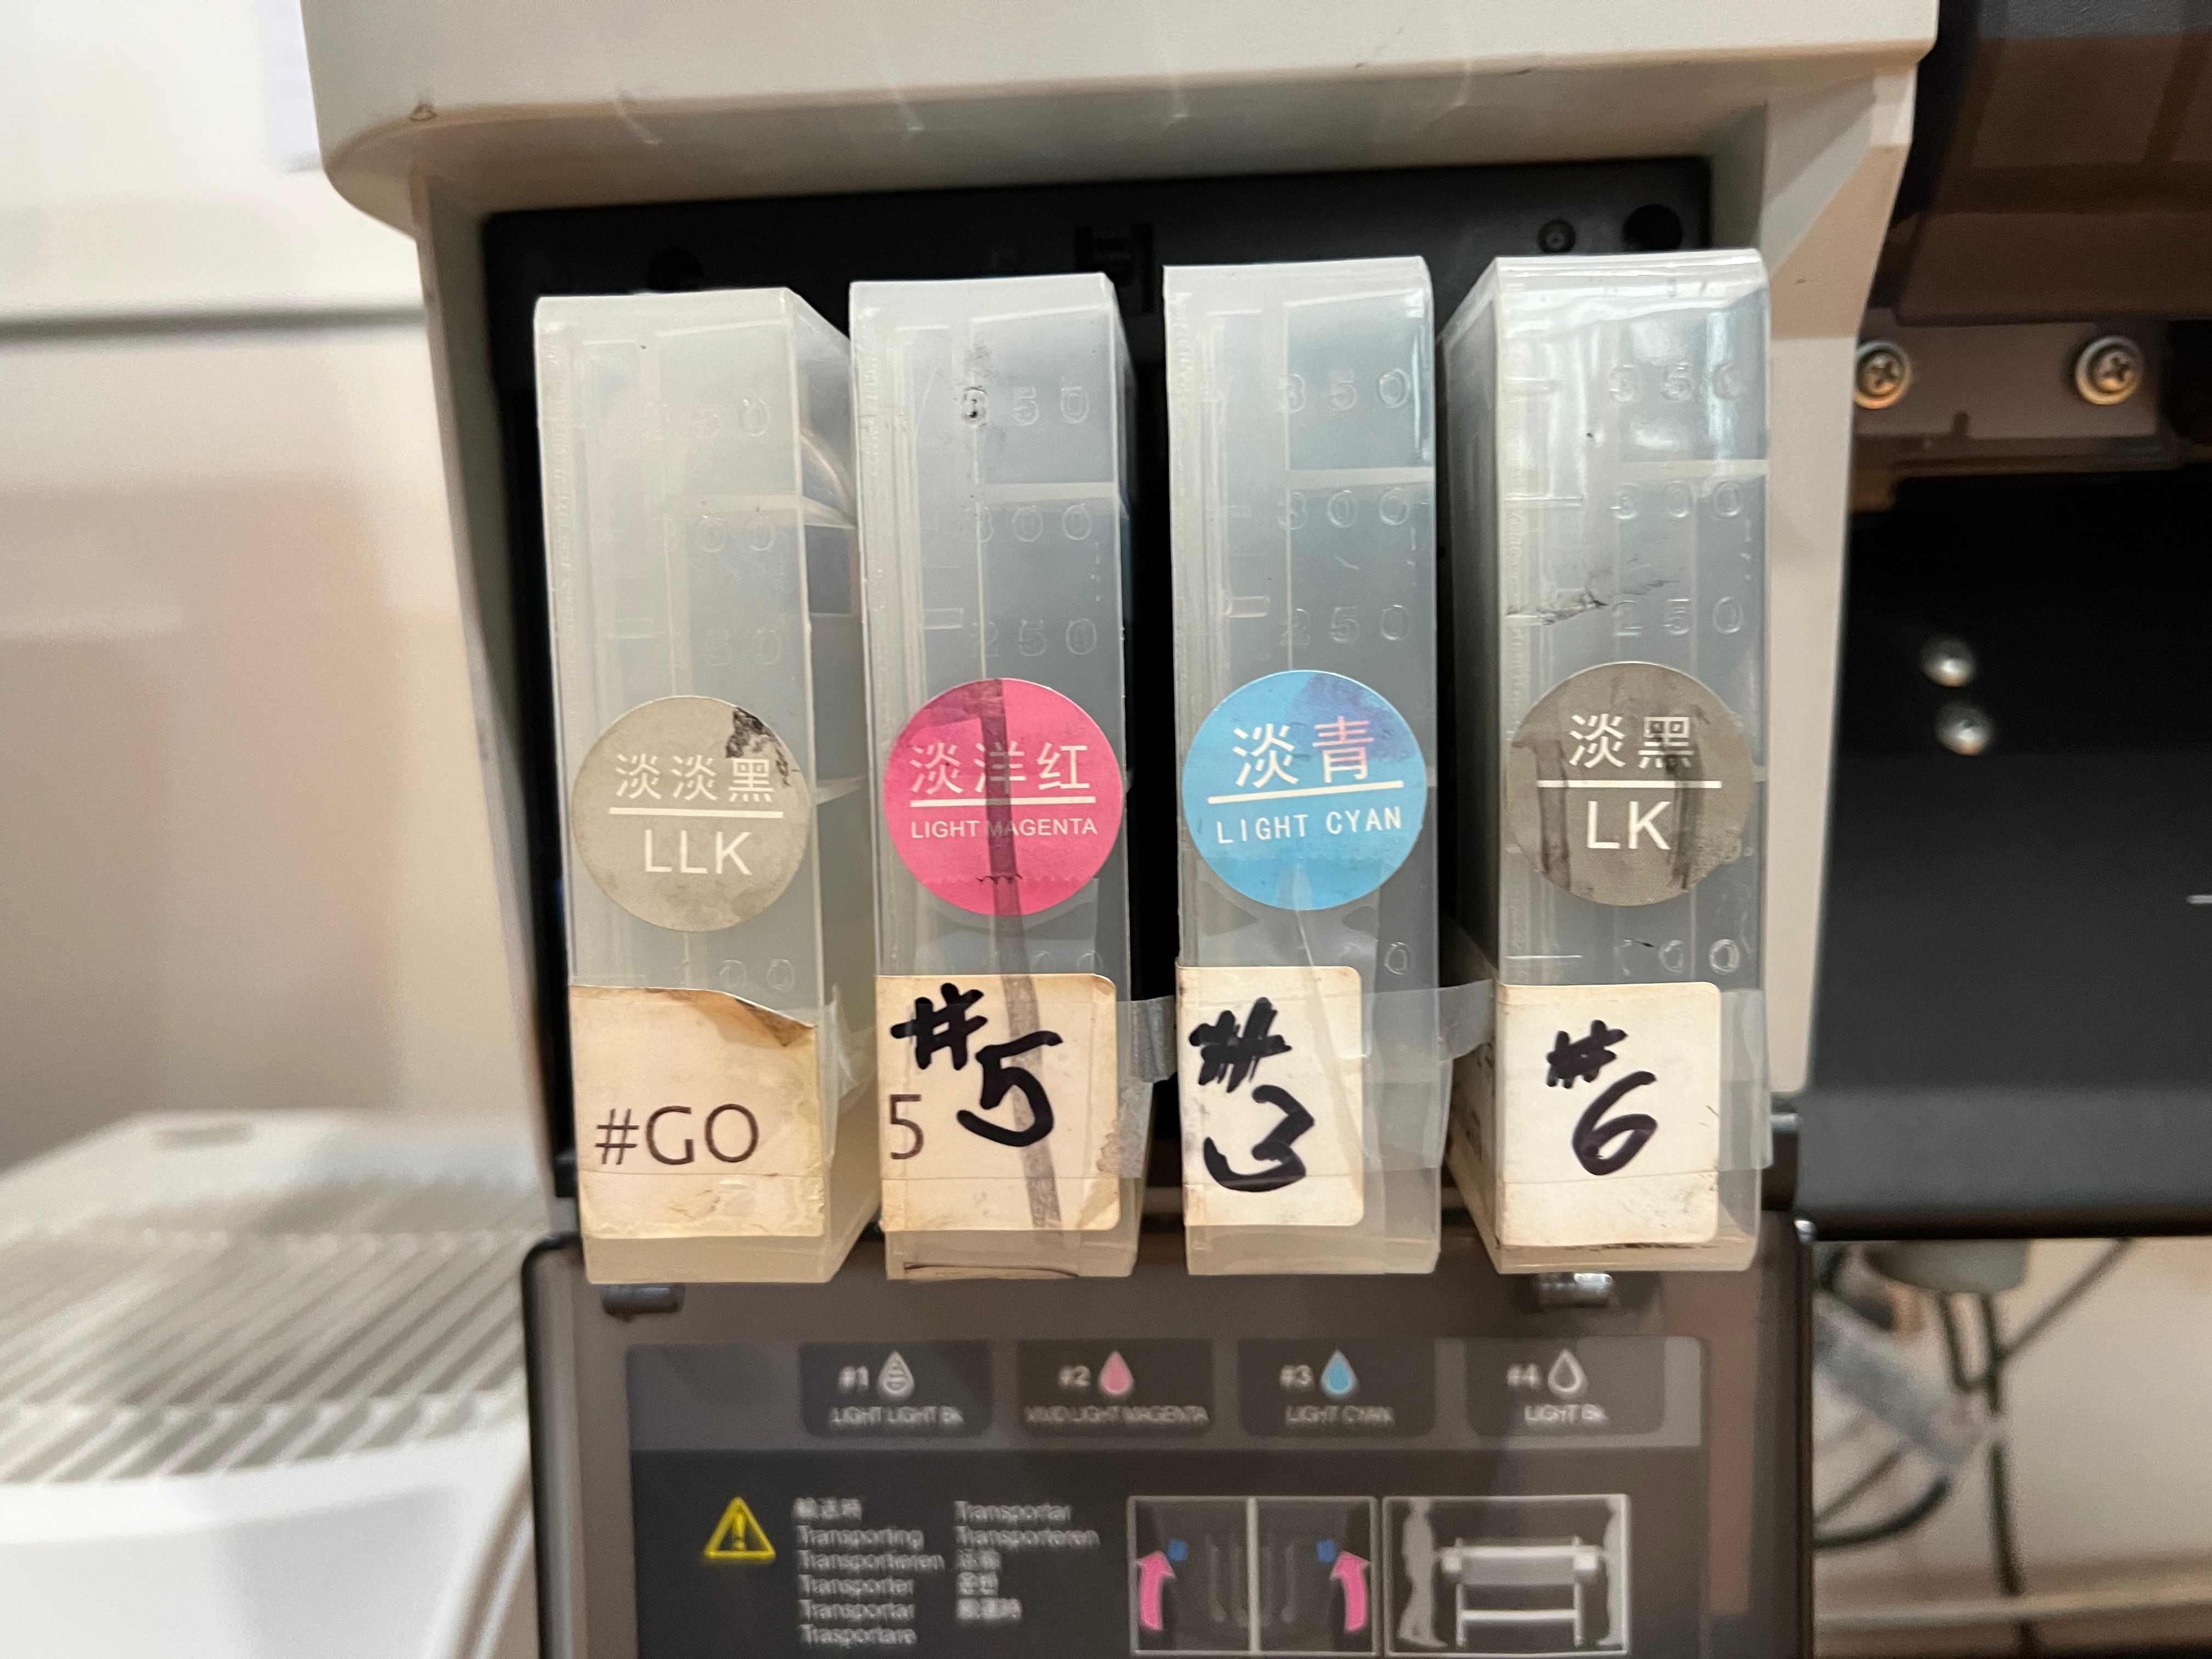
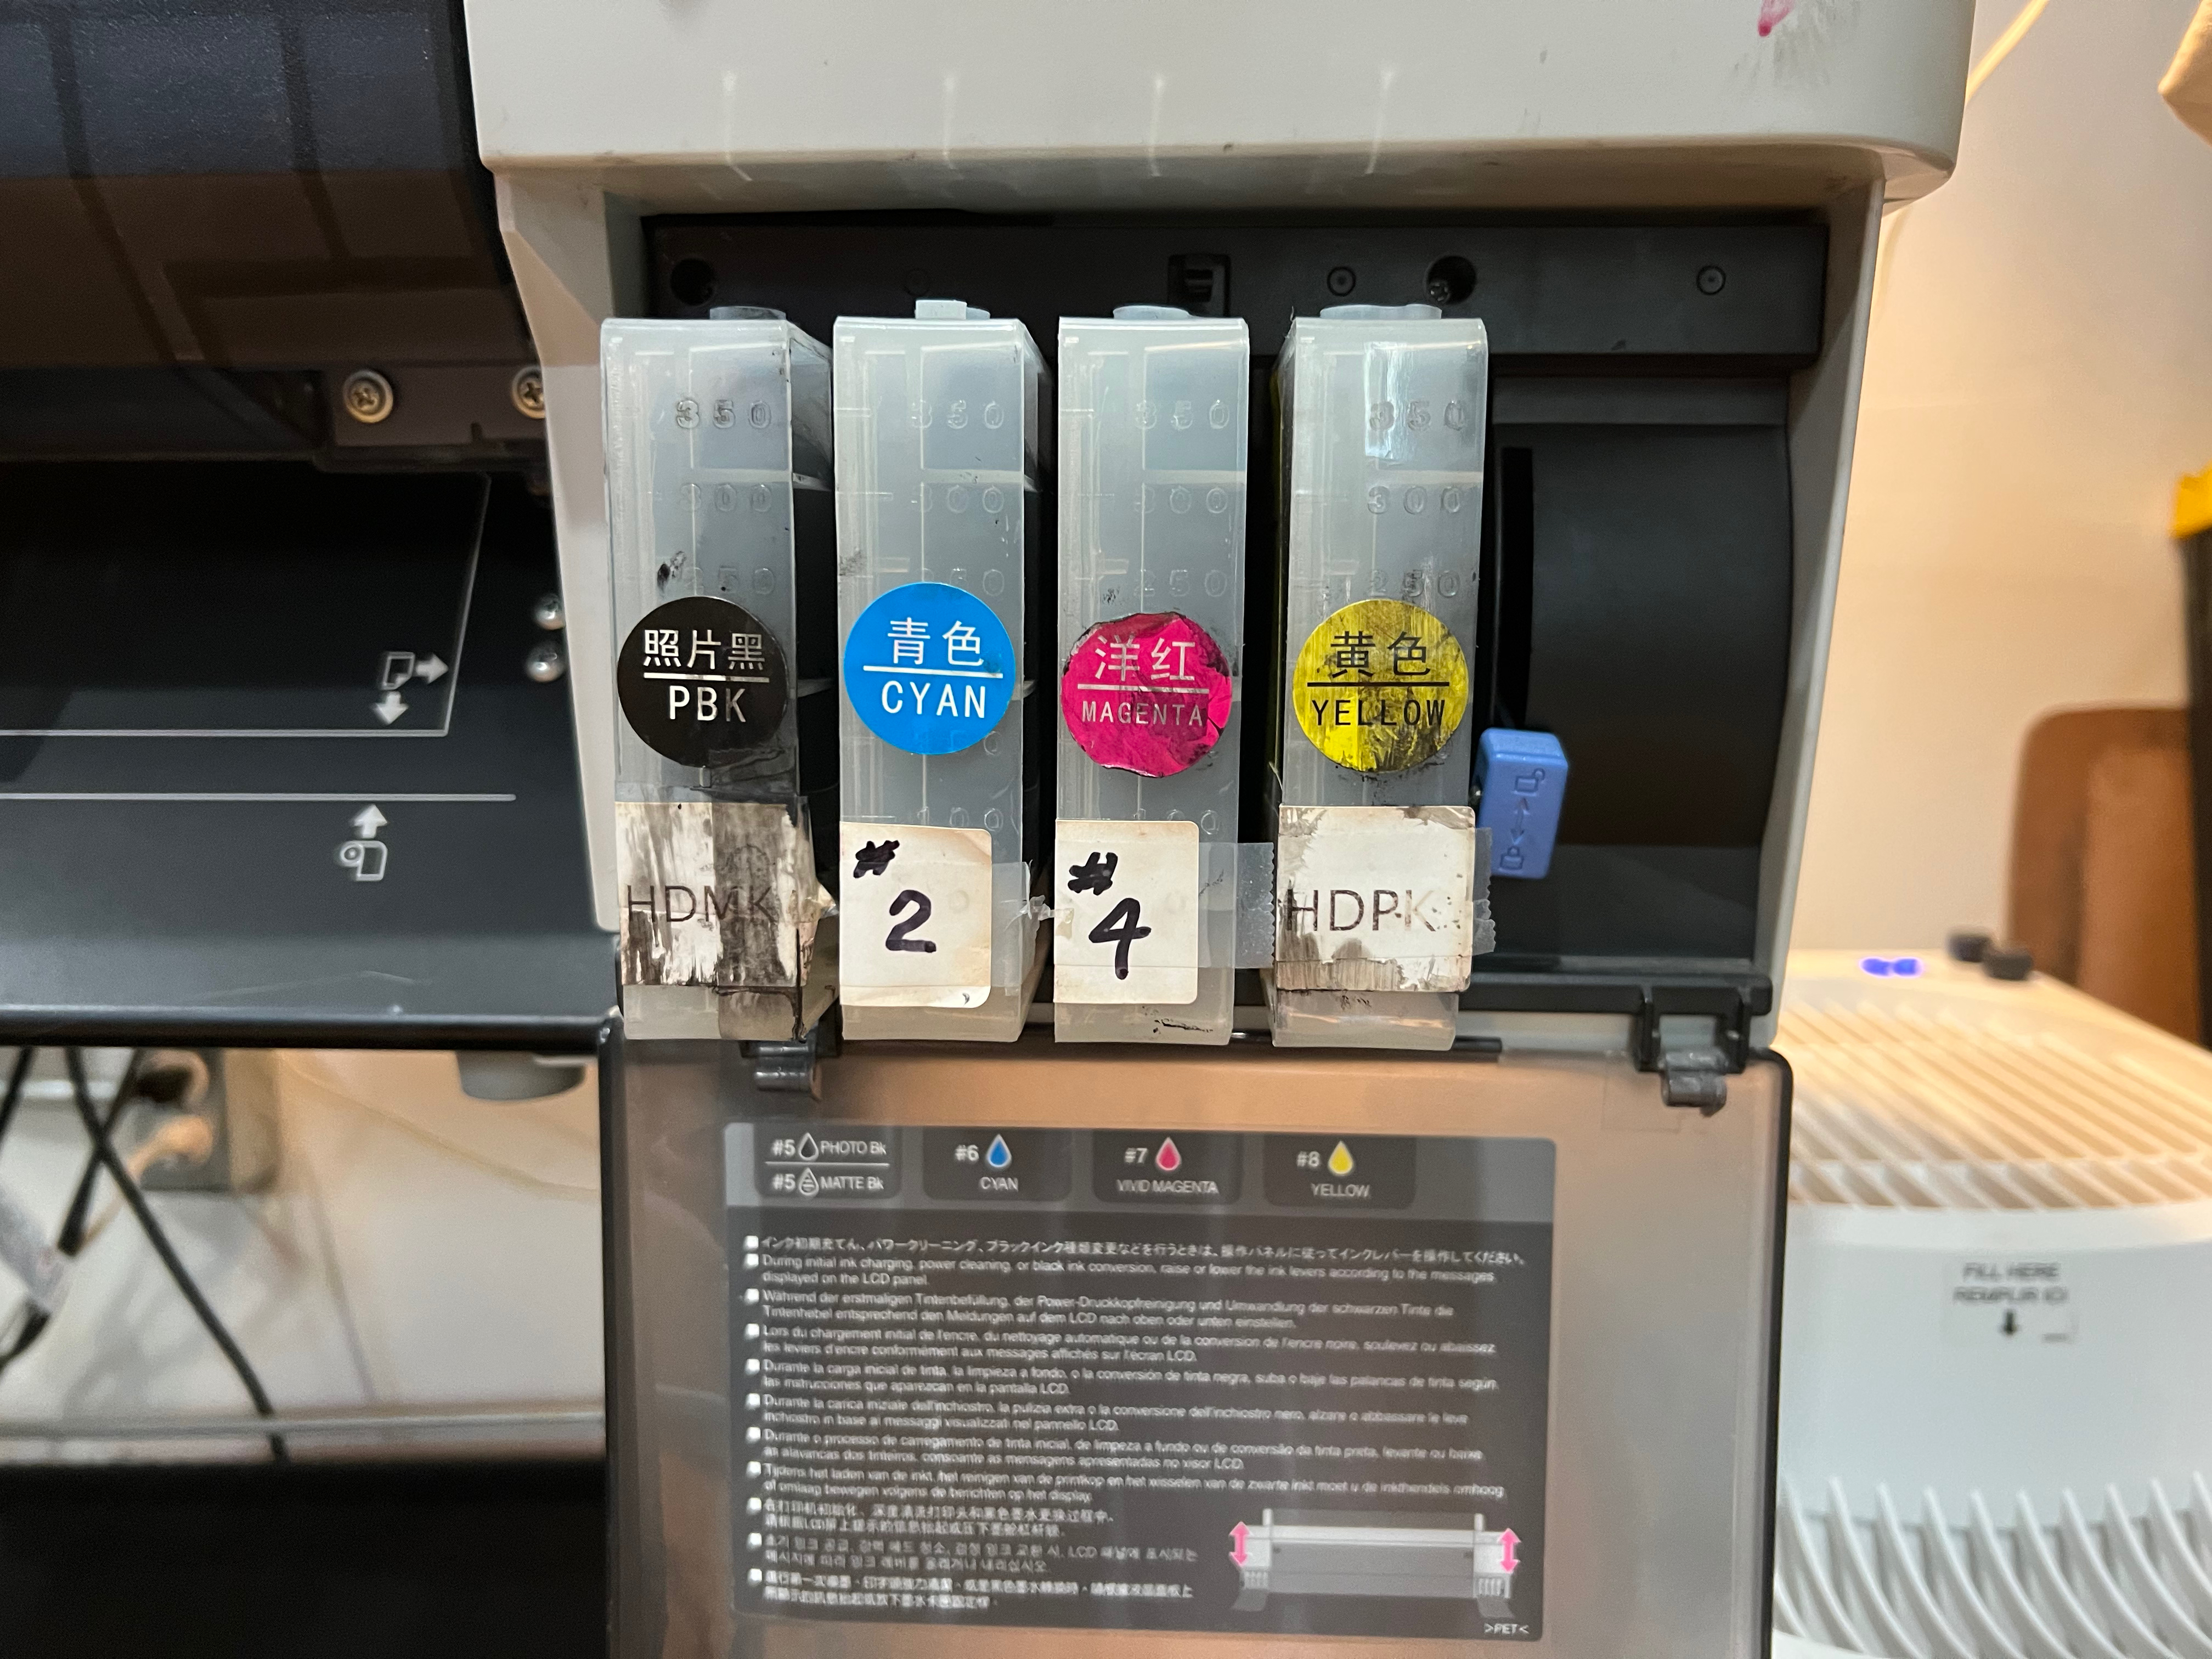
You’ll see in the accompanying photos, I have placed all the cartridges in the correct positions, although I cannot rule out an ink mis-fill, as you point out. I’m usually careful to line up the ink bottles with the corresponding carts when I refill them, but it is not impossible that I may have mixed up the inks inadvertently. I will test this hypothesis more carefully.


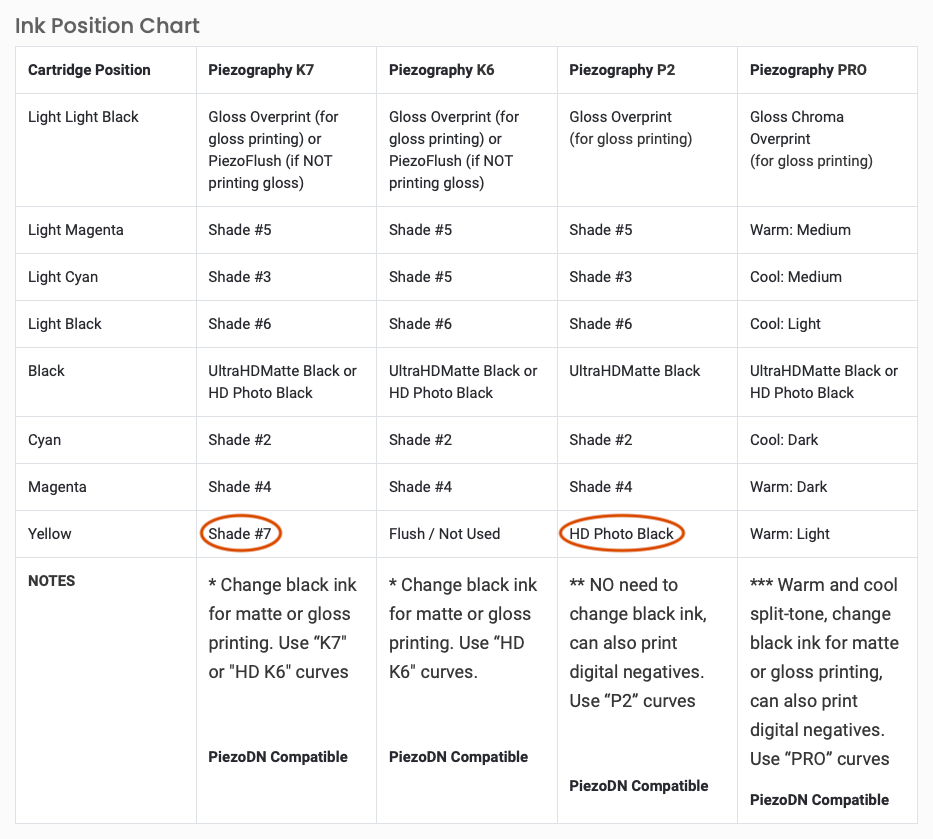
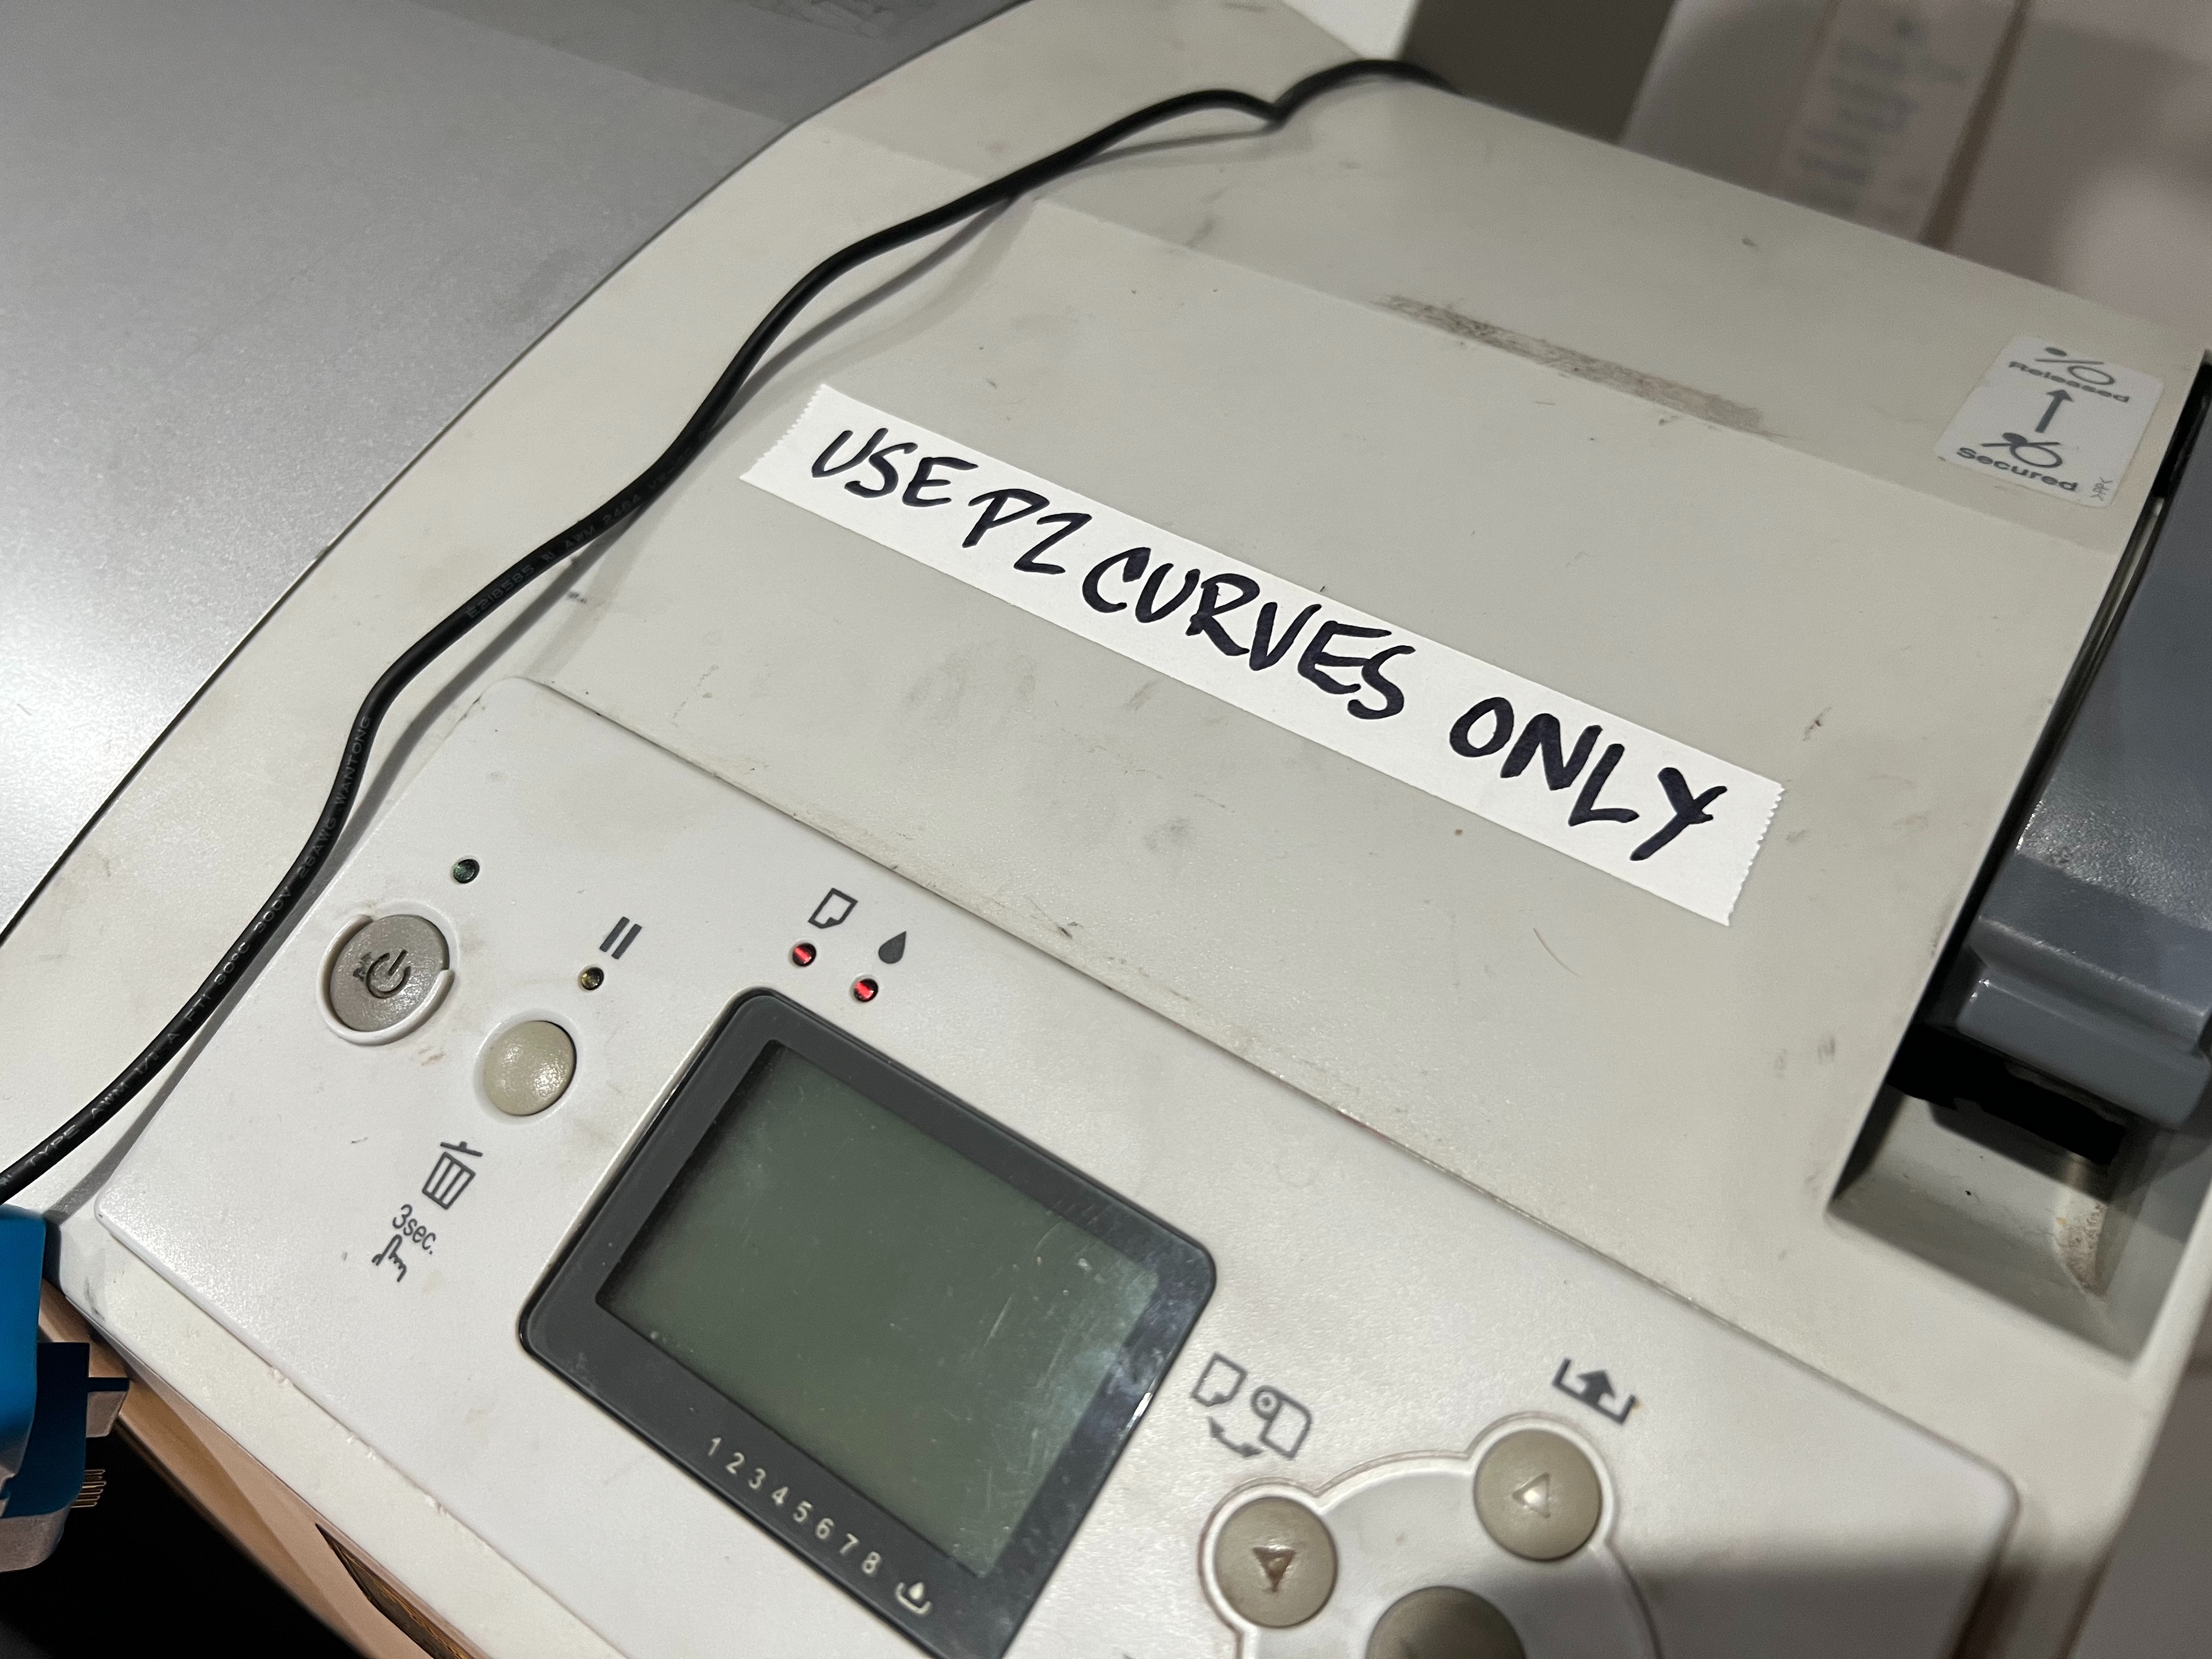
However, there is a more likely explanation that Walker suggested. Even though my inks are of the P2 variety, (out of sheer laziness) I was printing the images (on Cone Type2 paper) using K7-SEL-UHD-ConeType2.quad. I couldn’t find the P2 version and, instead of installing it, thought, “How much difference could there be between K7 and P2?”

So, just now, I opened both curves in QTR-CurveView and was astonished by the Y channel output: 0 vs. 47!

I think this difference is probably the source of my problem and I will test print another set of images as soon as I return to my studio.

And now to your damper problems . . .

I changed all the dampers because I suspected air leaks around the O-rings were causing gaps in my nozzle test prints, not clogged printer head nozzles as is usually the case. I replaced the print head about one year ago, and was trying to figure out why my nozzle checks were failing so badly.

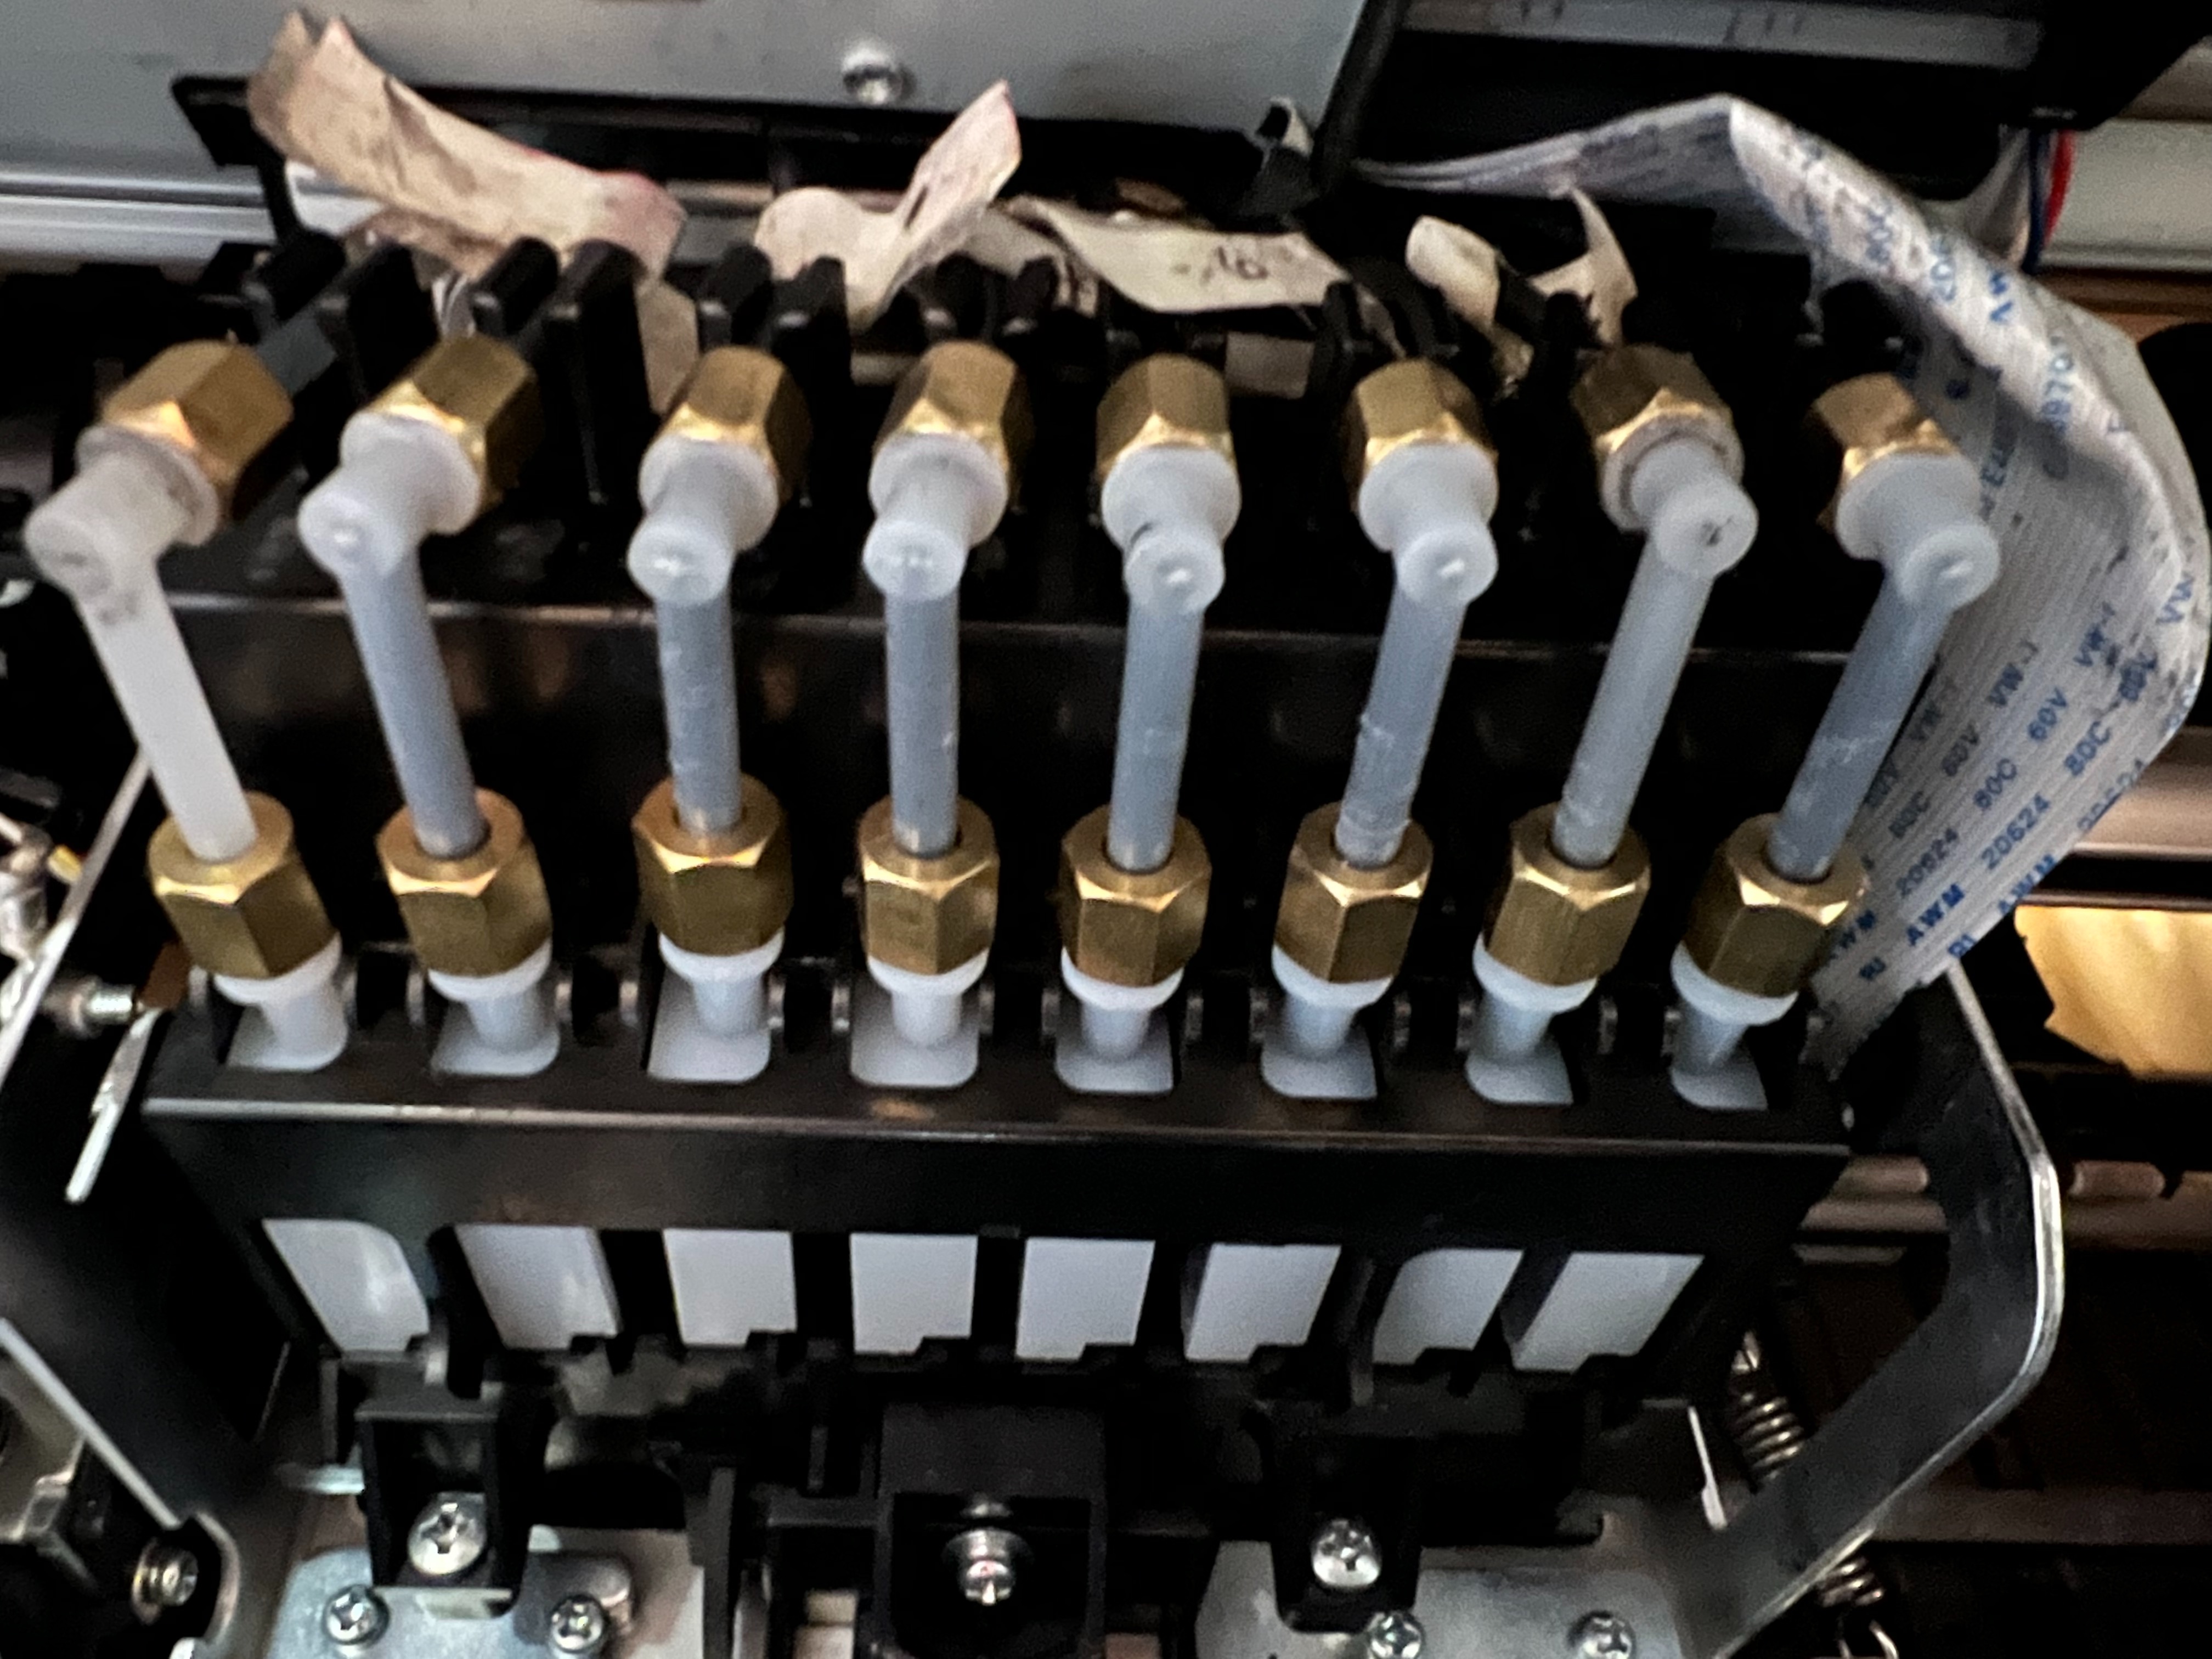
Since replacing the dampers, nuts, L-tubes, and O-rings, I’m finally getting perfect nozzle checks! Here are a couple of tips relating to the damper replacement procedure:

  • Get the brass nuts (sometimes listed erroneously as copper), because the plastic ones are prone to mis-threading and failure due to over-tightening. I also think they are not manufactured to exact tolerances like metal and can become distorted by heat leading to tiny air and ink leaks. A set of small open-end metric wrenches from Amazon helped me avoid over tightening and made the whole process easier.

  • The nuts and O-rings are sold in two sizes, 3.6x2.6mm (Big Damper) and 2x3mm (Small Damper); this small difference is sometimes difficult to discern and the hardware can get mixed up easily. The small nuts connect the ink supply tube to the L-shaped connecting tube. The big nut connects to the threaded nipple on the damper body. Be careful to use the correct O-ring to make an air tight seal. The small O-rings are very tiny, so make sure to order extras in case you drop one; they’re nearly impossible to find if you do! I had to use tweezers to handle them.

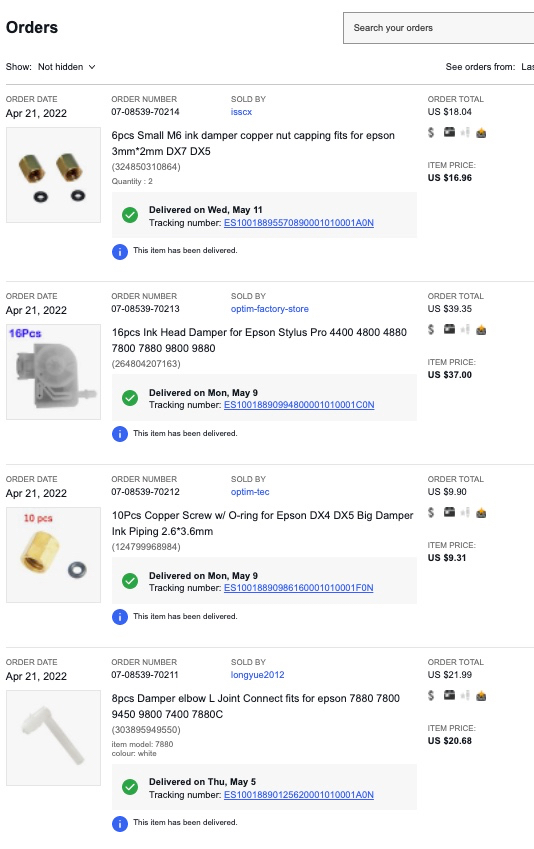
Here’s my eBay damper and nut order info. As you can see, I had four different suppliers and I waited about three weeks to receive everything. You can also find these products on Aliexpress.com but often the postage from China is four or five times the value of the product. So, I suggest looking for domestic eBay sellers who buy this stuff in bulk from China and repackage it for a profit.

Thanks again for your thoughtful comments. Hope I was able to assist in your 7880’s recovery.

–Mark

Hi Mark,

I think you nailed it with this analysis:

As I noted yesterday:

The difference is the ink that is in the yellow position. With P2 it is PK, but with K7 it is Shade 7 which P2 doesn’t even use. Here is the ink position chart for the 7880 for reference:

So the K7 curve you used put down PK (since that is what P2 has in the Y channel) where it would have put down Shade 7 if you had a K7 setup. That is quite a difference. I think the corresponding K6 curve would have worked.

Thanks for the lead on the parts. Maybe there is still hope for this old printer.

Cheers,
Keith

Hi Mark,

Looking closely at the image of your parts order I see that you ordered nuts of 2 different sizes. Am I correct in guessing that the M6 nuts fit the elbows and the other (larger?) fit the dampers?

Thanks,
Keith

Keith,

Yes. The difference in size is small and barely noticeable unless the two are side by side. You are correct, the smaller nuts and O-rings connect the ink supply tube to the L-shaped elbow connector. The larger ones fit on the dampers.

–M

Keith,

Here’s an epilogue regarding my skies (and all light grays) printing too dark:

It was a rookie mistake. Walker was right (as usual) . . . I was definitely printing with a K7 curve while using the P2 ink set loaded in my 7880.

Here are the revised prints I made today using the correct curve and a reminder to myself to avoid the problem in the future.

My excuse? I haven’t made more than a few Piezography positive prints over the past two years because I’ve been focussed on printing PiezoDN negs. As the Post-it note said to the paper clip, “That’s my story and I’m sticking to it!”

–Mark

This is one of the best forum posts I’ve seen. A terrific example of people helping others solve problems.