After switching my P6000 over from color to Piezo Pro inks using the SC-P6000 Service Program (PC) it is embarassingly obvious I rushed into trying to linearize my printer. I noticed a strong greenish cast in the mid-tones of each printed target. I should have stopped and done another head cleaning. I finally asked for help (I wish I had much sooner!). Walker recommended running an ink channel validation using “QTR-Calibration-Mode.”
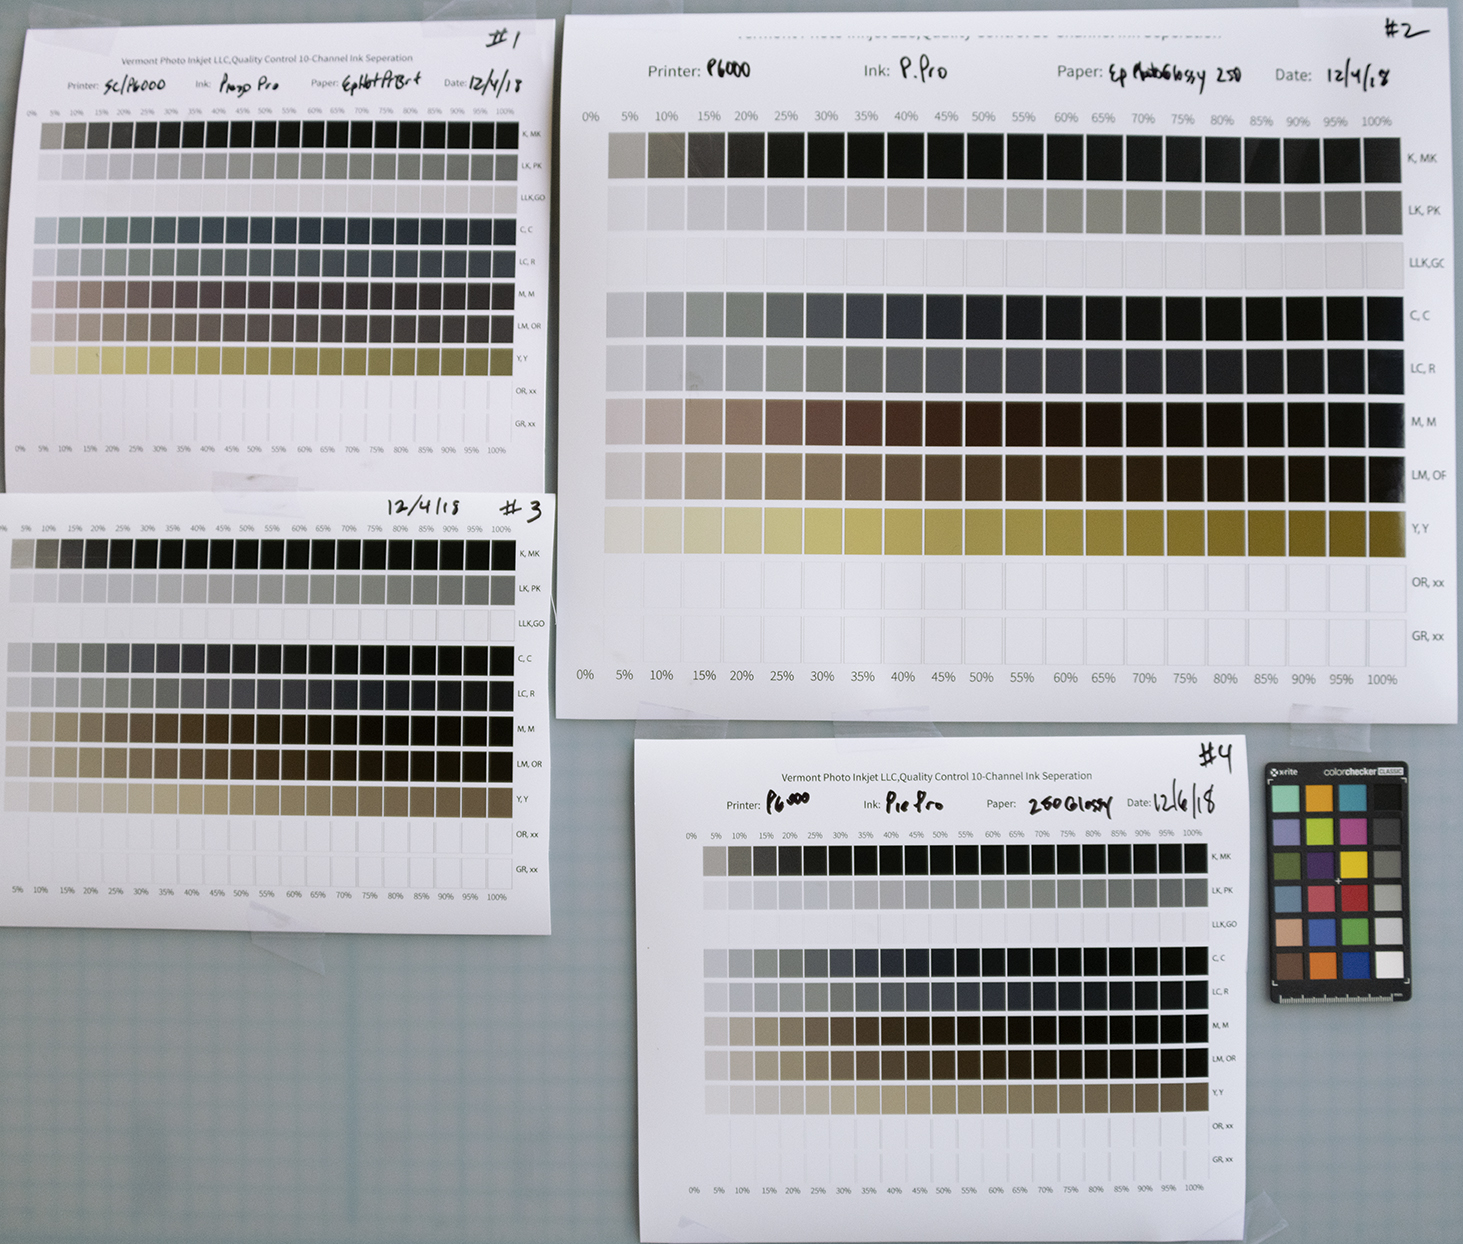
When I ran the ink channel validation the 5 rows at the bottom reveal the cyan, magenta & yellow ink dampers are still contaminated with color pigment. Another clue was “a” & “b” values measured by my i1Pro 2 spectrophotometer indicated color, which gray & black inks don’t have!
Should I hook the P6000 back up to my pc and run 1 more “Ink charge”? Then repeat the Ink Channel Validation again to look for color pigment in my Epson’s ink dampers?![]()
Run a few power cleanings first, then do a validation. No need to go through an ink charge again yet.
cheers!
Walker
I’ve did 2 head cleanings (Heavy) Ran ink channel validation and did 2 more head cleanings and a nozzle check. I still have cyan, magenta & yellow ink in system. I ran the Ink Charge, which filled up my maintenance box. Ran another ink channel validation and still have contamination of color ink. Ran 3 more head cleanings because now, in addition to color remaining stubbornly my nozzle checks are showing quite a missing lines in all nozzles except LK. Getting frustrated!
I wish you had not done the initial fill! Please share the printout is the ink calibration chart if you would. Ideally each 21 step measurement to so I can compare it. Seems to me like something is restricted.
-walker
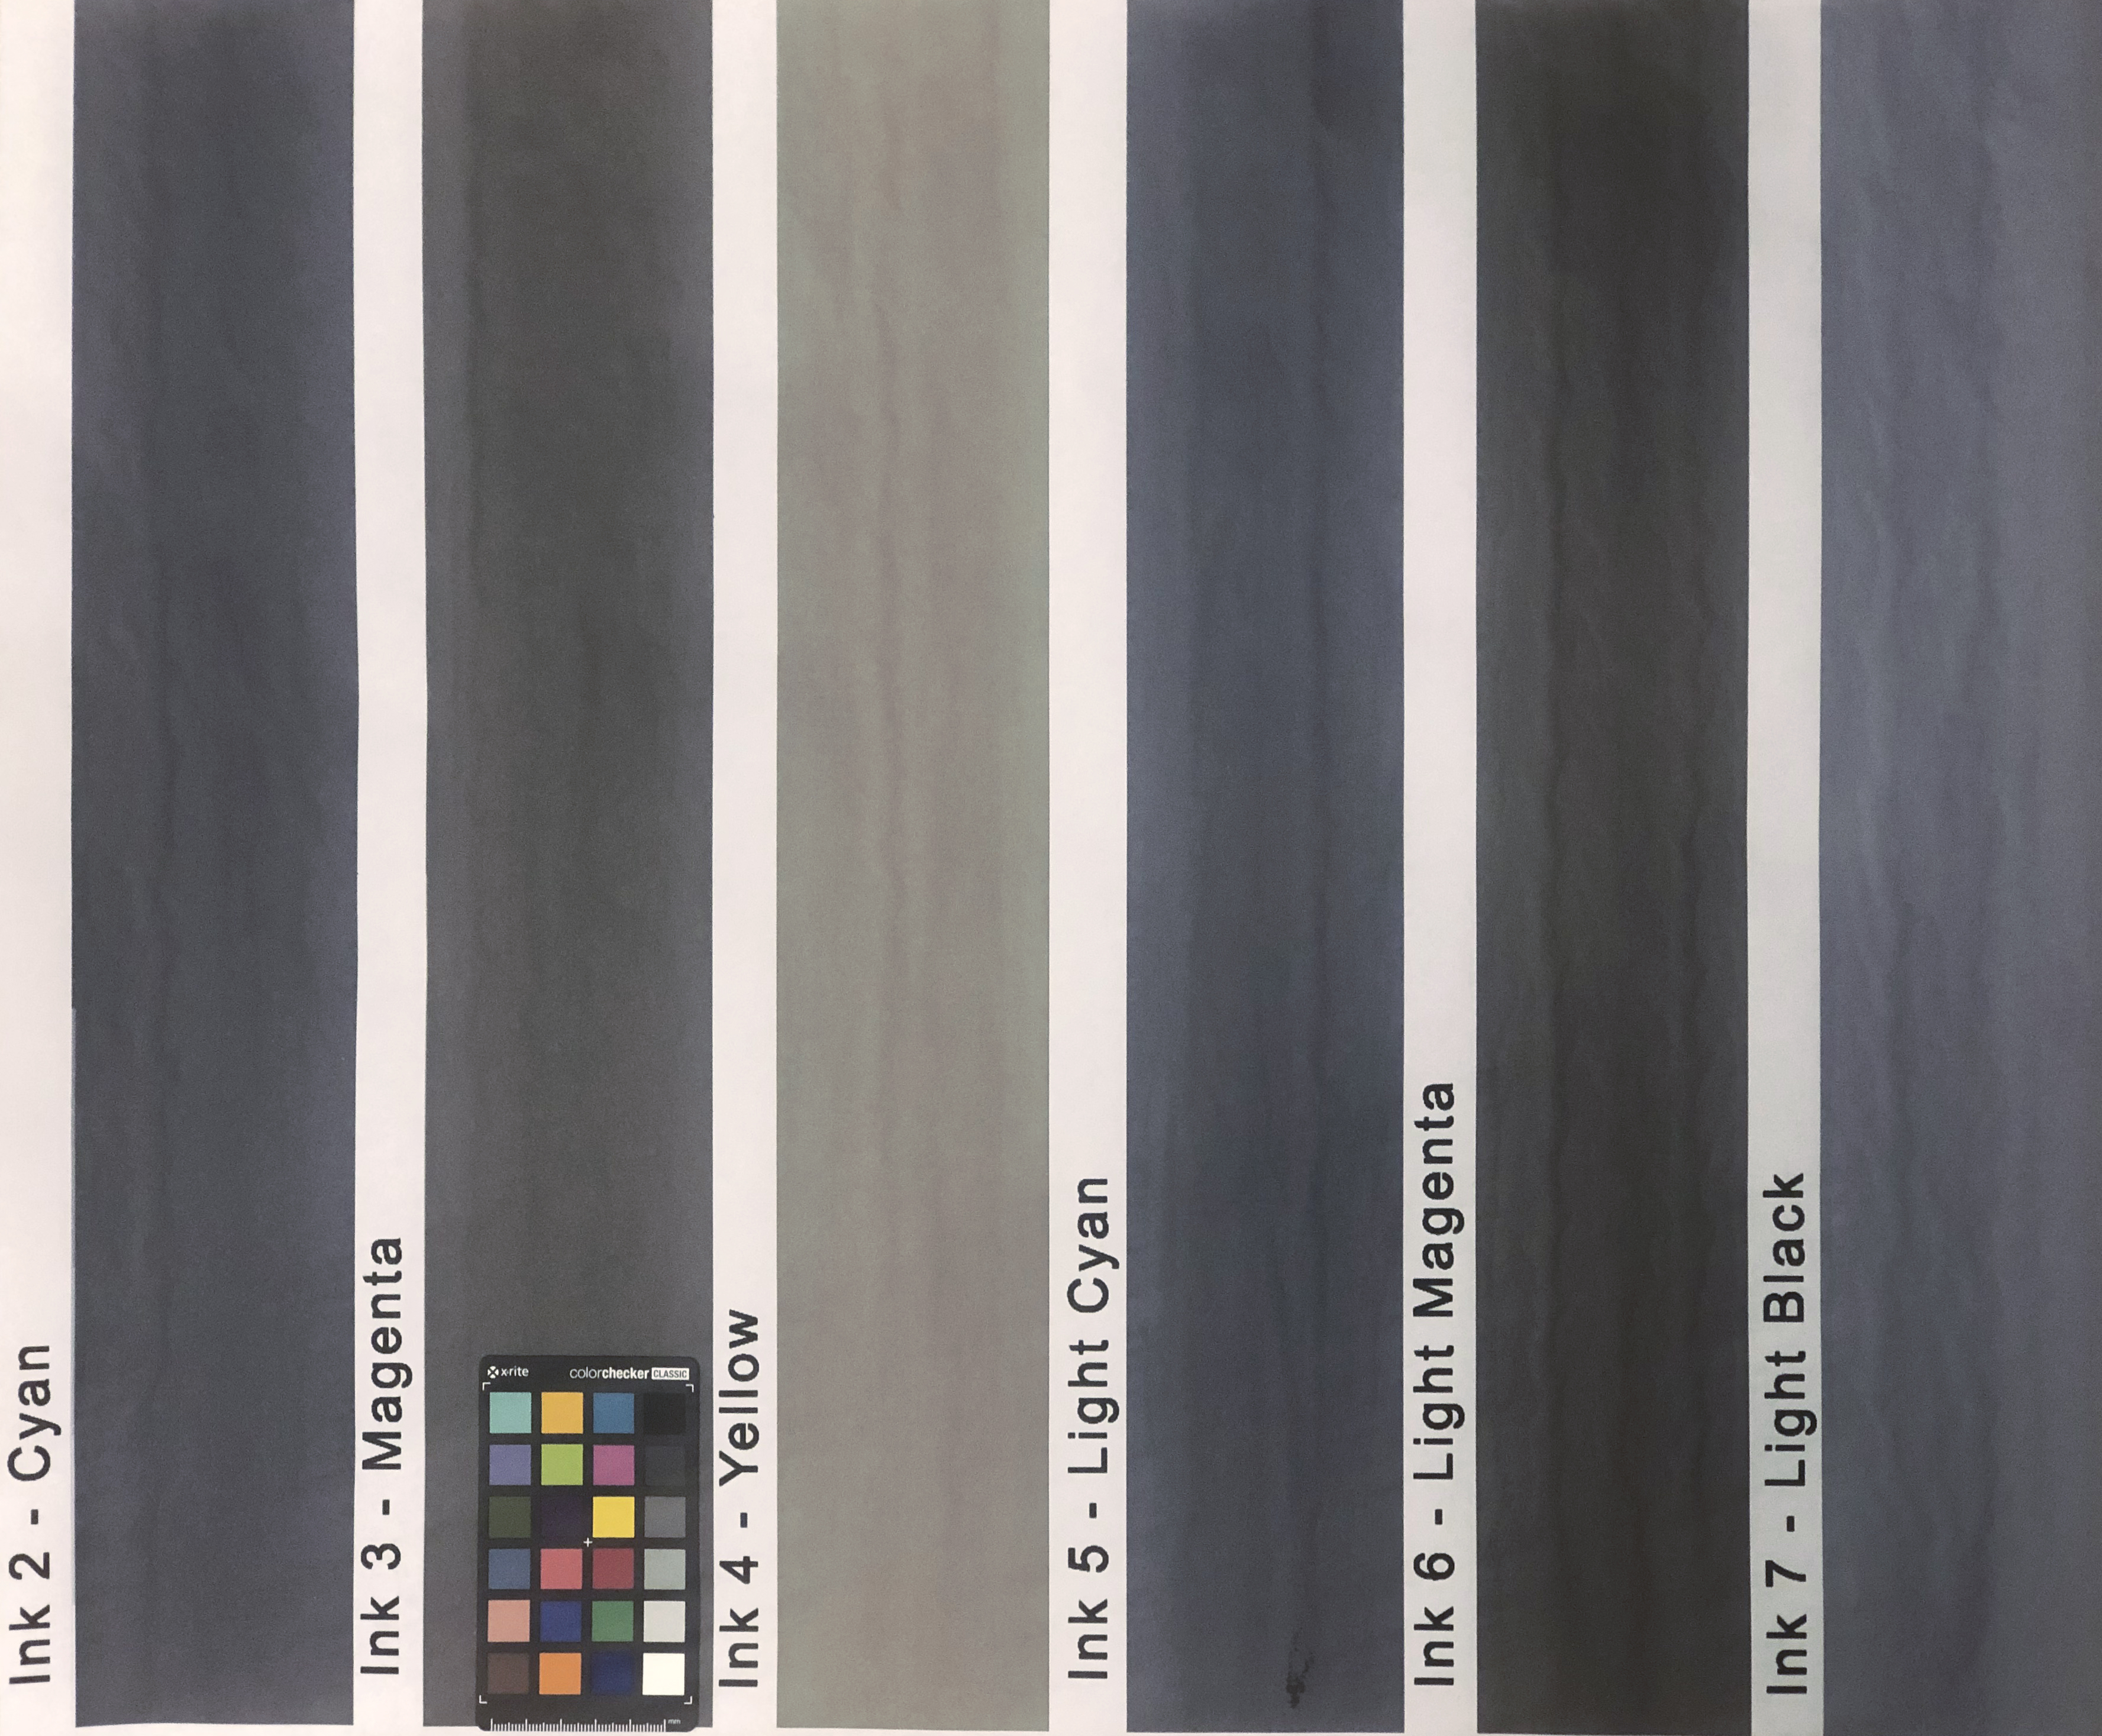
FYI, in these circumstances if a power clean does not fix it I make sure all nozzles are clean and then run purge prints on canon bond paper using qtr calibration mode and a flush image. This saves ink and also I can see a clear graduation as any color pigment purges out.
W
I had to abruptly halt the linearization of my new Epson SureColor P6000 earlier this week. I had jumped the gun and began trying to linearize before the ink change from pigmented color to Piezography Pro was complete. I wasted many days doing printing, waiting 24 hrs to cure and measuring the next day, so I could repeat the process.
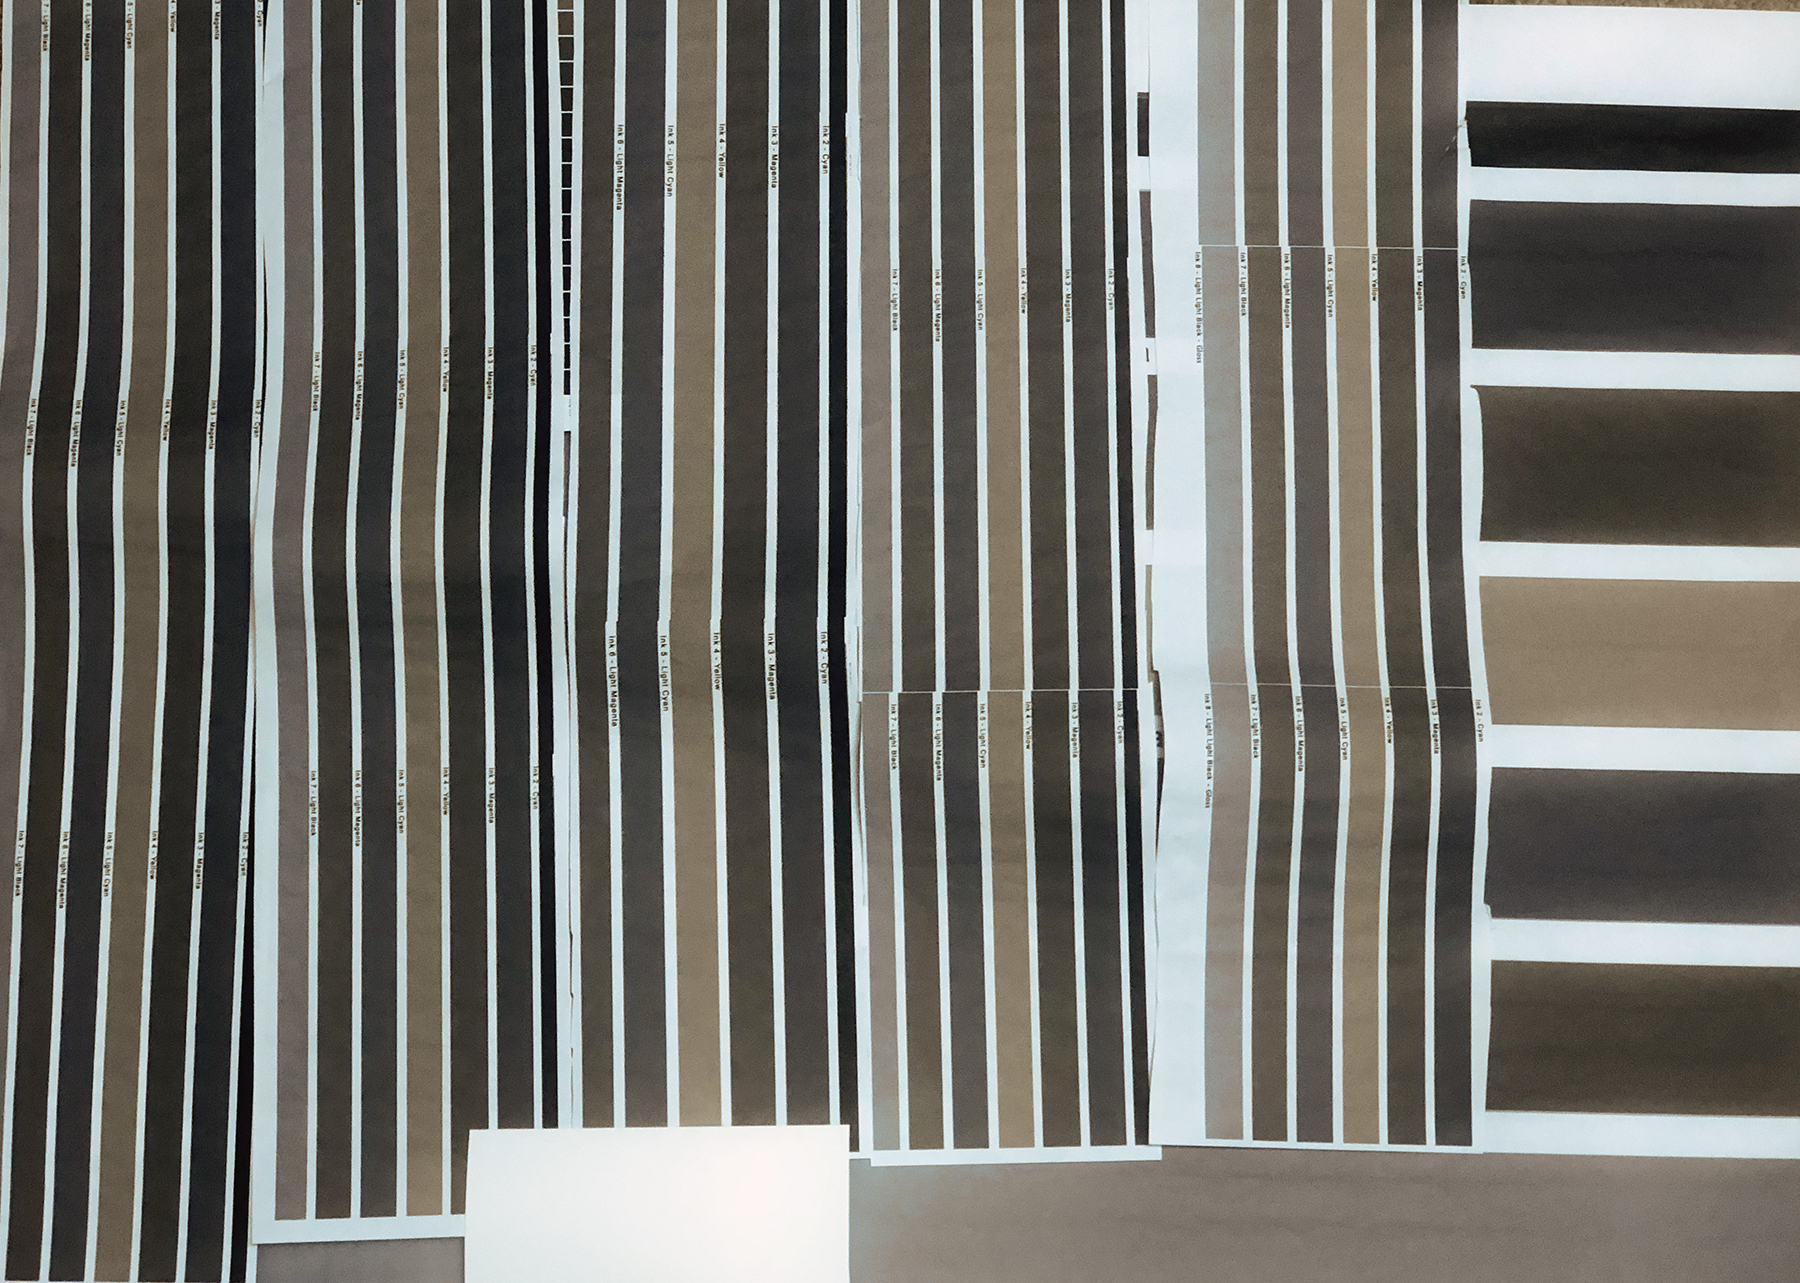
Only after raising the issue & seeking help did I realize I was spinning my wheels until I was printing pure warm & cool tones. As directed, I printed 7 ink purge images on 20 lb. bond paper. It looks like things are settling down and the color is getting cleaned out. #1 (upper left) shows cyan cast in lighter (15-25%) in the Cyan (Cool Dark) channel.
After running flush sheets the 21-step target #4 (lower rt of the top image & also the bottom image) shows much less cyan ink contamination in the lighter tones of the 3 cool channels. The 3 Warm channels don’t show as much improvement from what I can tell, but I really don’t know how these are supposed to look.
I started out running 3 purge images side by side on a 24" x 8" 20 lb bond roll over and over.
Then I switched to a 24" x 12" size.
I can continue the purge prints using QTR Calibration mode if you think I should, Walker. The 21 Step target in the top photo marked #4 and dated Dec 6 (also enlarged below) was run after all the purge prints in the 2nd & 3rd photo.
This pretty much represents where the system & process sits today, as I step away from the studio for about a week. I’ll try to remember to gently shake the ink cartridges when I return.
Steve
I’m back in the Saddle! Ready to get back to linearization if you think I’m ready. Can you tell anything from these photos I posted?