finally exhausted all of my old inks have ordered and installed NEW PiezoDN (K7 set with Warm Neutral Shade 1)
Few questions:
I used the setup instructions that came with new inks and switched to PK on the 3880 for the negatives, is this correct?
If so, when I print at new DN curve do I need to print a GO coat like on the K7 curve for glossy printing or does that happen automatically for negatives? Didn't see anything about GO in Section 11 of the guide.
last, I did run a test print with PiezoDN-Pd-Ox curve and it has the dreaded Epson "printer guide marks." The little dots that look like they were made with a tracing wheel. I tried widening the platter and that did not help. Also the ink looks like it's "pooling" on the media. That is, the ink lays down and looks like a dried river bed...
I'm using the Pictorico Premium OHP with an Epson 3880
D’OH! yup grabbed wrong film (always forget about the dark blue versus light blue label thingy)
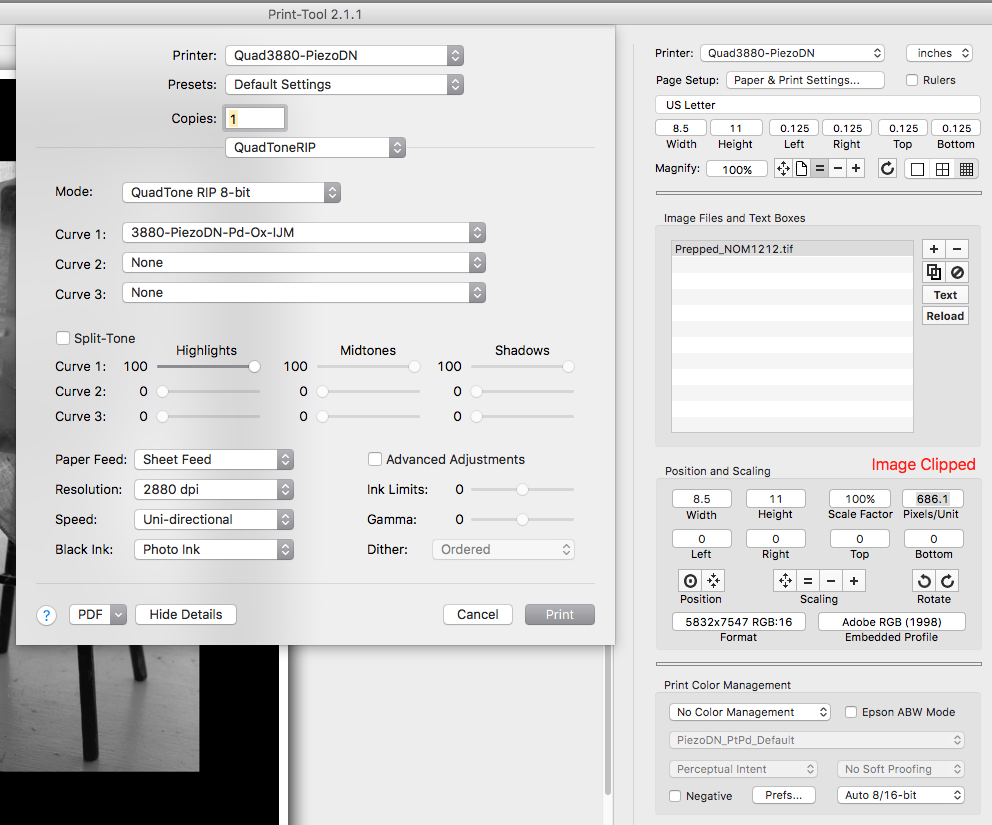
So switched film, ran DN with new curve (through print-tool 2.1.1 ~ see attached jpeg for my settings).[attachment file=27620]
Ran print and got marks. Then tried the Schreiber method for bypassing “star wheels” and that removed the marks BUT my head hit the film over and over again. After 8 sheets I decided to bite the bullet and swap the inks into my other 3880 in the studio.
Same issues with second printer.
Also tried the Schreiber method and still getting head slap. and the last 1/2" of print.
And two of the sheets went “off the rails” and film was crooked towards end. Not a pretty sight.
I also printed positives to see if I got the marks on paper, but they were all clear on both printers. The K7 curves are GREAT BTW.
Humidity is nicely controlled in studio and I’m printing on the sheet version of the pictorico.
Digging around the web for solutions, but so far no luck.
Firstly, while I wish I could take credit for the star-wheel bypass, I only wrote it up - Walker deserves full credit which I give in the article.
Secondly, this is the first I’ve heard of trouble with head-strikes using this method. Are you sure you didn’t skip any of the steps? There is one thing I see in your setup which is that you are using sheet-feed instead of manual rear-feed. I’d suggest using the latter since you’ll know before hitting print if the film is mis-loaded.
Thirdly, did you do step 6 - which I note as being optional? If not, it could help.
Fourthly, how much clear margin are you leaving at the trailing edge? You mention head-slap in the last 1/2", but how close is that to the end of the sheet? You need a minimum 1 inch margin on the trailing edge.
And finally, on my own dedicated PiezoDN printer I cut off the little guide tab at the front right of the front-feed tray (shown in step 4) with a hacksaw blade. This makes the exit path clear of all obstructions. I realize most folks won’t want to do this so I haven’t mentioned it before now.
I have also recently discovered a way to get around sawing off the right-tab thingy.
If you take a 17"x6" strip of the slick waxed paper that comes with OHP film, and tape the 17" edge underneath the front-load tray but up and between the two lines of star-wheels this will force the film underneath the front-load tray in an even non-destructive way.
You still need to make a new media type (custom) that is 2.5" shorter than the actual media type of your film or simply tape a trailing bit of paper to the film so that the back edge does not ride up in the printer.
Thanks everyone for the notes. I’m going back to studio this weekend and try the new bits.
Keith,
Thanks for your follow up. and to answer your Q’s: yes, followed all the instructions EXCEPT step 6. I had spring cleaning in the studio and had no scraps or cardboard lying around. Will do that that this weekend.
As to other things, the screenshot has one of my settings, but yes, I did try with manual feed and had the same weirdness with head slap. To clarify, the scraping and marking occurred at the last bit of the image area not just the trailing edge of media.
Admittedly, the 3880 I use for my negatives always had a little bit of a feed issue that’s why I switched to my other one.
My solution for now is to simply change how the negative lays on the “page”. The workaround is I came up with is to move the image area closer to the leading edge of the film so that the image is done printing BEFORE the film starts to shift in the printer. Not ideal, but for now it’s perfect since the negatives are not more than 8" on the long edge.
I’ll follow up with more info later this week and may take a slice at the tray with a hacksaw.