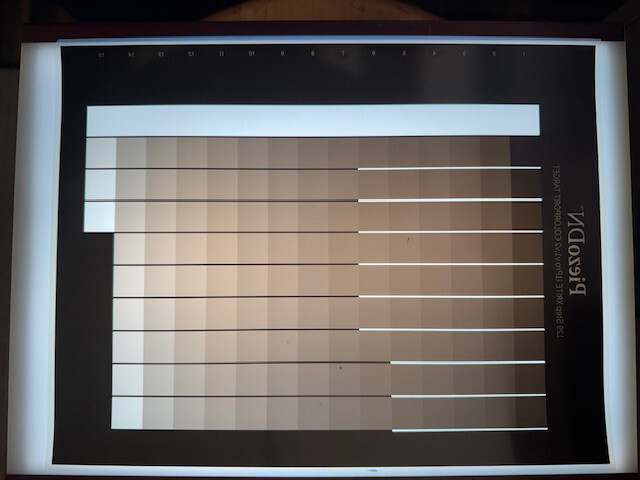
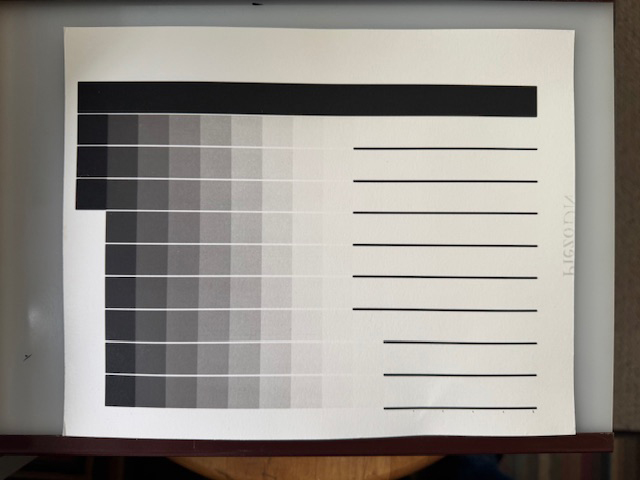
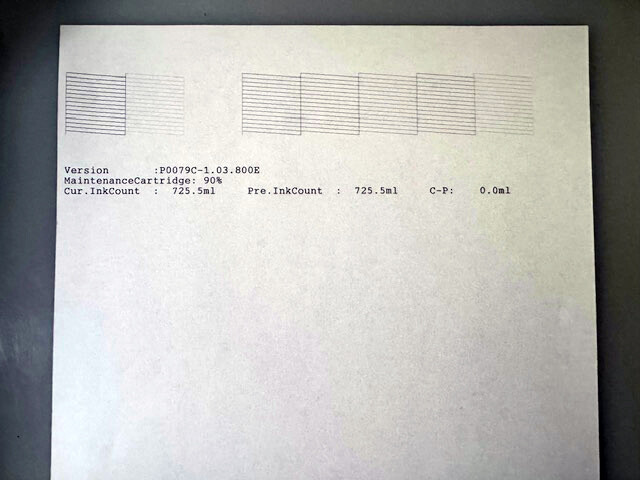
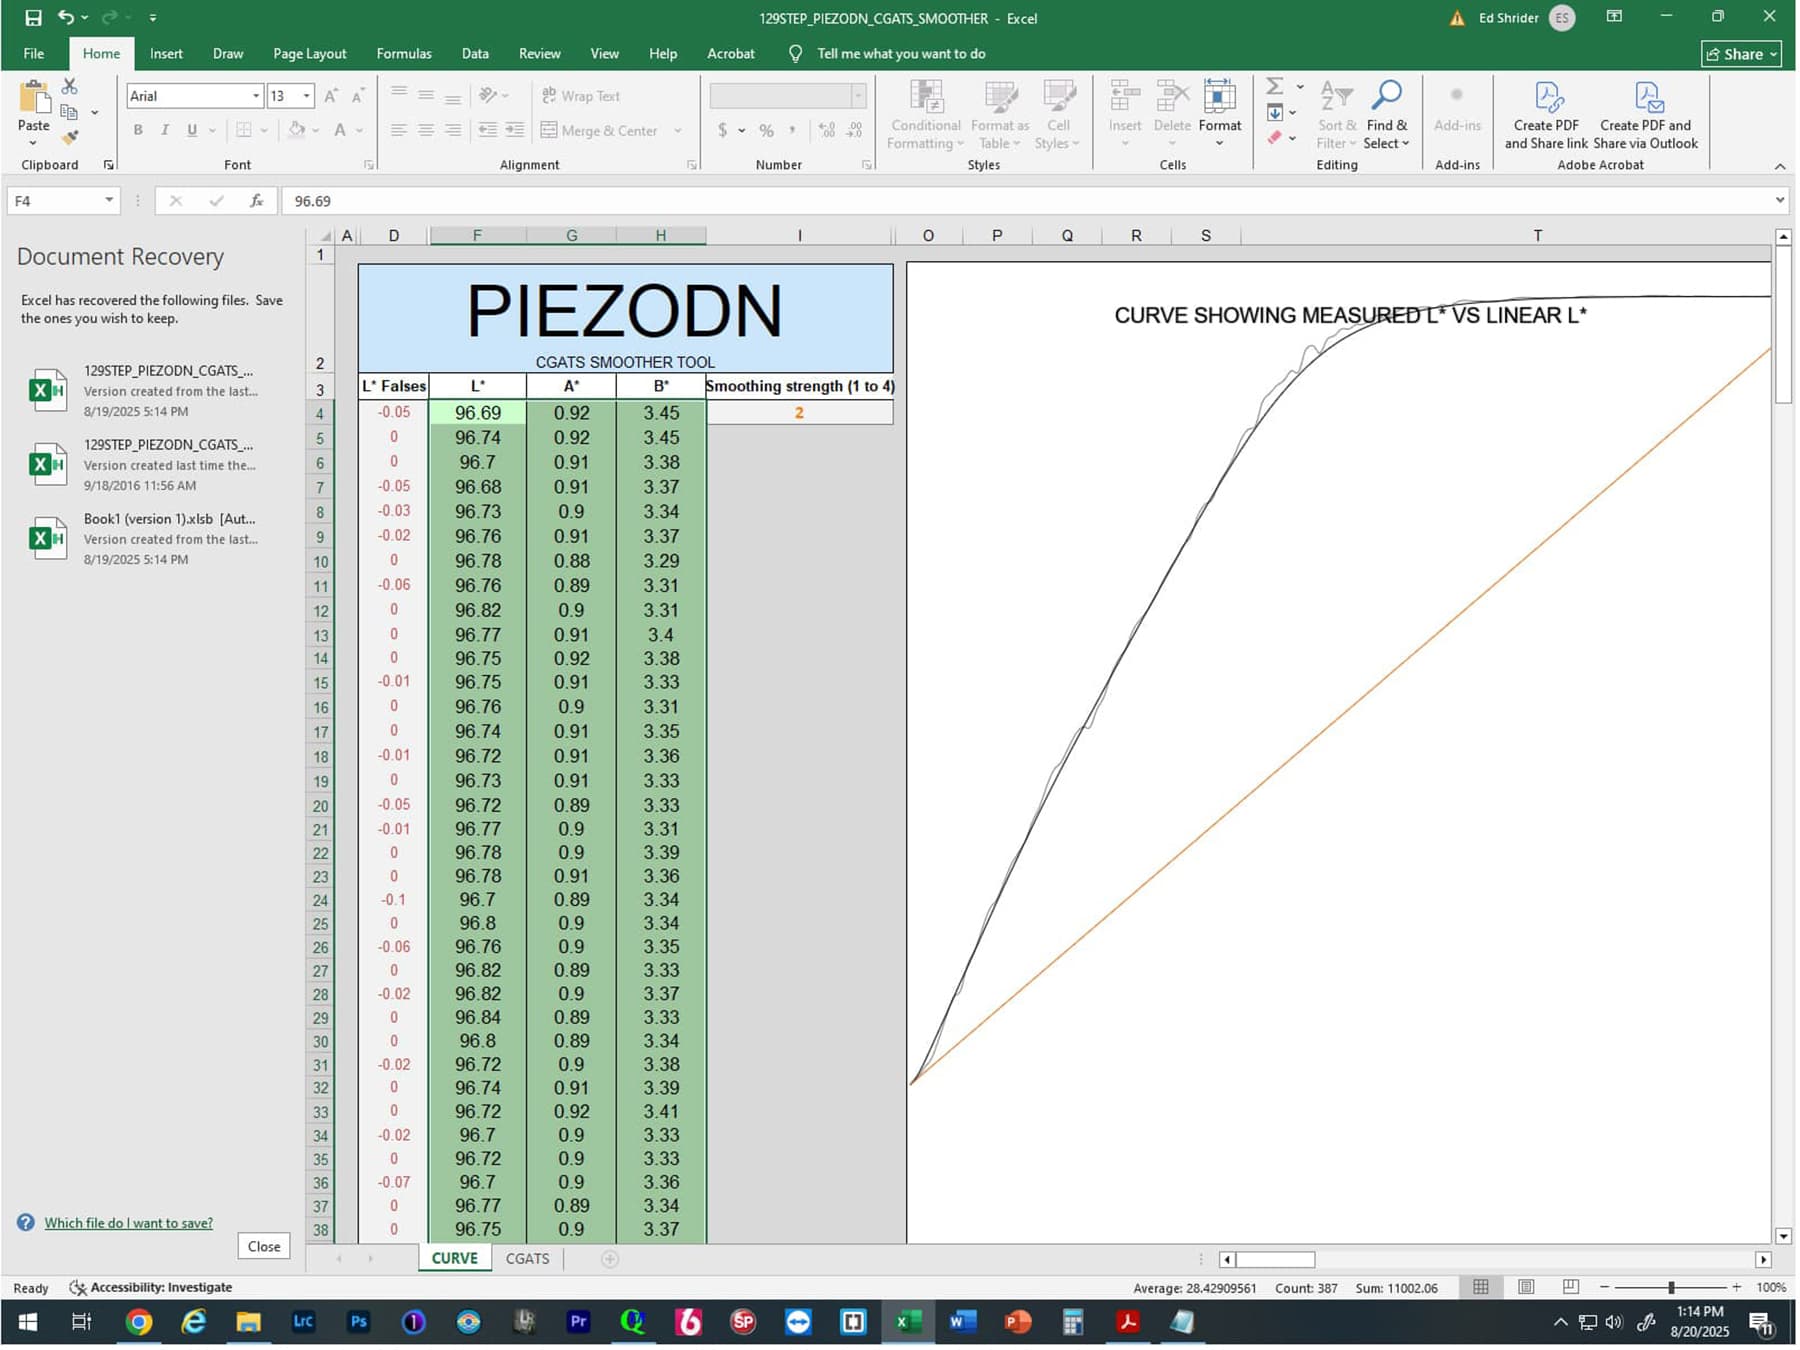
Epson 3880 with Pro inks using both Pro-PiezoDN-Master or Pro-PiezoDN-PtPd-PrintOut quad files to make the negative. Using ColorPort with an XRite i1Pro V2 to scan patches. Malde.-Ware method 3 sensitizer with appropriate amounts of glycerin and tween 20. I made a step wedge print to determine minimum exposure time for blackest black using a 16x20 VerifiedUV exposure unit and determined 1 min-5sec was the best. All printer channels appear to be firing. Darkest patches seem to have decent linearity but quickly falls off in mid to lightest patches. See images for negative on lightbox, 129 printed target, printer nozzle check, text file and screen shot of CGATS smoother which vividly illustrates the issue.
I am guessing if I increase exposure the mid to light patches will pull in but this goes against what appears to already be good blacks and would cause those values to go non linear and be corrupted.
I have performed Cone K7 selenium ICC procedure using QTR on another 3880 printer and linearity and ICC procedures with ErgoSoft system on a variety of Epson printers in the past
without all this kind of difficulty.
Any advice would be greatly appreciated. We briefly went over the calibration process at June’s Platinum printing workshop and I felt confident I had this based on past experience with Cone inks and QTR but obviously I am missing something.
One last thing, I bought the Pro inks when they first came out and kept them unopened in their containers on my basement storage shelf. I know they have technically reached their expiration but do you think that would cause this? When I cross check the nozzle pattern with my K7 printer the density of the patterns look to be very similar.
129 Patches.txt (2.1 KB)
Hi Ed,
Your starting curve is too “light” for your chemistry, conditions, and exposure.
So, using these results to create a second curve and reprint the target what were those results?Have you performed this second step yet? The third step is to confirm you are linear by a third repeat (and might as well save that as the final curve!)
As for the Piezography inks they do have a much longer printer use and shelf life than OEM inks. However, it is never advised to use inks over five years old in a printer. There is always a chance that the negative is too dense producing the too light results in the print as a result of pigment settling.
When linearizing many things can cause your prints to drift. If you are making platinum prints the most obvious will be temperature and humidity. Jon told me that just a 3% rise in rH will cause very visible results. Part of my training was to make platinum prints and we did that as an experiment. Too high a humidity caused lower contrast (darkening the highlights) and too low humidity caused higher contrast (losing the highlights). In each case I was able to correct by printing a new target and creating a new curve for the new rH.
Rachel
IJM-TechSupport
Rachel,
The chemistry is Malde-Ware method 3 purchased from Inkjetmall in June when I attended the 22x30 Platinum workshop by Jon. Paper is Revere Platinum and humidity/temperature is tightly controlled in my home darkroom to 60% RH at close to 70 degrees temperature. I am using a 4x VerifiedUV exposure unit. Though the Pro inks are technically out of date the bottles were agitated prior to installing the inks in the printer and I regularly agitate the cartridges taken from the printer as well.
Following the procedures we learned at Jon’s workshop, step wedge exposure for maximum density with least exposure time indicated a 1 minute 5 sec exposure. The 129 i1Pro target negative was printed using QTR Quad3880-PiezoDN-Pro model and Pro-PiezoDN-PtPd-PrintOut curve on a Windows computer.
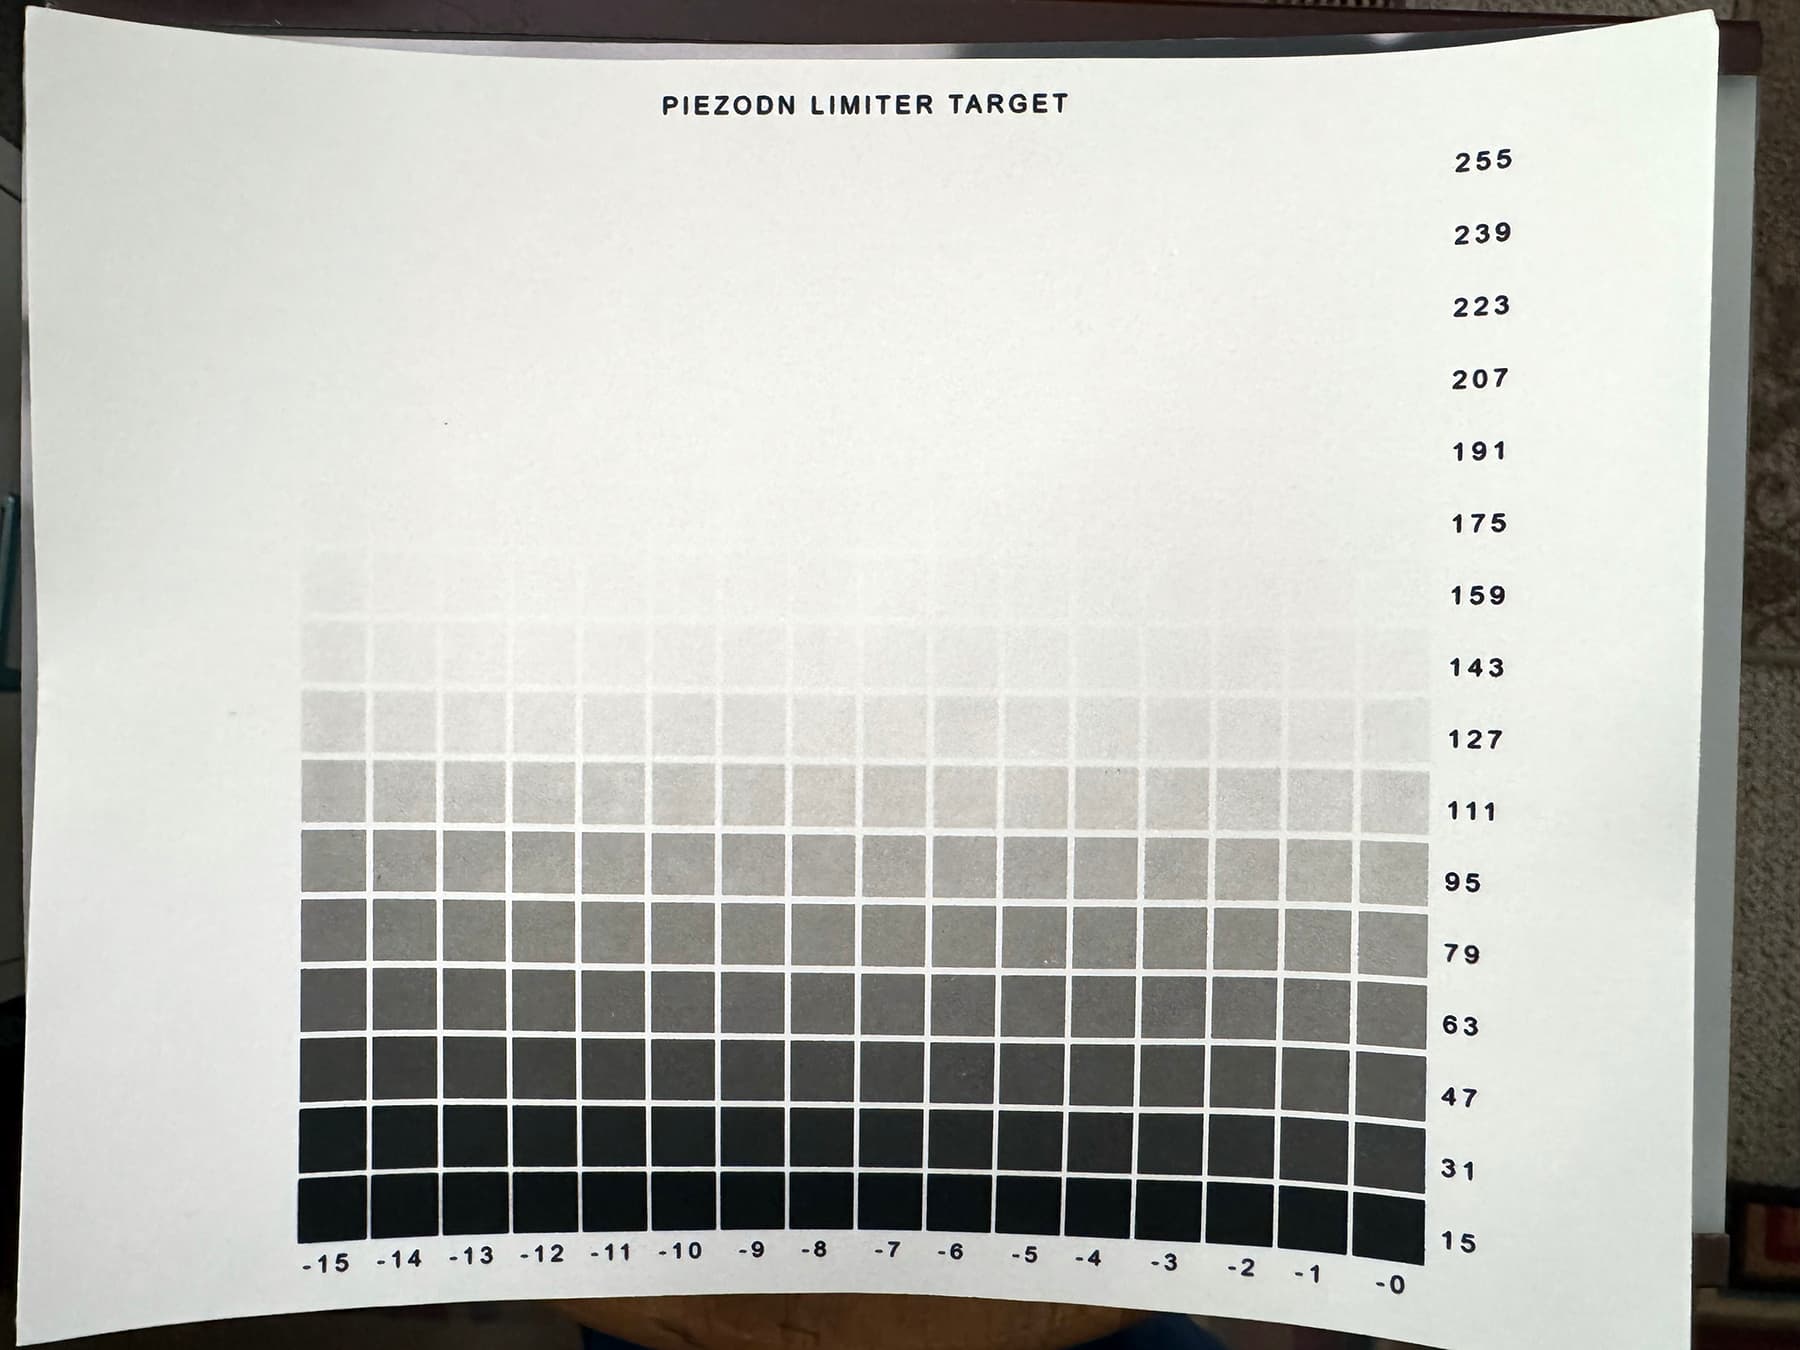
The darkest values of the 129 target and now this limiter target appear to be correct but almost all the ligher values on both charts are blown out.
My expectation is that using the Pro-PiezoDN-PtPd-PrintOut curve should have got me close to having a full range of values close enough that I could build a -lin curve using the CGATS Smoother app. This obviously is not what is happening.
Increasing exposure time to open up the light values I am afraid will have the opposite effect for the darkest values causing them to be crushed. Again, I “believe” have already determined maximum density at least exposure time already.
Any additional advise you may be able to provide would be appreciated since I have already went though expensive materials, particularly the sensitizer, and still do not have control of the process.
Bests
Ed
.
Hi Ed,
You should not be using the PiezoDN Limiter target for any purpose with platinum printing. If you have used it and made some adjustments to the curve - please start over. If you have not made any adjustments to the starting curve and are just printing this target then it does appear to be light.
The target you should be using with all alternative process that is applied by hand is the 21x16 target. It is the most appropriate target for your purposes because it accounts for hand application of sensitizer which can vary due to pressure and application.
Still, your upload is very light. From my memory of my training in Malde-Ware with Jon the 60% is higher in contrast than 65% and that will contribute to only some of the highlight loss.
If that is the result of the unadjusted starting curve try the attached curve which should start you off with darker highlights.
Why yours are blown out with the starting curve may be due to a number of factors. For example, are you allowing the paper to come to the 60% rH for at least 3 hours before coating? Are you drying it in this same rH for precisely 60 minutes? Or have you dried it out with a hair dryer (that would blow out the highlights)? Your exposure sounds right for a 4x system.
Here is an adjusted curve for you to try.
Pro-PiezoDN-PtPd-PrintOut-ES.quad (7.6 KB)
Let me know if it improves anything… You can always just use a 21 step target and coat a very small piece of paper until you are on your path….
Rachel
IJM-Tech Support
Rachel,
I just printed the Limiter Target to see if it performed differently then the 129 step target. Apparently not.
The paper was/is hydrated for 3+ hours before coating and after coating dried for 1 hour at same 60% / ~70 degree humidity/temperature as it was hydrated. No hair dryer! I have only used the Pro-PiezoDN-PtPd-PrintOut curve nothing more or extra for both 129 step and limiter target printed negatives. I have to say that I have also made a test negative using the Pro-PiezoDN-Master curve and negative densities appeared to be about the same when viewed side by side on a light table. Not sure that tells us anything.
The attached curve you sent is the same curve that I installed in QTR from the unzipped curves folder and have been using so unless the curve you provided is different in some way then that is not going to change anything.
Will advise if anything changes. It’s a mystery to me given the parameters I am using from what I took away from the workshop, refencing the Getting Started with Piezography Manual and using the Pro-PiezoDN-PtPd-PrintOut curve this has been such a challenge.
Bests
Ed
Hi Ed,
It is different and it has a different name (your initials on the end!) It has been adjusted to start you off with darker highlights.
Rachel
IJM-Tech Support
Rachel,
Got it.
Thanks. I will give it a try.
Bests
Ed
Hi Ed,
This is the Methodology 3 curve used in the workshop transposed to a 3880. We were running 70% humidity at 72 degrees. So this would expect a flatter condition and you may want to print the 16x21 target and re-linearize for 60%.
20250604-Meth3-50-50-65rH-70.quad (7.5 KB)
Best,
Jon
Thanks Jon.
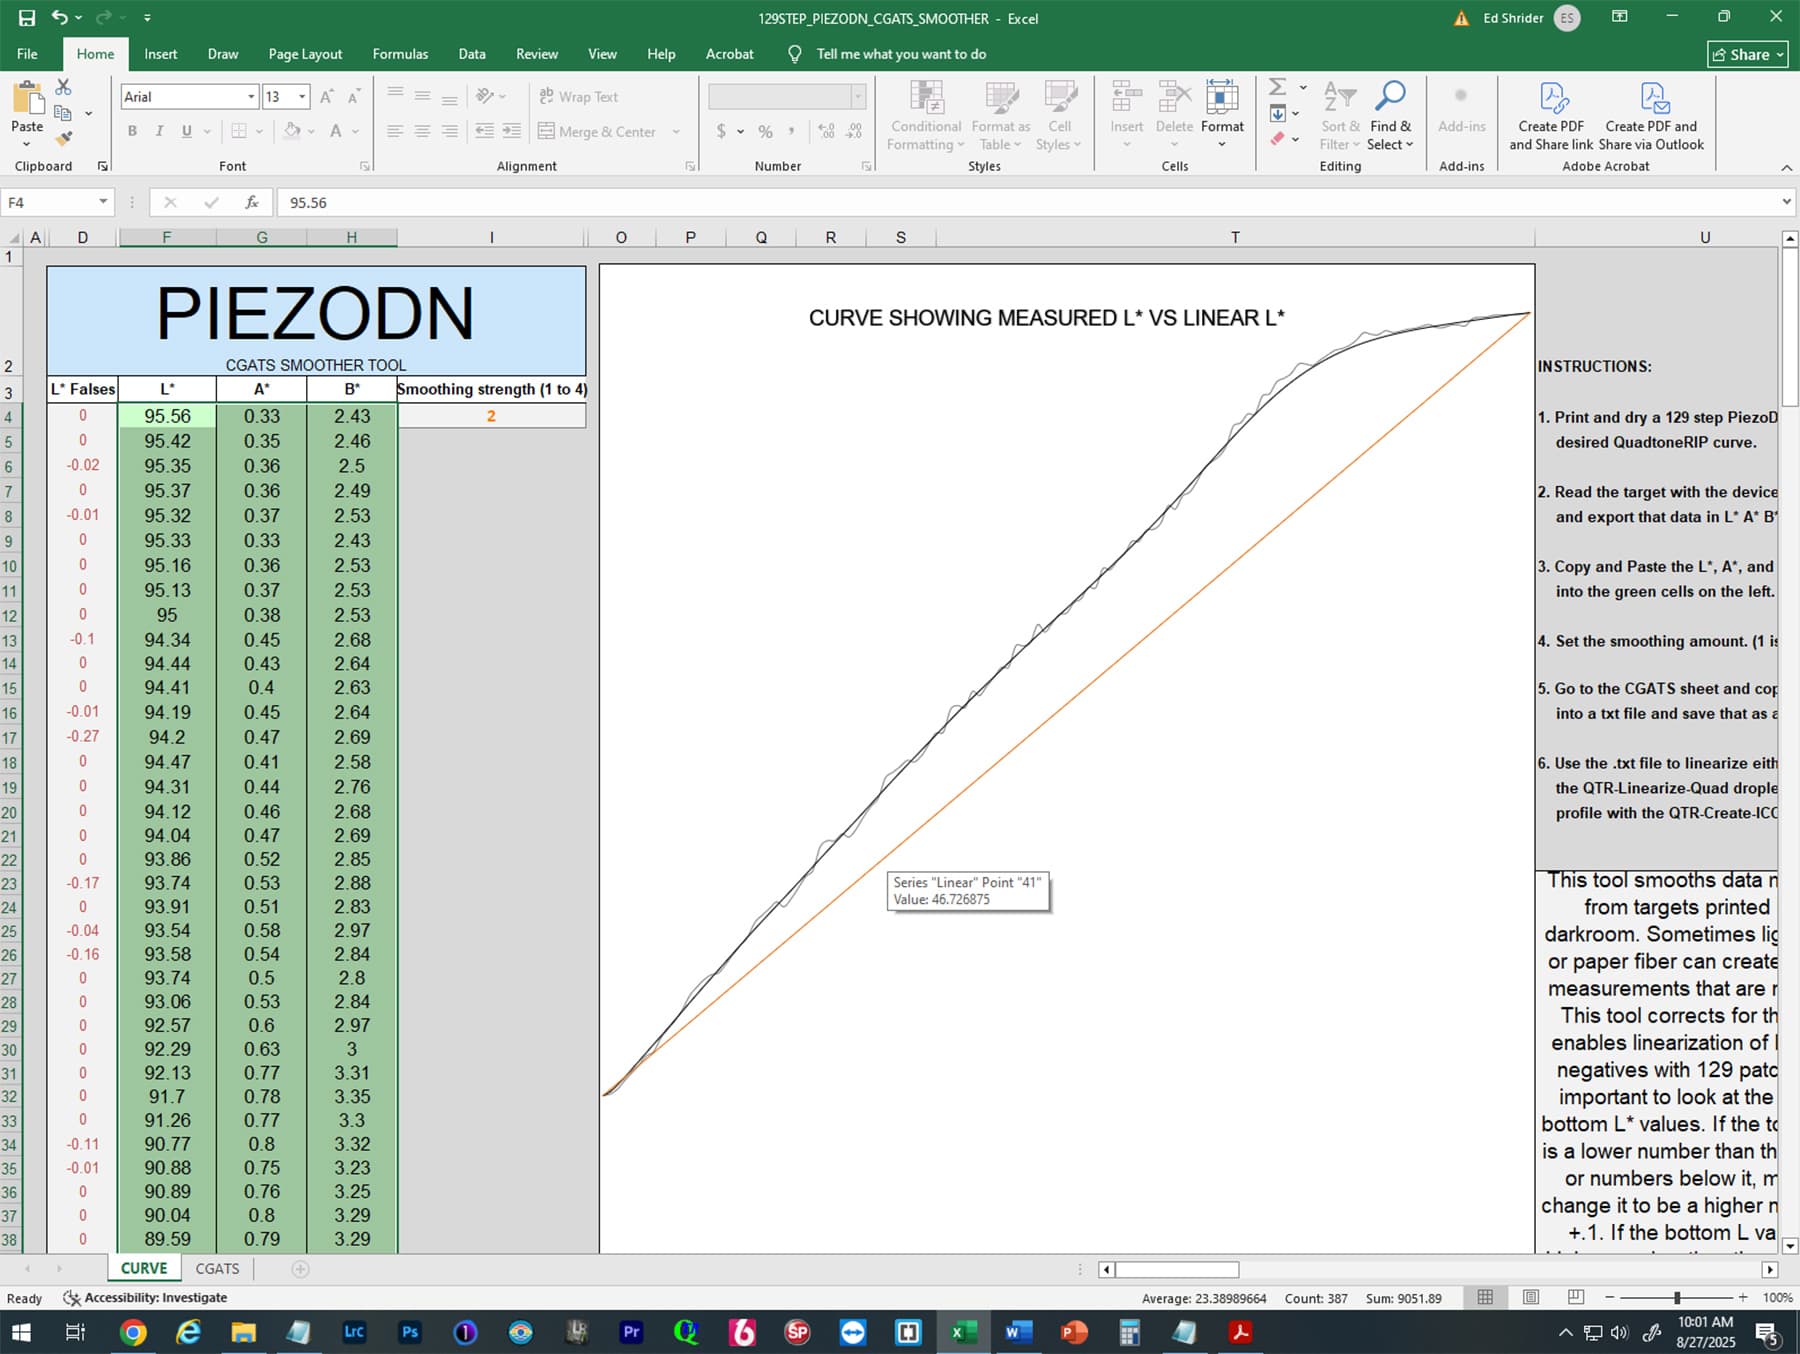
The 20250604-50-50-65rH-70 quad you sent allowed me to produce a negative that printed out a target which when scanned using ColorPort produced a text file that CGATS Smoother could use to build a -lin curve. Success!
My quest from the beginning of this process was to reproduce as closely as possible in my darkroom the environmental conditions at the workshop darkroom. When I reviewed photos I had taken at Topsham I saw that RH was set at ~ 65% and temp at ~70 degrees (photos specifically show 66% and 69.1 degrees respectively). When I received your quad I did increase my hydration/darkroom RH from 60% to 65%.
Comparing the installed PtPd-PrintOut quad from the curves folder to the -Ed quad that Rachel sent to the quad you sent I see that the negative’s darkest to mid tone values progressively become lighter.
I would have thought the original PtPd-PrintOut quad would have satisfied a workflow that mimicked the workshop workflow as close as possible. Raising the RH 5% had some effect on the final color/contrast of the printed target for sure but unsure how dramatic it really was.
See below CGATS results showing the two curves, PtPd-PrintOut vs 20250604-50-50-65rH-70 quads.
Bests
Ed
Hi Ed,
I used the the original PtPd-PrintOut quad with PPETv2 to make the curve for the workshop. It printed light. I then used the new curve it produced to reprint the target. It then was very close. The 2nd new curve it produced probably “good enough”, but to confirm I used that second new curve to reprint the target and accepted the 3rd spot on new curve as the one I sent you which we used in the workshop.
Why things are different in your studio I can not say exactly. I am on the original formulation of Revere Platinum paper and each batch is as different from the next as to one another. It may have a significant affect on your process.
The important thing is to linearize and then use the new curve to make a confirmation print of the target and measure again. Minimum two iterations…moving the new curve to starting curve each time. My best practice is three iterations.
Best,
Jon
Jon,
Copy.
I am working on the 2nd iteration today.
Bests
Ed