I suggest the 21x16 step chart so eliminate step-wise problems (jagged readings).
-Walker
I suggest the 21x16 step chart so eliminate step-wise problems (jagged readings).
-Walker
Hi John,
I’m sorry if I gave the impression that I disagreed with Walker’s suggestion. I think they are complementary. Fewer steps will effectively smooth out the jaggies that come with the closer spacing of targets with high step counts. The greater precision they provide comes at a cost. The ability to get 16 21-step series from a single target print that you can average can be really useful. BTW, that target is in the Piezography Targets folder, not the PiezoDN Targets folder.
Cheers,
Keith
Greetings,
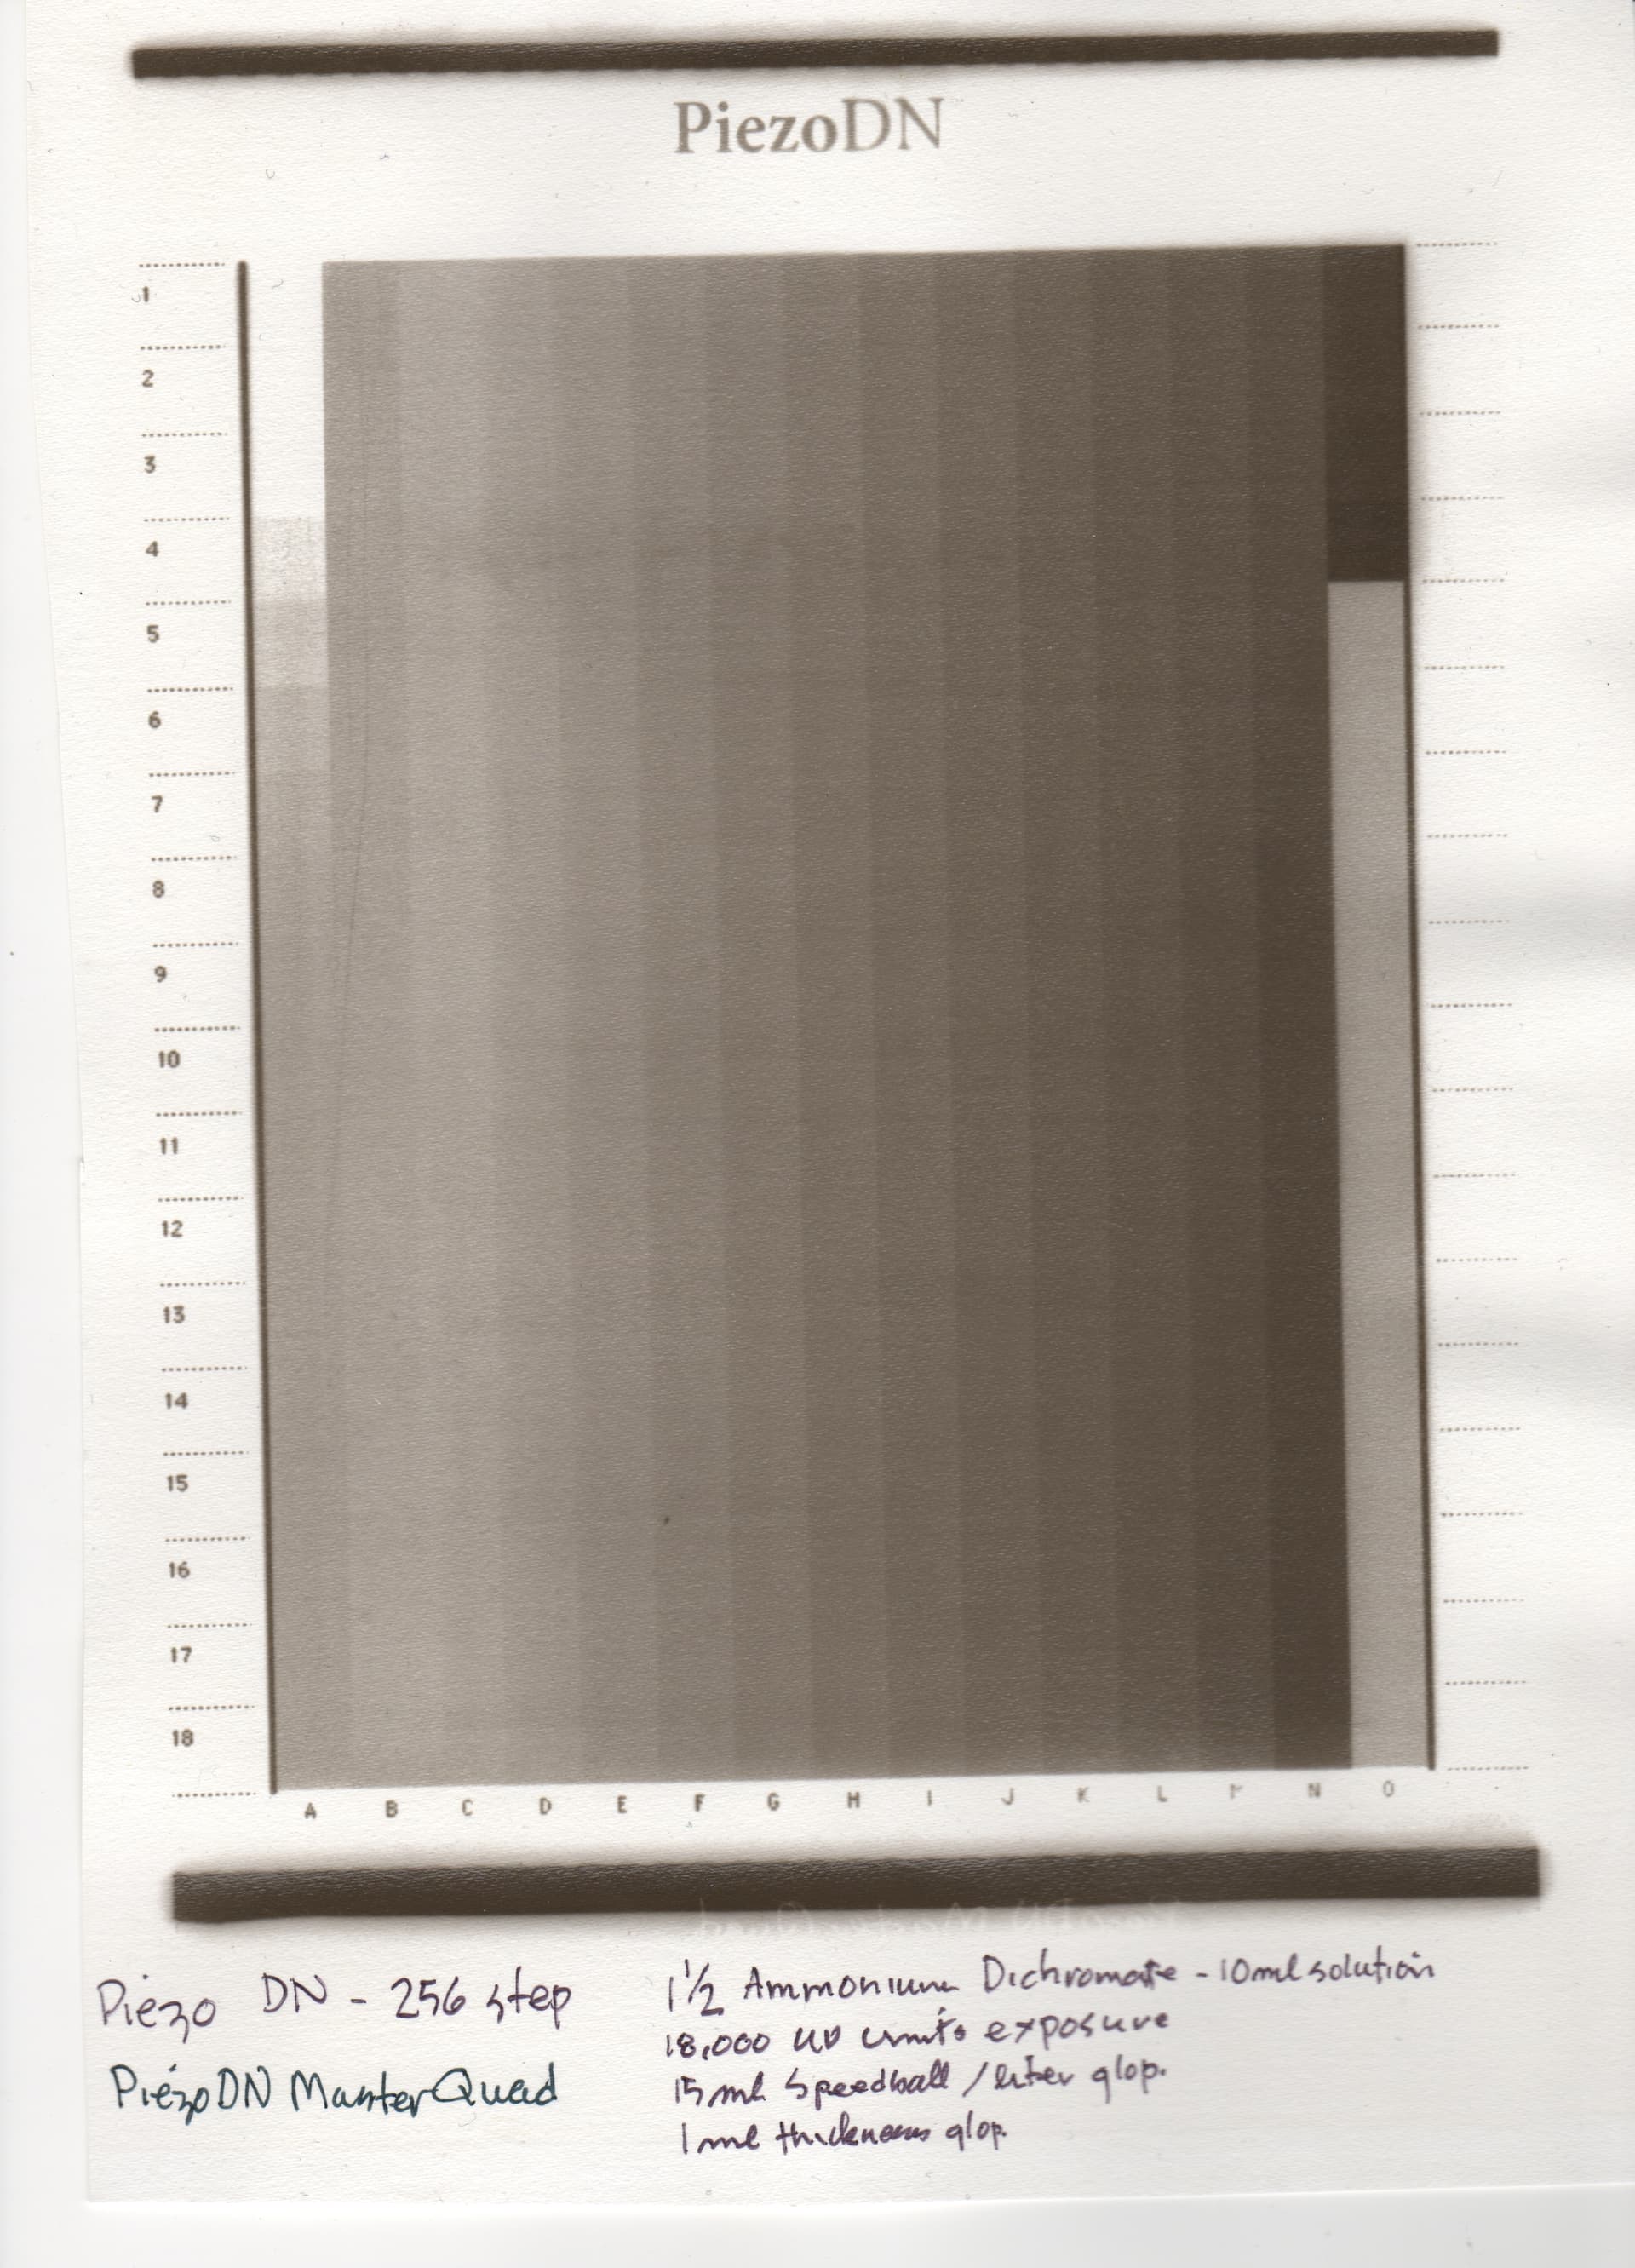
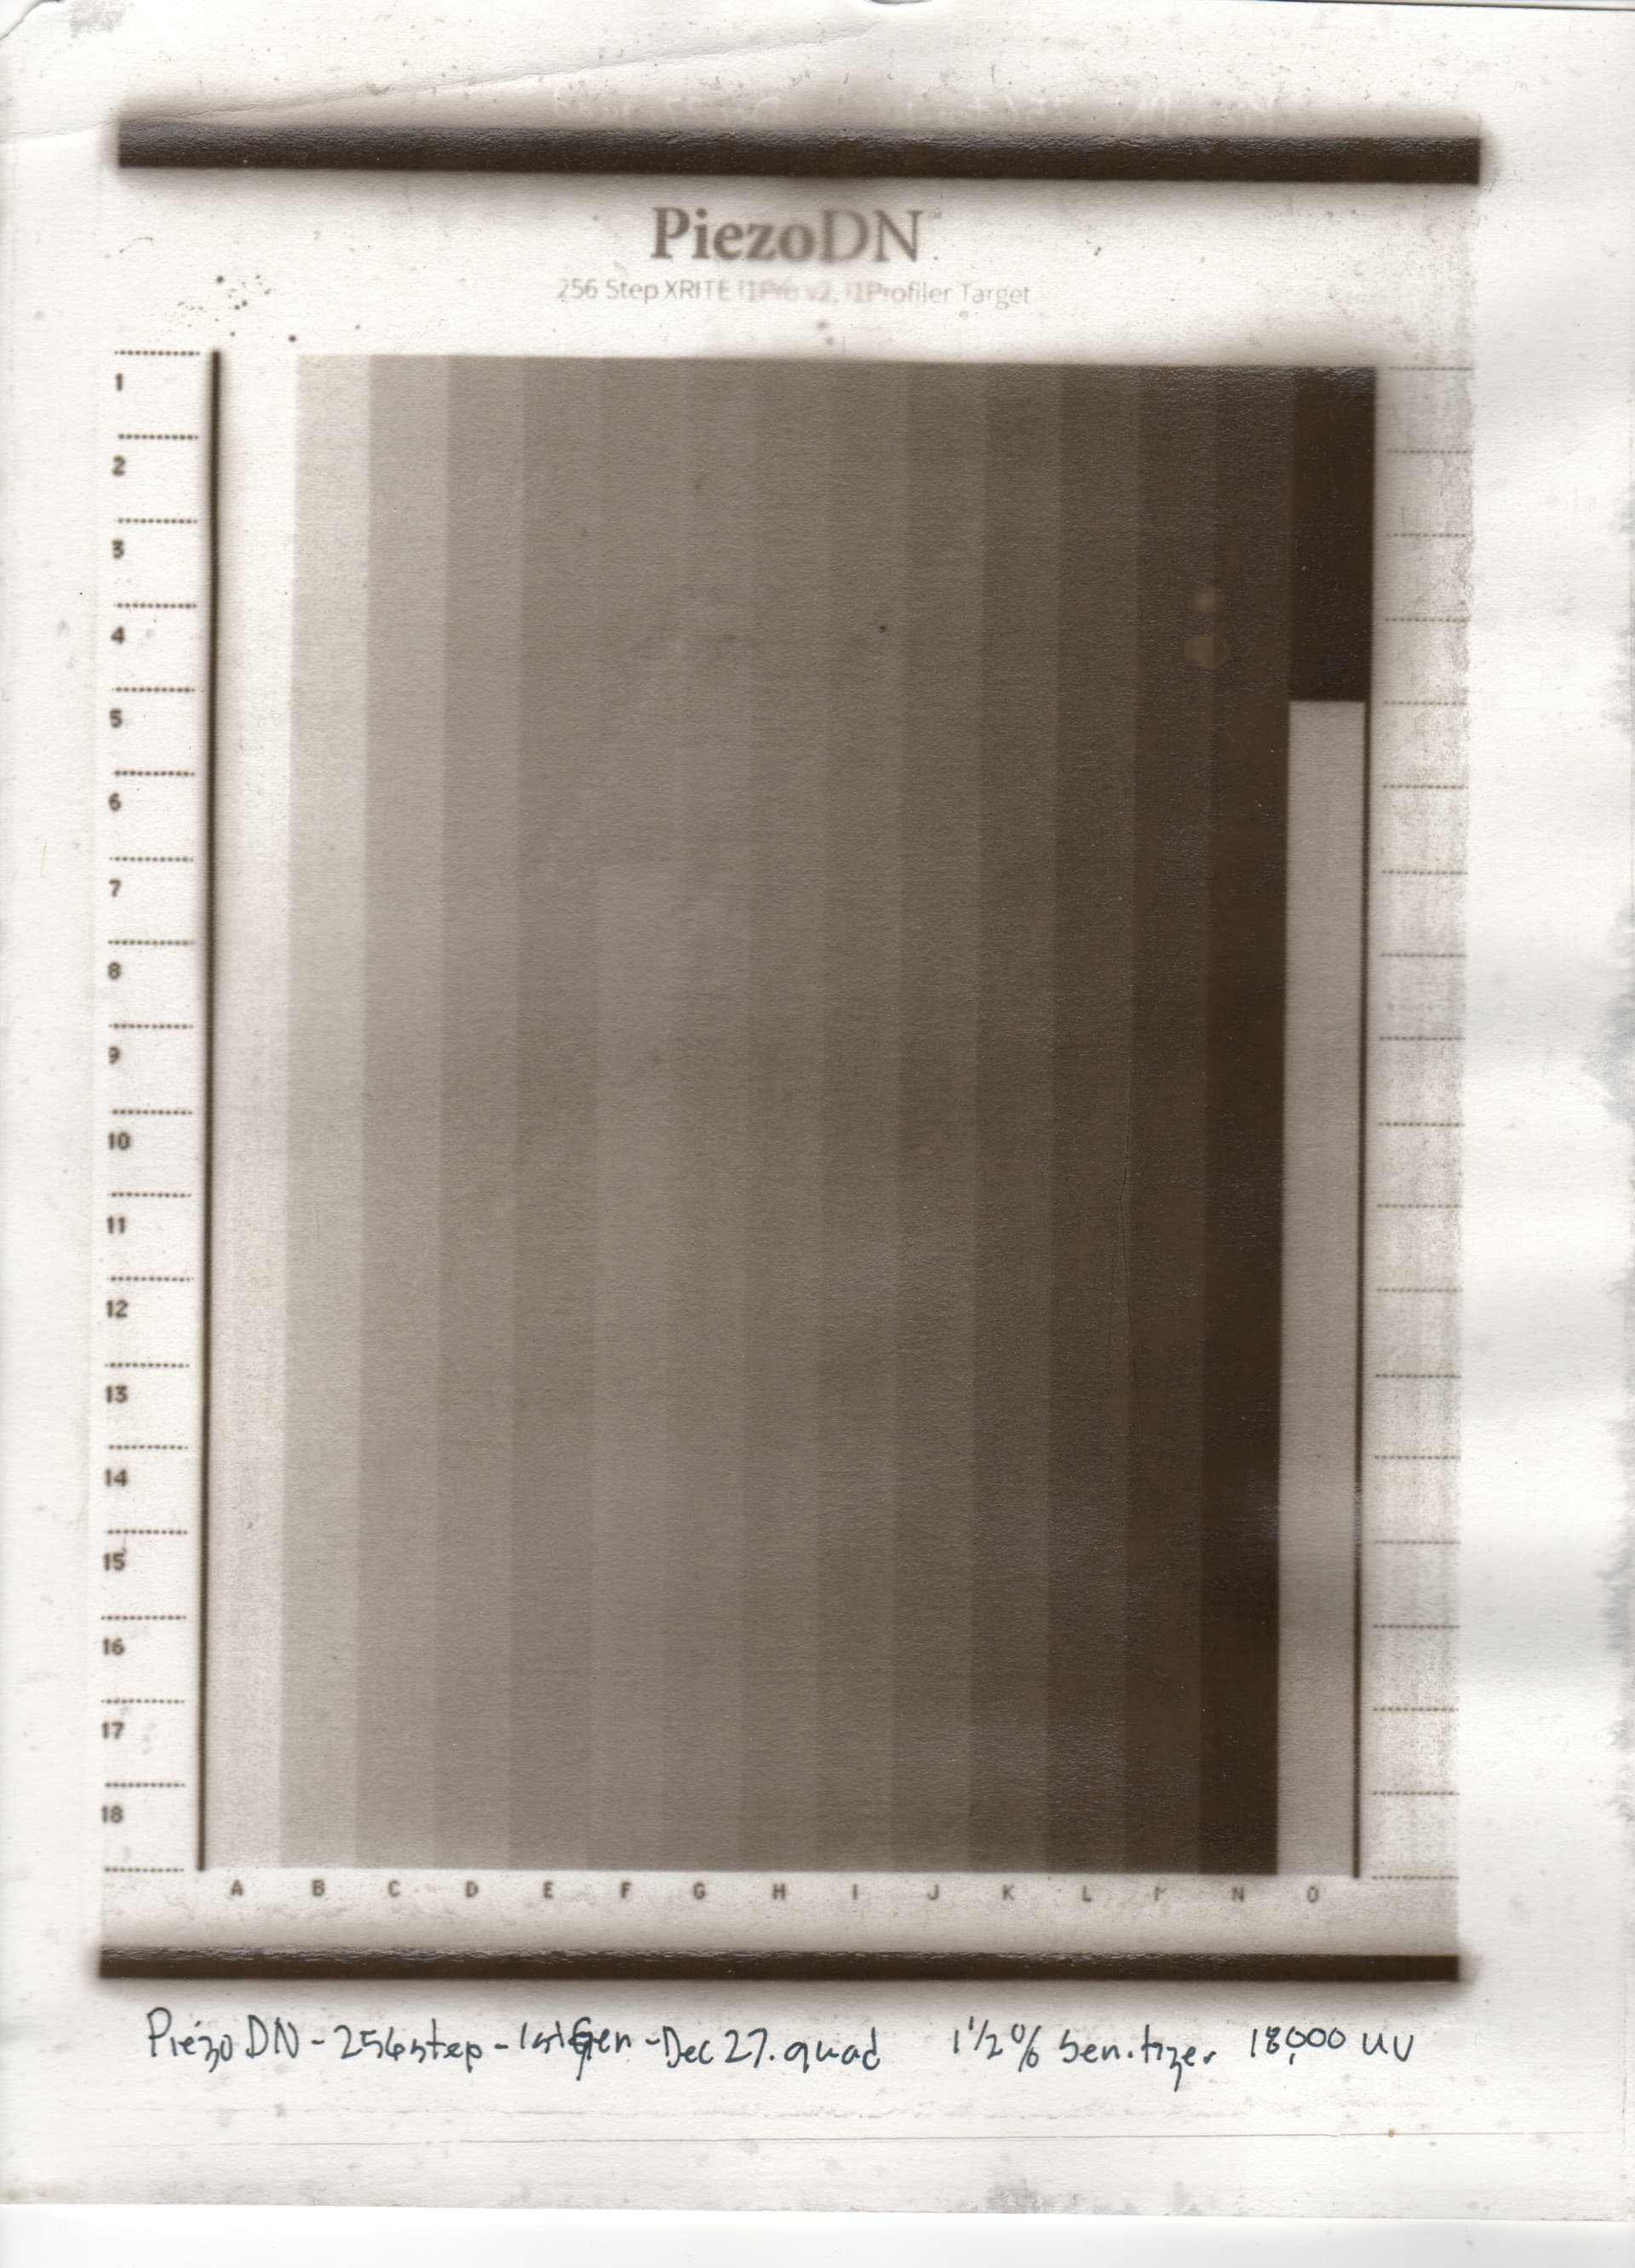
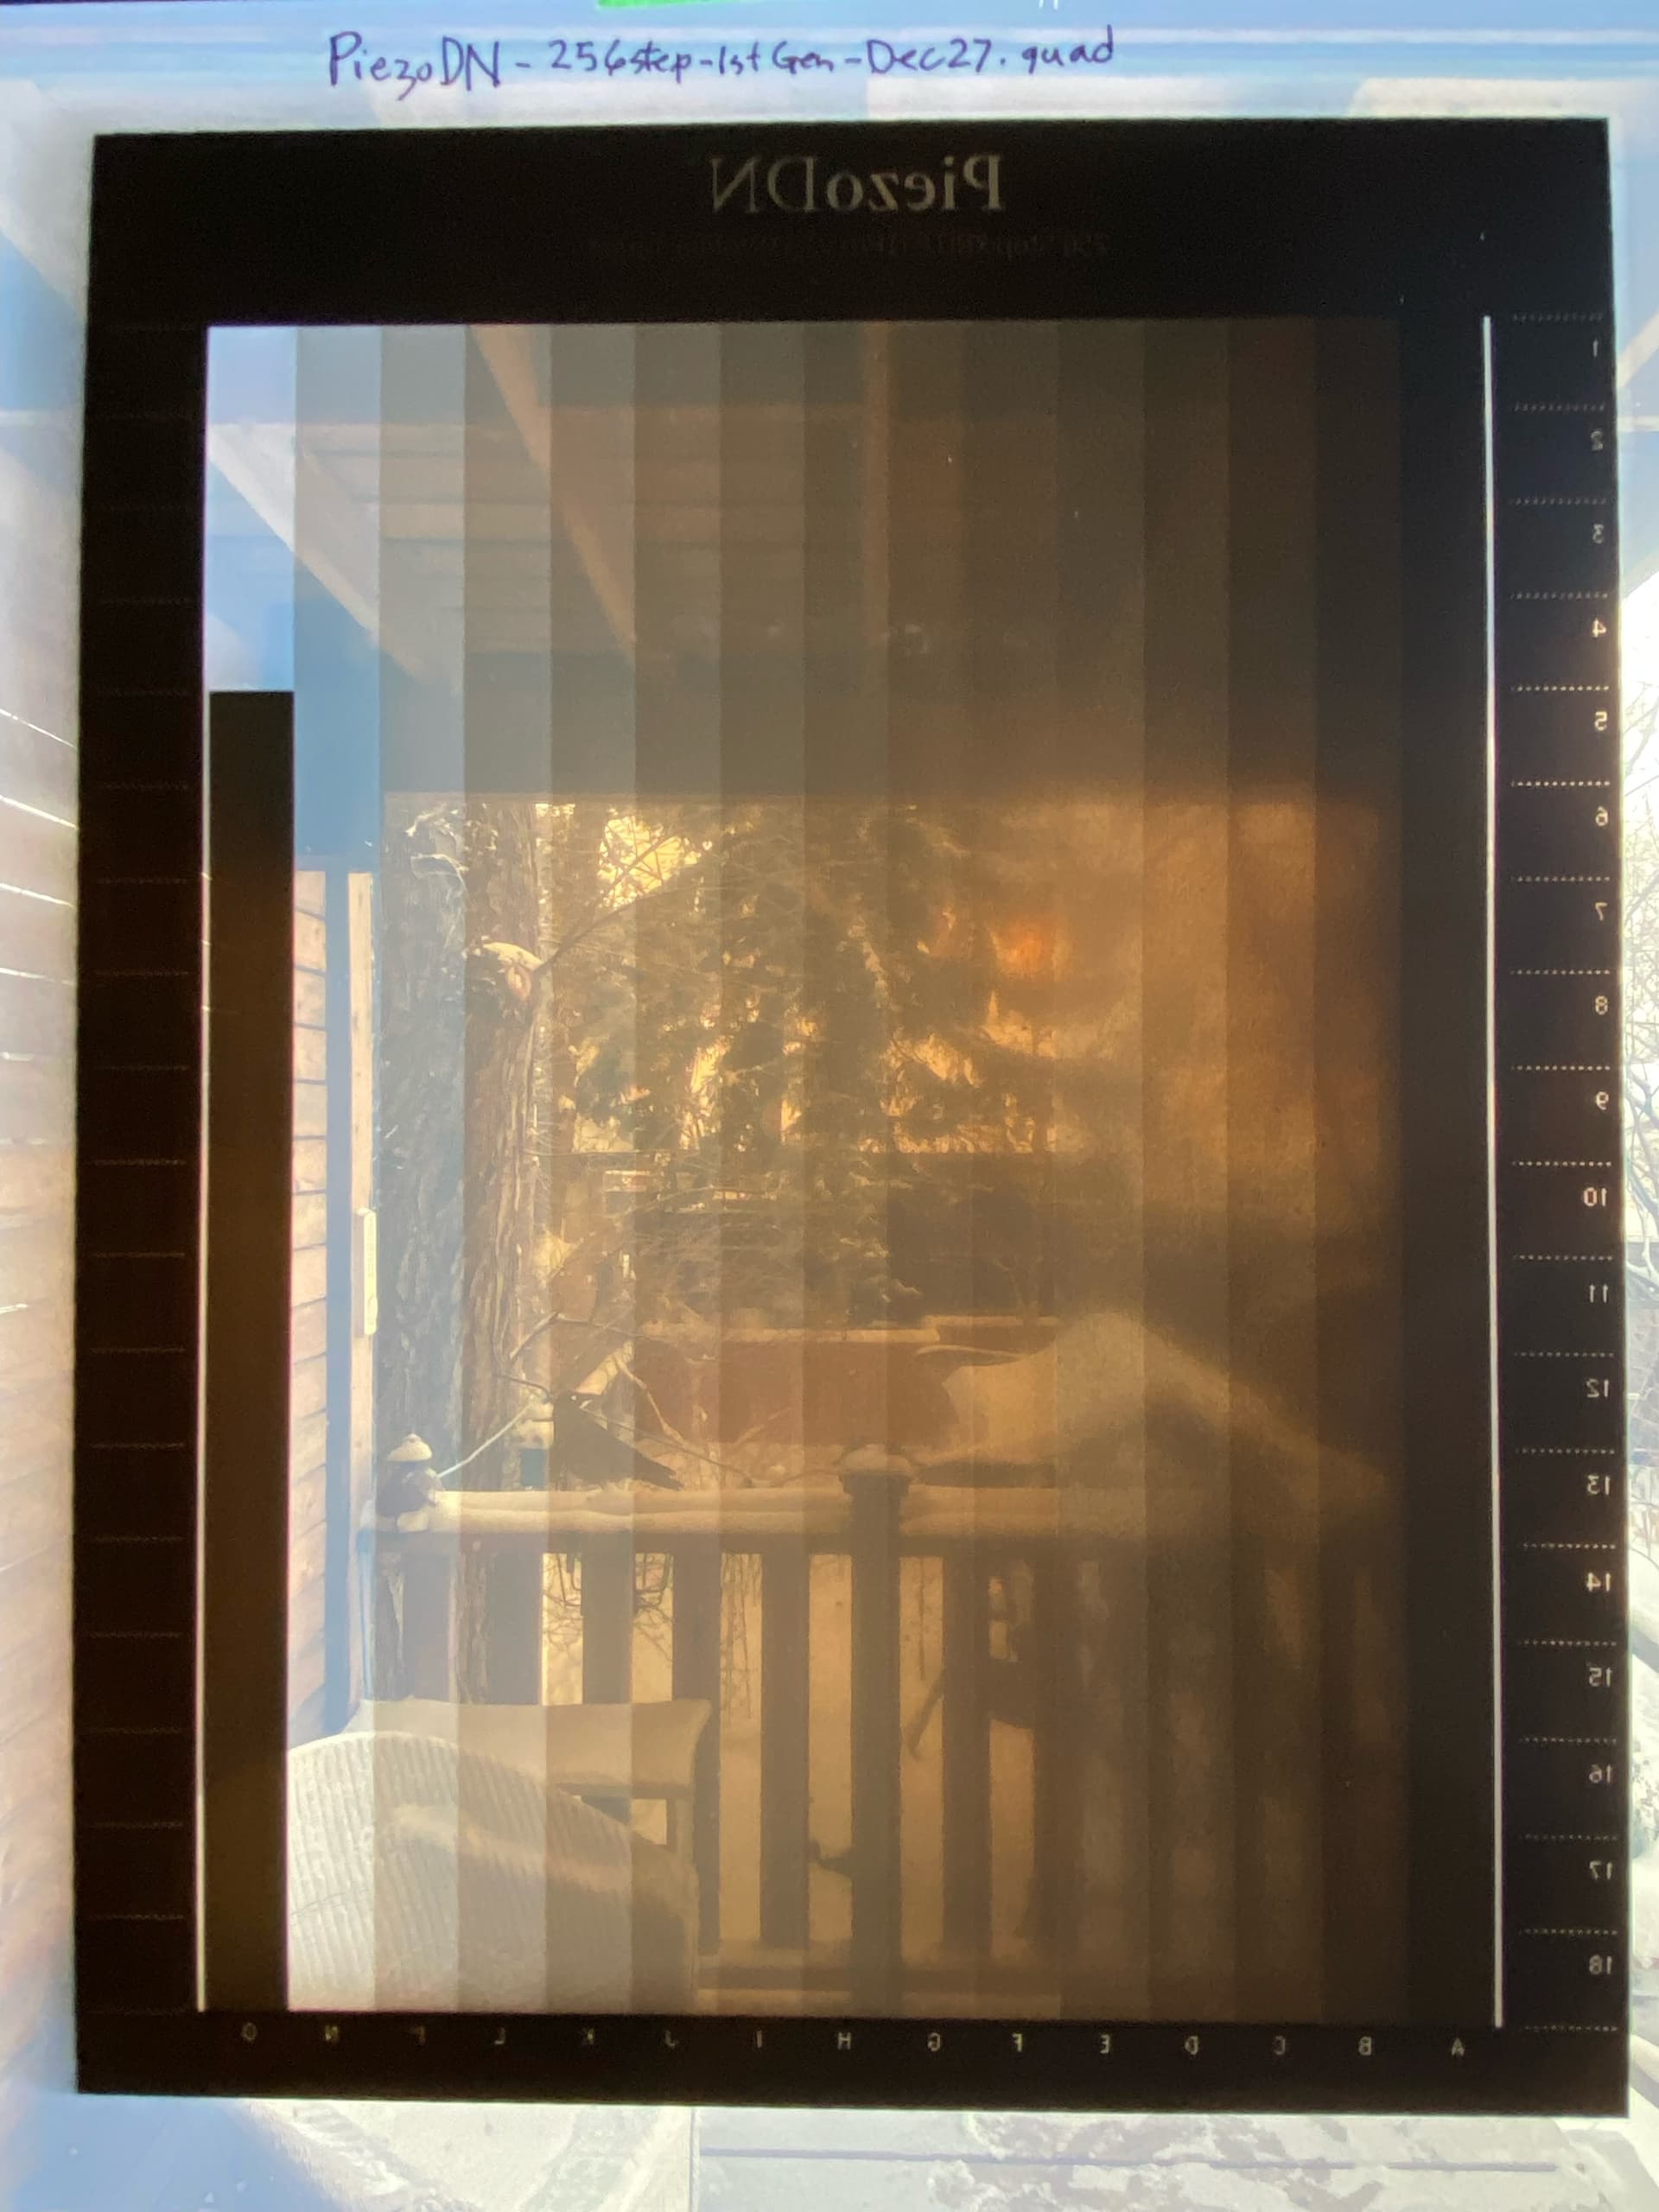
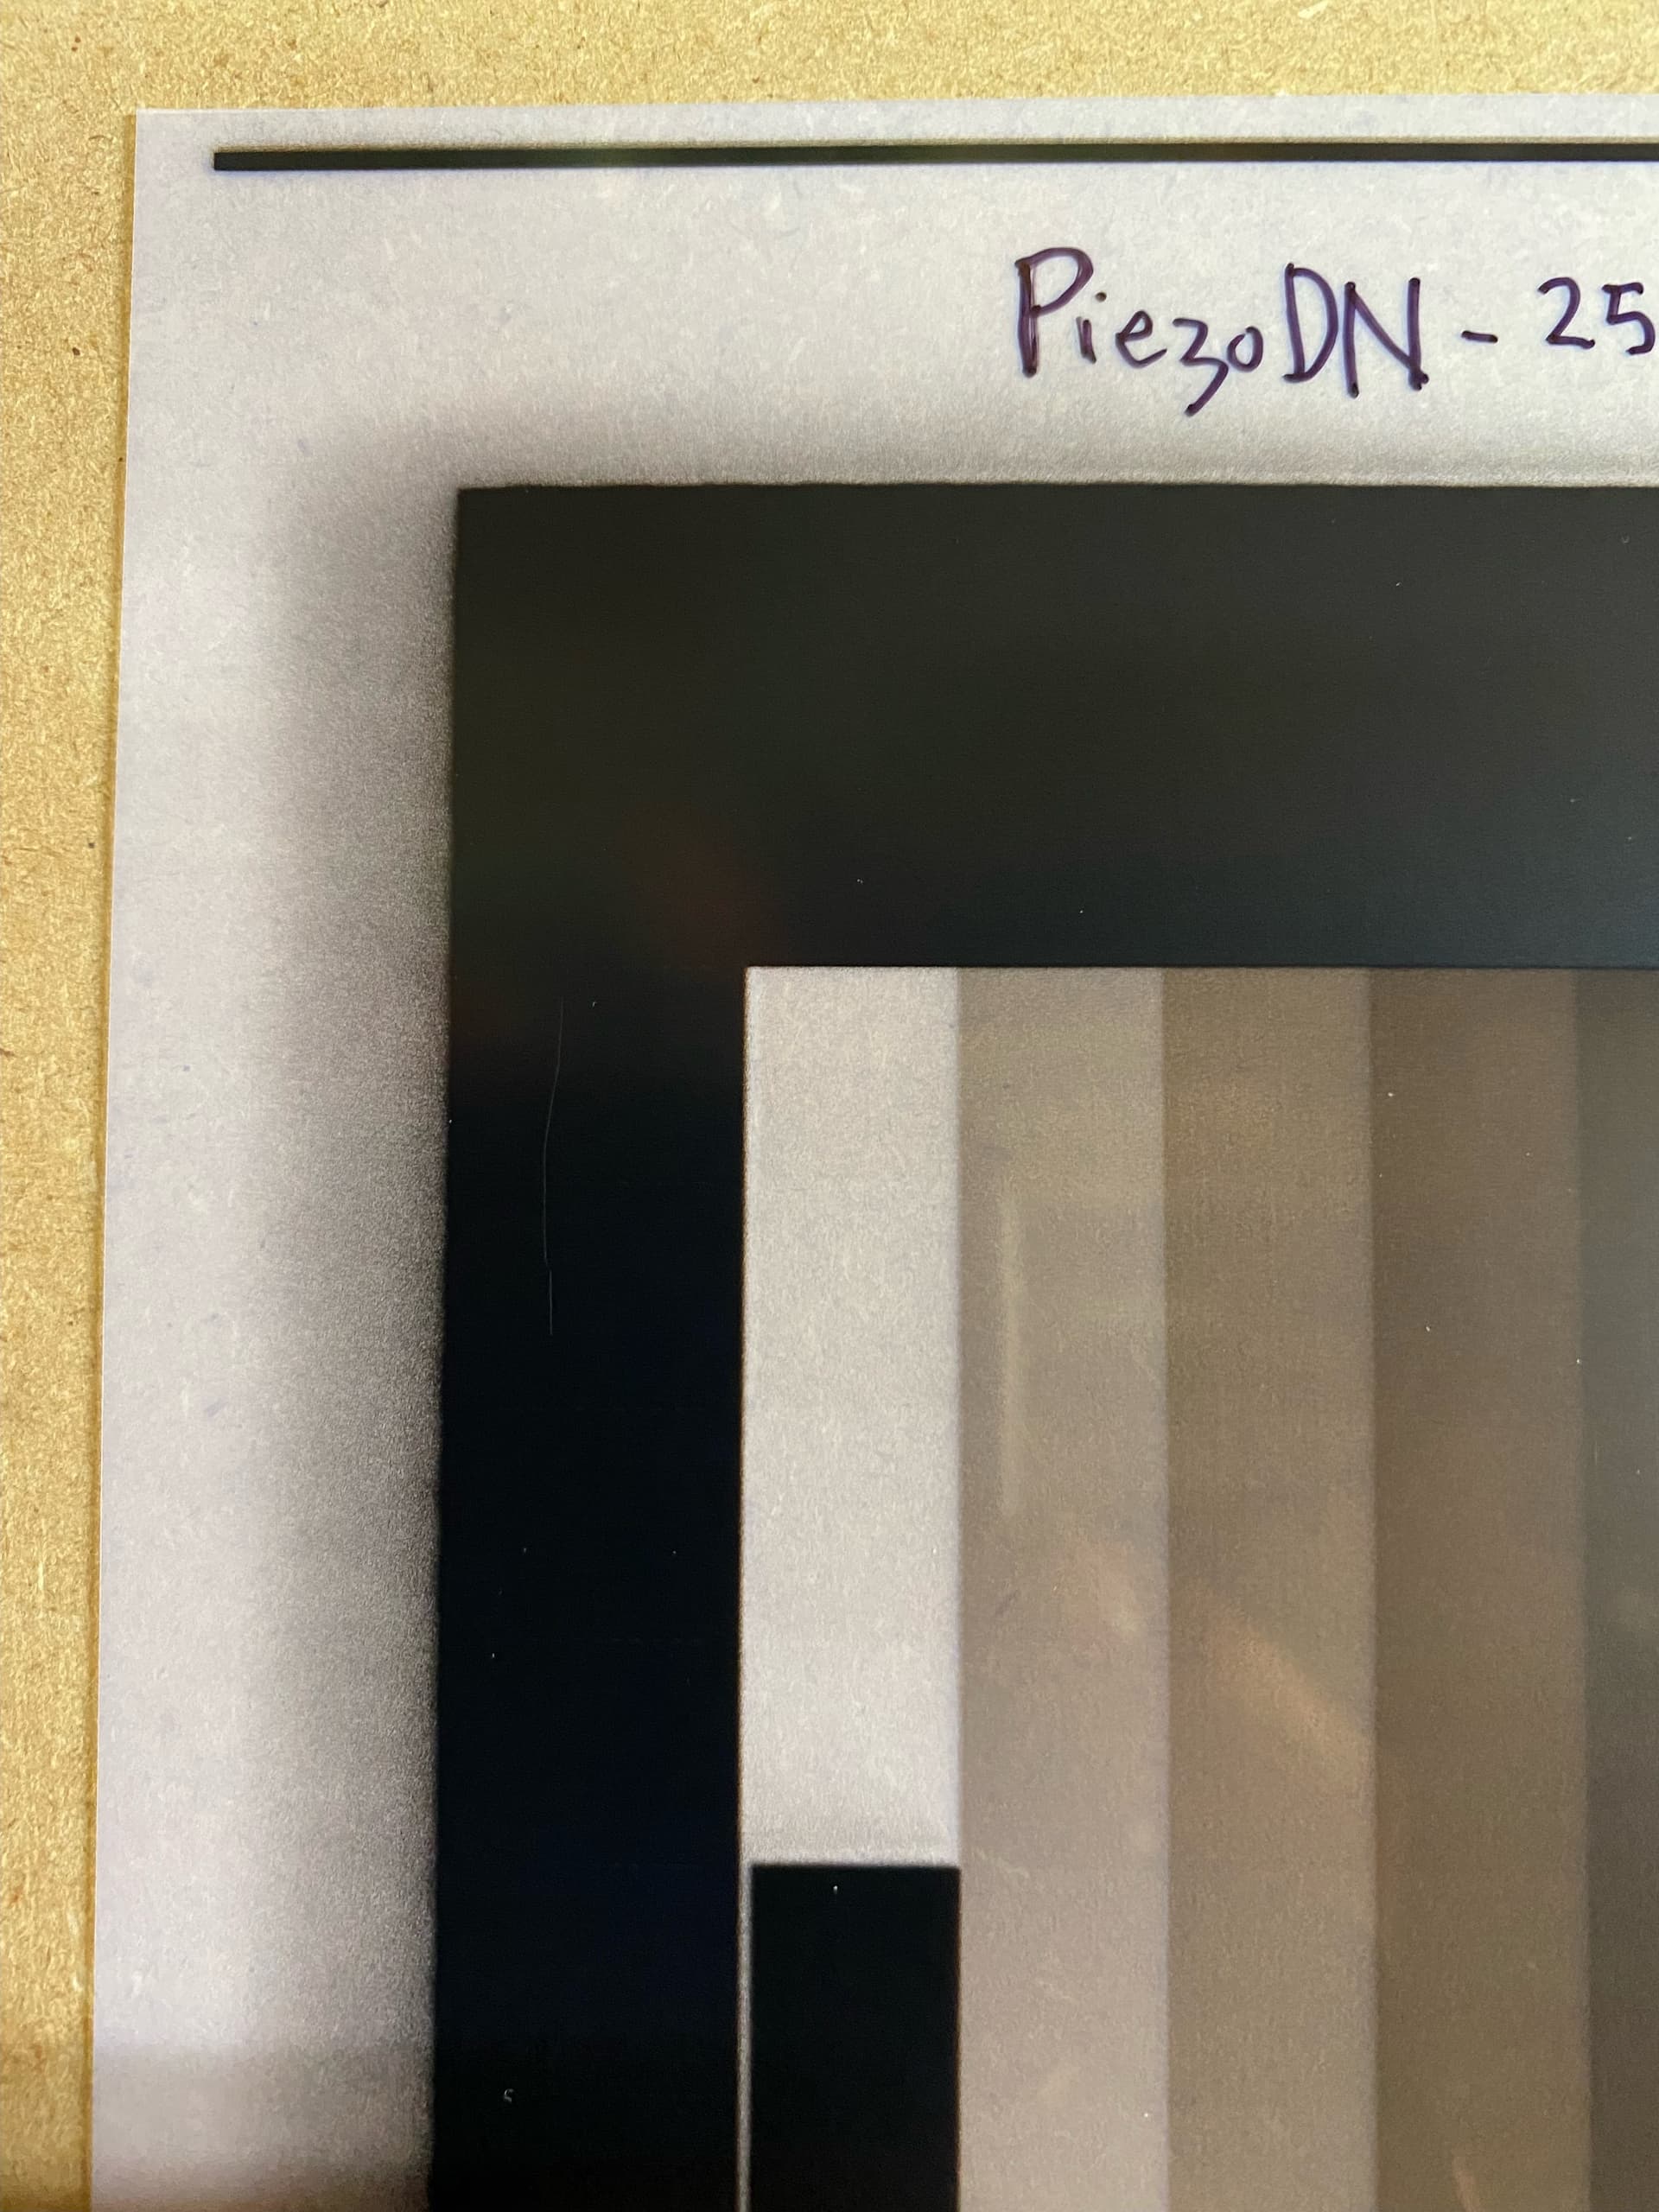
I printed a 256 step greyscale target using the PiezoDN Master quad. I then read the print with the i1Pro2 and created another 1st generation adjustment quad. In making this quad i had a lot of reversals in the Professional spreedsheet so I adjusted the first (hightlights) a bit so I had no reversals and left the rest along. I had to apply a lot of smoothing (90/70). I then used this quad to make another negative and carbon print. I also seem to getting some overspray of ink around the periphery and dark areas of the negative. Any remedy?
Attached are the Master Quad Print, the new adjustment quad, and the adjustment quad print. I have also attached a photo of the adjustment quad print.
I re-read your email just now and found the 16-21 step target you and Walker wrote about. I had a lot of jaggies in my Master Quad print analysis so I am going to try the 16-21 step target to see if I can get soother transitions. I was looking in the PiezoDN directory so didn’t find it until I re-read your note. Thanks!
In the meantime any comments?
jjp
I further question, the 12-21 Target in Piezography image directory is a positive image. Do I print it as a positive image and used the associated i1Pro2 to analysis this from the print? When I take the LAB values into the the Piezography Professional spreadsheet do I have to reverse the numbers?
OR
Do I print the target by turning it into a negative and then using the i1Pro2 to read the target print in the normal manner?
Hi Keith,
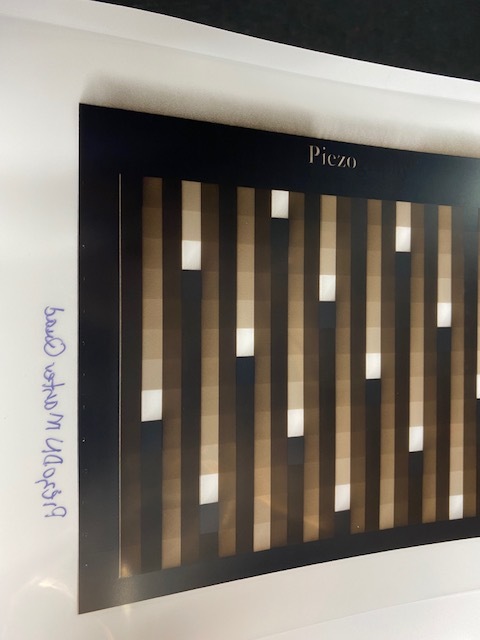
I tried printing the 256 step target with the PiezoDN-Master quad and the i1Pro2 analysis showed quite jaggy steps which required a lot of smoothing in the Pro spreadsheet. My first derivative quad was better, but still had shade transition problems. So I want to try the 21x16 step target. I found it in the Piezography image folder, as you said, but it is a positive target, not a negative DN target.
Do I invert this image before printing it on the Pictorico film, and can I use the i1Pro2 data file for this target which is found in the same folder? Please clarify as I am confused. Jjp
Jjp
Hi John,
You can use the target as is – no need to do a tonal inversion or anything like that. In fact the only difference between the targets for regular Piezo inkjet printing and those for PiezoDN negatives is that the latter have been flipped horizontally as evidenced by the reversed text. It is the quad that makes it into a negative when printed on film.
Personally, I use right-reading target images because I have customized my targets somewhat with a 21-step strip and some space for pre-printed text that I have found to be indispensible for organization when doing lots of testing. You can select Flip horizontally in the layout section of the print dialog and save that as part of a preset along with the QTR setup if you want.
I’ve never used more than 129-steps for digital negatives. The higher step counts are certainly useful for inkjet on paper, but may be more trouble that it’s worth for alt-process printing where the hand-coating and other darkroom variables can quickly compound minor fluctuations into major (and misleading) jaggies. If I was starting over on this Carbon project with my friend, or working out something for a process myself that we don’t have a useful starting quad for, I think I’d start with a 21- or 31-step target to find the ballpark, then move to a 129-step for fine tuning once the basic parameters were established.
I’m afraid I’m not fluent in i1 Profiler. I’ve been using SpyderPrint for a long time and am very comfortable with that, and I can use any of the targets with it. I had a student a few years ago who was very good at i1 Profiler and he spent an hour one day trying to teach it to me, but it didn’t stick. I still use ColorPort occasionally. I’m guessing that the associated .pwxf file is useful for sorting the patch readings, but I really don’t know. Hopefully Walker can throw some light on that question.
Hope that answers your questions.
Good luck and happy new year,
Keith
Greeting Keith and Happy New!
I have made some prints of the 20x16 target and have had some difficulties with my i1Pro2 reading the values. I may have to resort to reading one patch at a time.
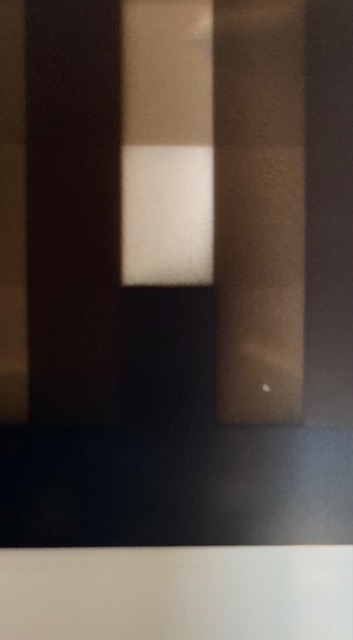
However, I may have another problem with my printer, an issue of overspray. I have done head cleanings, head alignments and setting paper thickness but I still seem to have the problem. I have attached two photos to illustrate my problem. One shows most of the negative with the overspray occurring on the trailing edge of the printed negative. The second photo show a detail of one of the clear patches which shows some overspray at the edge of a clear patch and a dark patch.
Do you have any idea of what the problem is and how to solve it?
jjp
Are you using front feed method? That can cause overspray. I suggest top feed method with the work-around for the star wheels.
-Walker
Yes I was. I will your suggestion a try.
Jjp
Thank You Walker!!
I found Keith’s pizza wheel suspension work-around description and followed his instructions. I managed to deactivate the pizza wheels, left the front load bay open and printed from the rear manual feed. What a difference! I produced a nice clean sharp negative and will restart my linearization process with a 20-16 print from the Master Quad. I did notice that the negative becomes skewed during the last 1 1/2 inch of the negative printing, but I can always leave a 1 1/2 inch margin on the negative. The alternative, which I used in producing salt print negatives, was to use a mylar carrier and taping the negative to it with a wide margin at the leading edge.
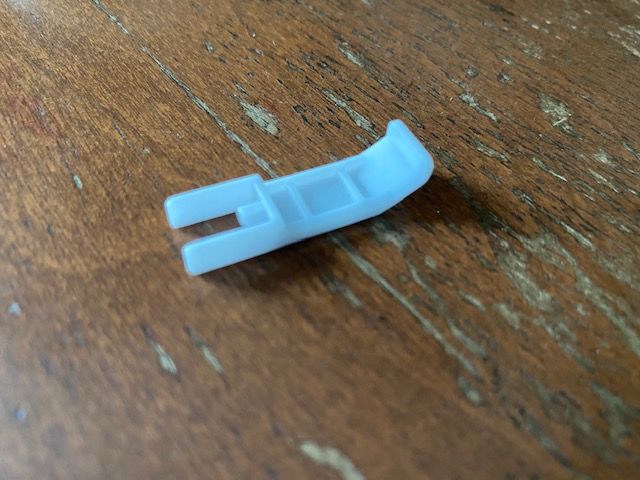
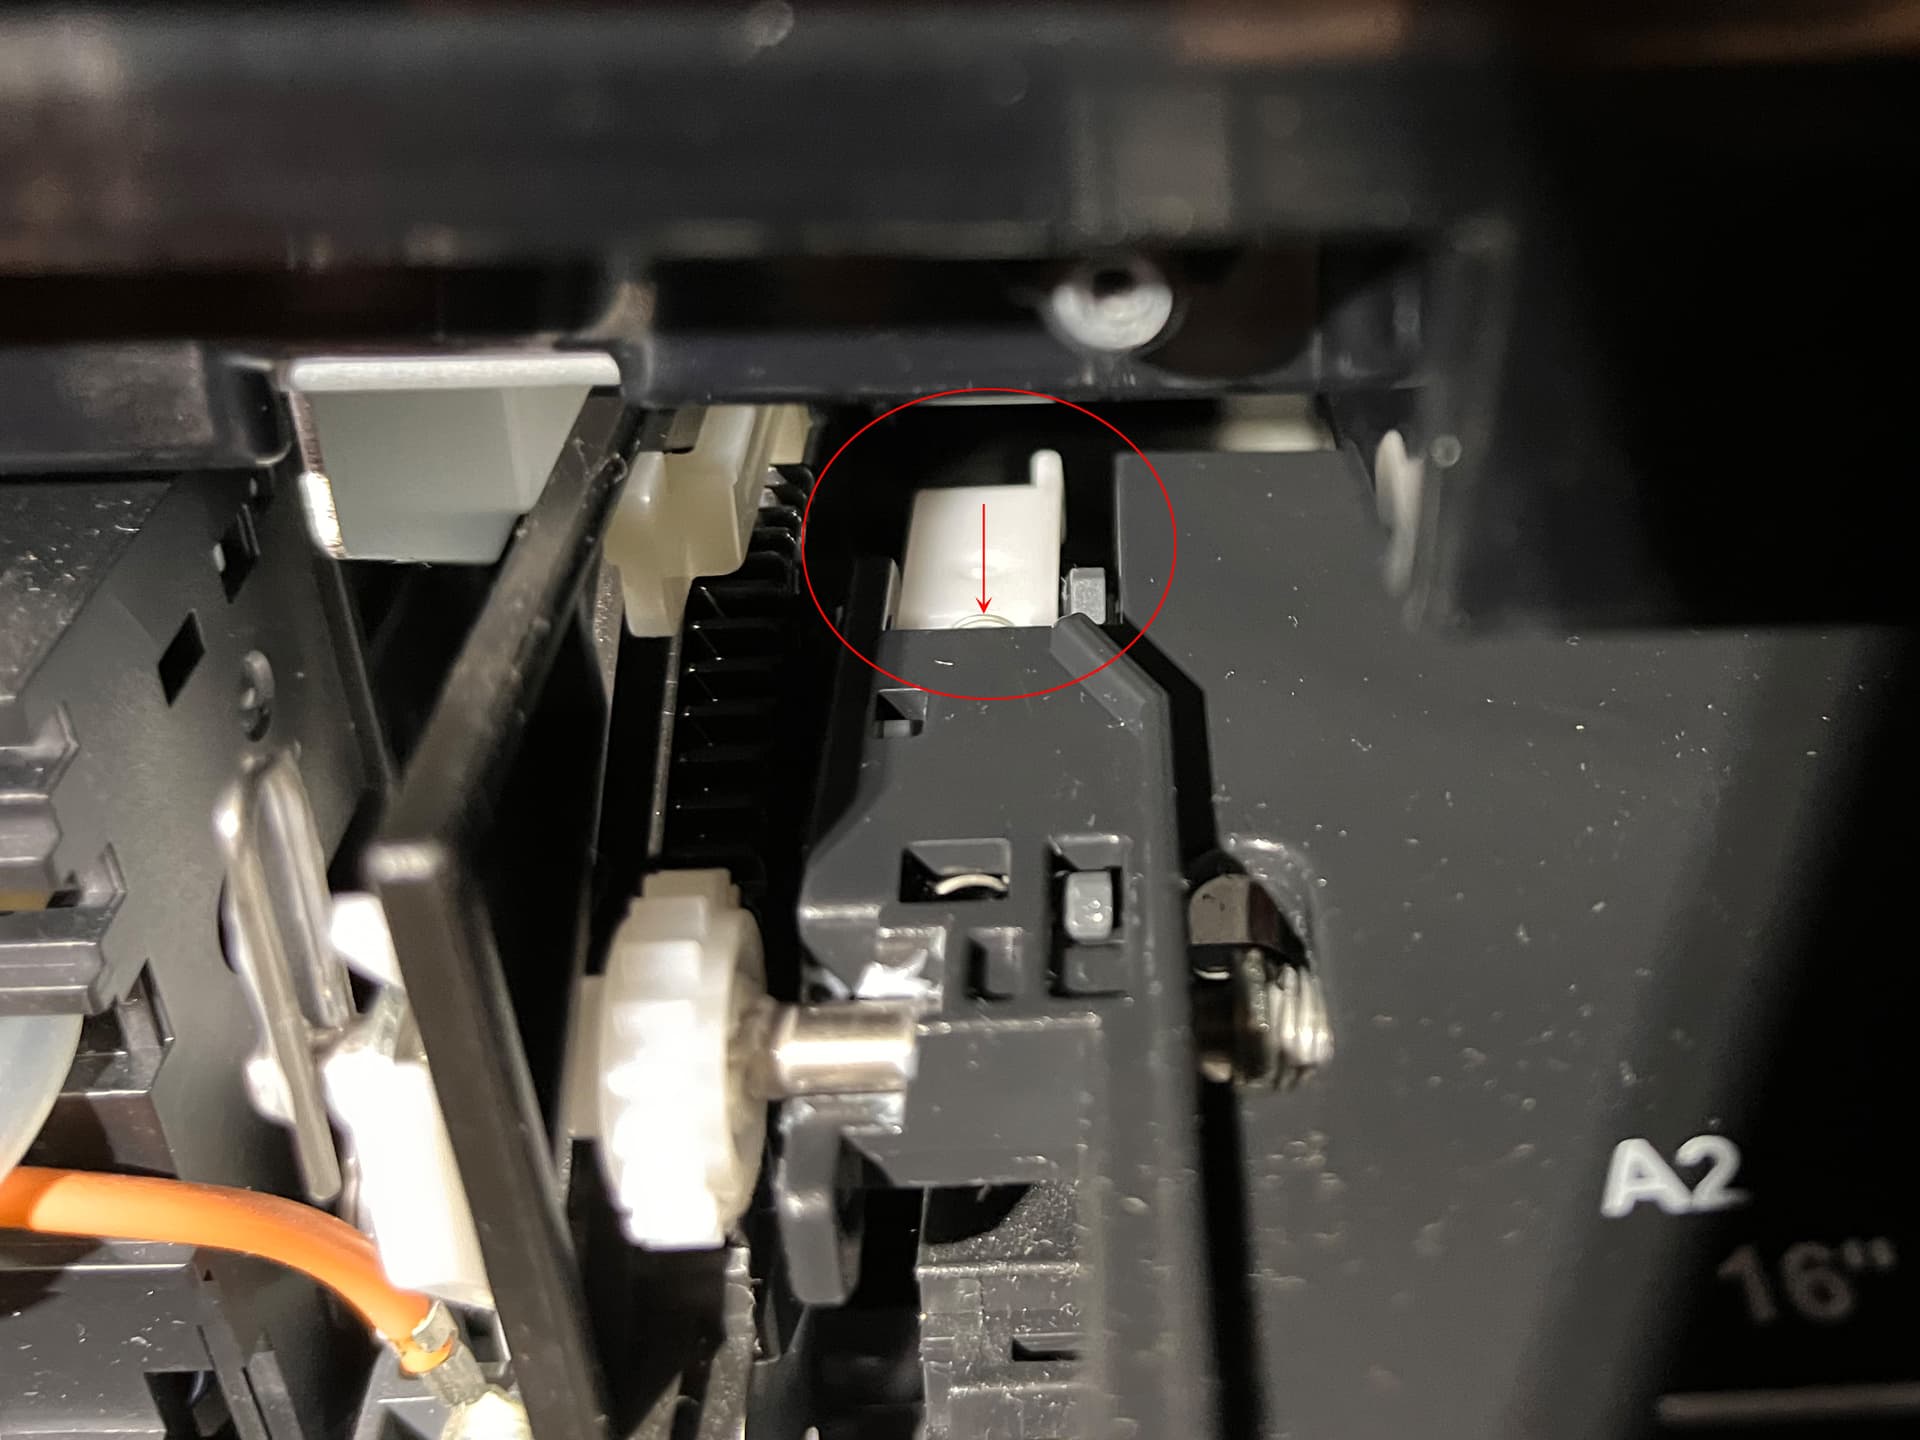
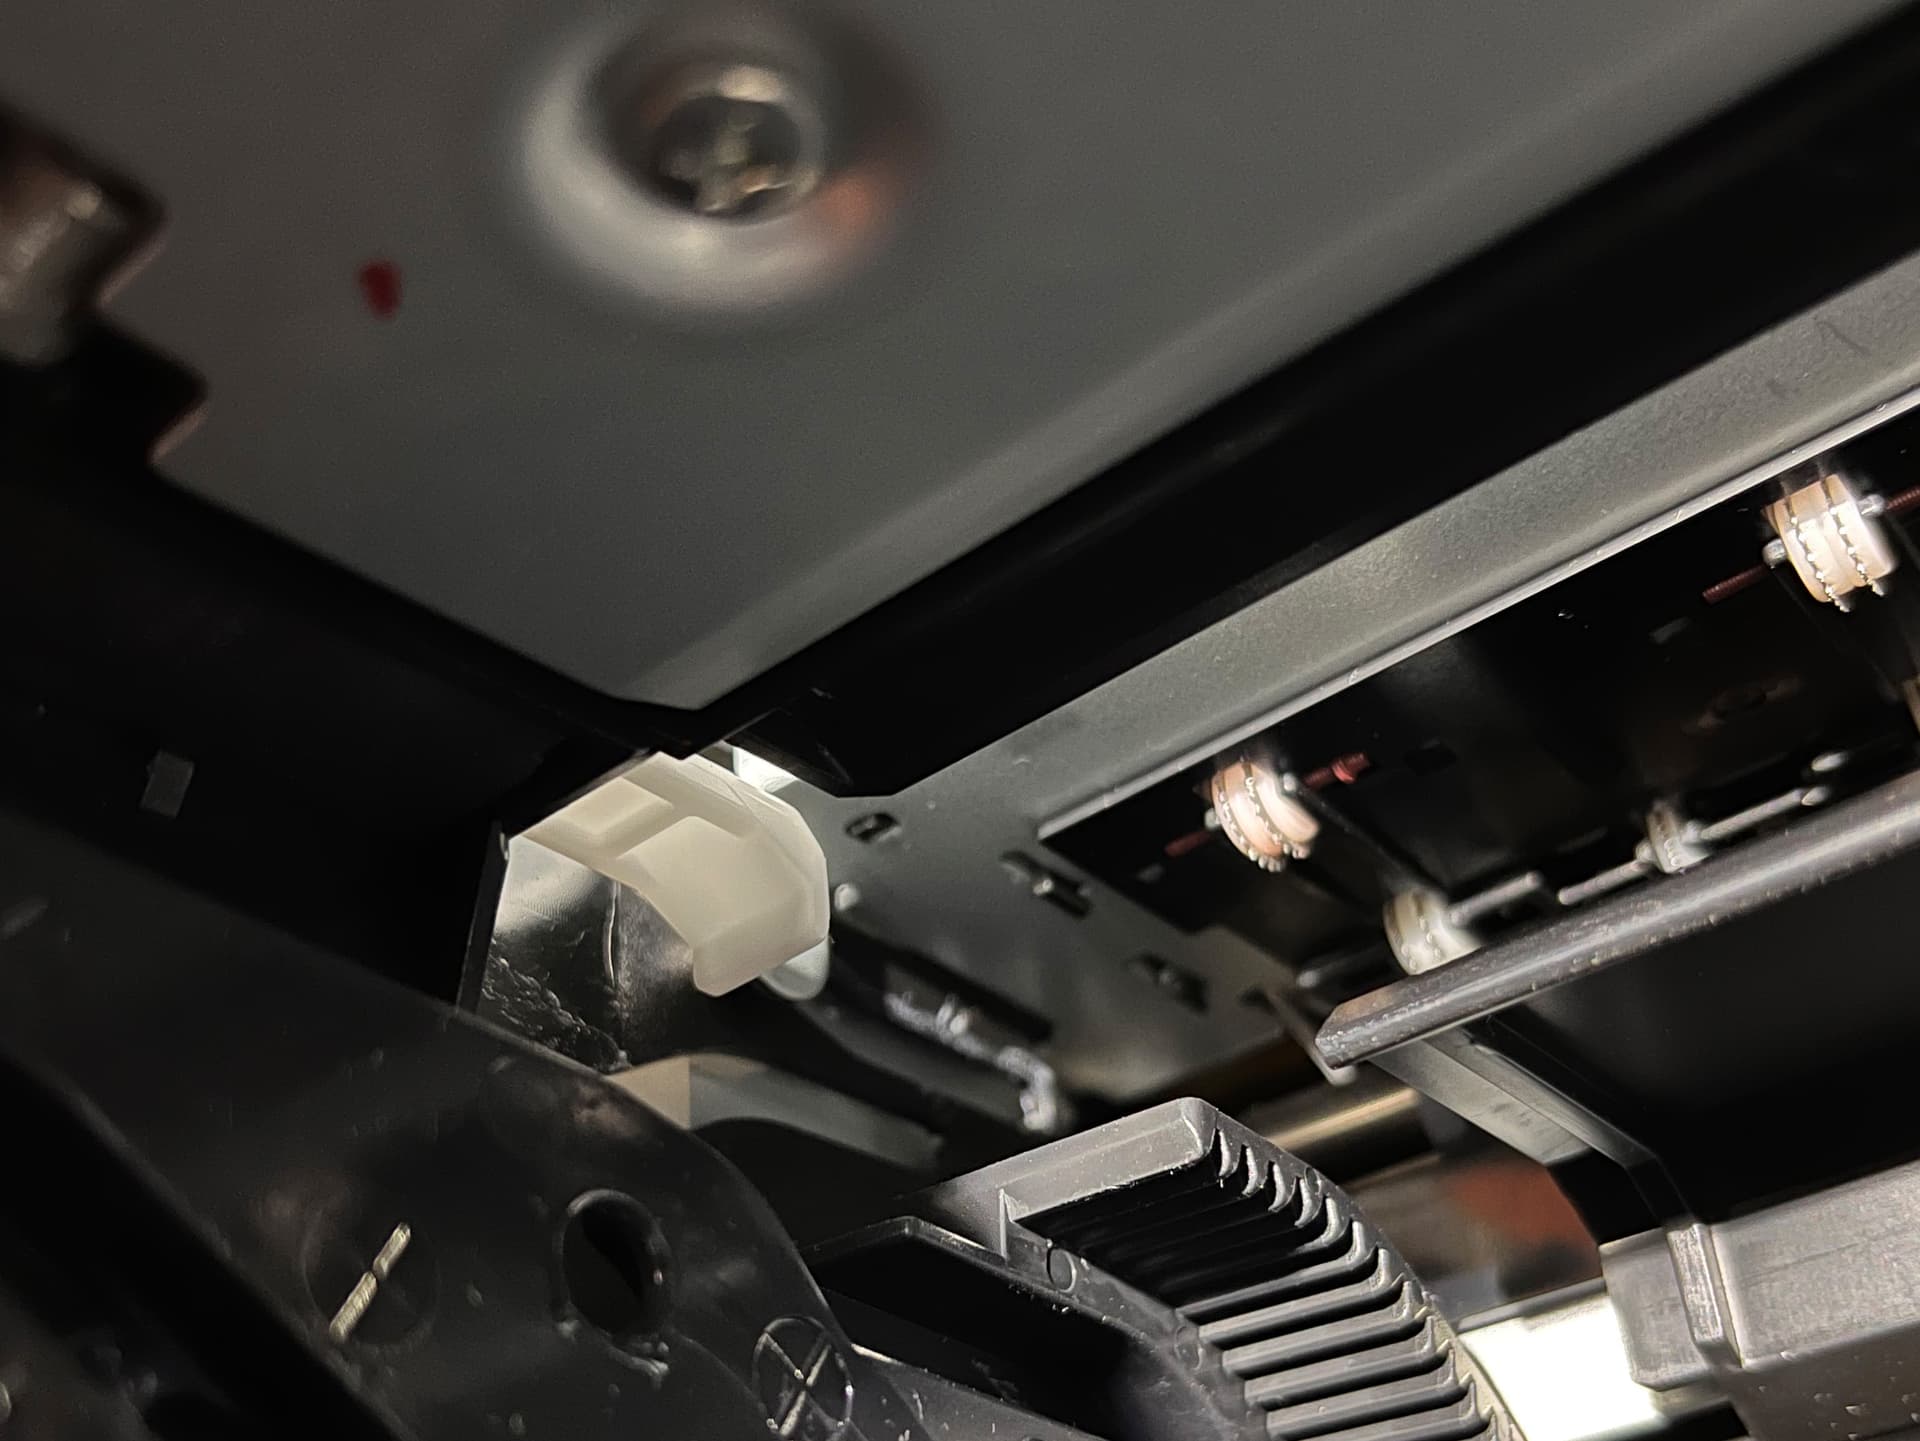
However, when I made the pizza wheel leaf adjustment on the left side of the 3880, I accidental dislodged a little plastic part and am not sure where or how to put it back in place. the pizza wheel bar seems to sit at a skewed angel so I think it may have to do with keeping the lefts side of the pizza wheel bar in place. I have attached a picture of the part. Perhaps you or Keith could advise me on how to get it back in place. It may have been attached to a small spring.
Hi John,
The trailing margin issue that you stumbled upon is well-documented in these forums, but it’s easy to miss until it happens to you. My initial work-around for target printing was to use 8.5 x 12 or 13" sheets cut from a 17" roll that I happened to have. After that ran out I usually cut them from 13x19 sheets. A little bit of waste but not enough to fret over.
I found that little piece that you dislodged and indeed it does have a spring as you can barely see it at the near edge of the piece in the first picture below. Hope you can find it. As far as I am aware, you are the first to have dislodged it! I’m not sure how to get it back in but it may involve removing the upper case. Maybe Walker knows about this.
My friend’s latest tests finally arrived yesterday. At my request he also printed a few Stouffer 21-steps which do not show quite what I expected. It will be interesting to measure and plot these results and see if I can reconcile the PiezoDN negs with the Stouffers. I think I’ll need the weekend to get through it all. He has also switched to printing on Yupo.
Keith
Hi Keith, thanks for the pictures, they help me identify the correct position of the plastic piece. Now I have to figure out how to get it in place. I think it holds the left side of the pizza roller bar in place.
Regarding the trailing margin, when I worked with salt print negatives using my 3800 and the Epson inks, I taped my Inkpress negative material to a Yupo carrier just along the leading edge of the negative, allowing for a wide margin. I was using the front paper feed. I had to tape carefully to avoid head strikes near the leading edge. Using the front loader on the Epson 3800 I did not notice the overspray problem around the edges of the negative. Don’t know why there was a difference.
I did make a print with the new negative, but have yet to analyze the results with the i1PRO2. I was going to print the Stauffer scale with the negative, but seem to have lost track of where I put it. It is a good to compare it to the actual negative on the same print. Good luck with your efforts.
Greetings Keith,
Based on the photos you posted of the plastic parts that I had dislodged, I was able to restore it and get the pizza roller bar back in its original location. Thanks for your help with that.
I did print a new 21x16 step target and had to use the spot meter function on the i1Pro2 to produce a CGATS CIELab (txt)file. However, when I entered the 3 Lab column values in the Peizography Professional 2.2.1 Measurement area of the spreadsheet and entered the Piezography Master Quad Lab values in the Starting Curve area, the results did not make any sense. I think the data entry area was still expecting the 256 step target info. I must be missing something. Should i be using a difference process with the 21x16 step target?
jjp
Hi John,
Glad to hear you got it fixed.
About that 21x16 target, are you using the associated .pwxf file along with it? I think that is how the readings get sorted properly into 16 sets of 21 steps and then averaged. I suspect you are doing this, so …
A few years ago when working on a method of creating what I call a Pseudo-Stouffer 21-step tablet using the Target-Measurements tab, I stumbled upon what may be a bug in the PPE-2. I found a strange work-around but it did work. A year or so ago a former workshop student with math and programming skills brought the idea up in a private conversation but he was after a 31-step version. Since IJM had dropped the inkset I was testing when I first made it I figured it would be a good opportunity to redo it with PiezoPro inks and demonstrate it to someone else at the same time. The big surprise was discovering that while I still had to do my work-around for 21-steps, it worked perfectly for 31-steps with no work-around needed.
So maybe there is a bug that only appears when dropping down to 21-steps. To test this idea I just now put 21-step data from one of my friend’s Yupo tests into PPE2 and see that it cuts off step 1 in the L* column on the Home tab. In other words, it only displays 20 steps. If I go to back to the Measurements tab and paste the data in starting from A2 rather than A1 it seems to display normally on the Home tab. This is similar to my previous work-around mentioned above.
If this sounds anything like what you are experiencing, maybe it will help. I’d be interested in seeing your PPE2 file if you’d be willing to share it. I know Walker frowns on posting those files here on the forum, but you could email it to me directly if you want.
After seeing these 21-step Stouffer tests, I wish I had asked for them at the beginning because they show an incredibly long straight line characteristic curve with no shoulder and very little toe unlike any other process I’ve worked with until now. I have also determined (tentatively for now) that he seems to have been underexposing by about a full stop which may account for the funkiness in the highlights we had from the outset, and that has now been tamed by drastically shortening the density range of the digital negative. This may turn out to have been a wrong turn, though it does seem to be working in a practical sense, which leaves me very confused.
Cheers,
Keith
Hi Keith.
I will email you the PPE2 file and try what you suggest. Perhaps you could comment on an oddity I encountered with the .pwxf file. The 21 x 16 step target I printed had 13 rows. However, the target that .pwxf shows only has 12 rows for data entry. Does this make any difference? I assumed it did not, just fewer samples for averaging.
John P
FYI, I’ll hunt this 21 step A1 bug down. Thanks for reminder.
Also in most recent PPEv2 version 31x9 averaging/target support is turned on.
best
-Walker