After learning Keith Schreiber’s method for making “pseudo stouffers” (posted elsewhere in this forum) it occurred to me that a similar approach can be used to do digital negative calibrations without printing linearization targets. This could reduce the time for a full calibration from several days to less than a day. I haven’t tried it since my P400 PiezoDN printer is currently mothballed, but if the idea has any merit, I may try do so.
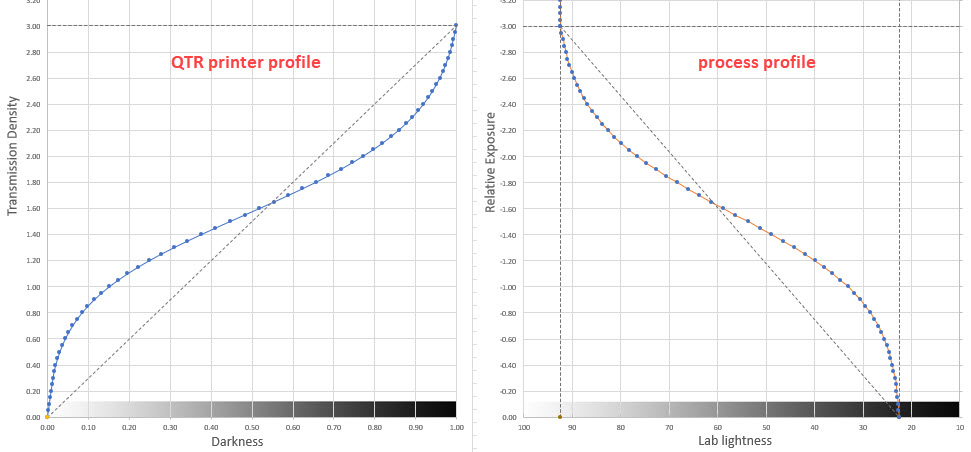
Make a process profile (a.k.a. characteristic curve) by printing one or more Stouffer step wedges at the standard exposure (this is your one trip to the darkroom). Measure Luminances with a spectro. Make a smoothed curve that maps logH → Lum.
Mirror the process profile and do some interpolation to get 51 evenly-spaced transmission densities from zero to a maximum that matches the process exposure scale (labeled QTR Printer Profile in the diagram). Paste these into the PPE Target Measurements tab.
Starting with the Master quad and the 51-step PiezoDN target, make a negative using Print Tool. But instead of making a darkroom print, measure the negative with a UV transmission densitometer. Paste these measurements into the PPE Measurements tab.
Make a new quad (Q1) by linearizing with the Master quad, the 361T measurements, and the target measurements. The box labeled “M-PPE-Q1” in the diagram is my shorthand for the PPE workbook used for iteration zero (I don’t like reusing workbooks since it destroys the calibration history).
Iterate until the Measurements curve is linear.
I’m probably missing something about the choice of starting quad and the possible need for limiting.
This method, assuming it even works, will not be as accurate as one based on measuring target prints, since it depends entirely on the accuracy of the process profile and has no feedback loop to act as a correction mechanism. It’s a tradeoff between calibration speed and accuracy.