I followed Walker’s video for printing the 31 x 9 step test chart in Print-Tool and measuring it in i1Profiler v3.30 using i1iSis and the curves in Excel are blocking and weird.
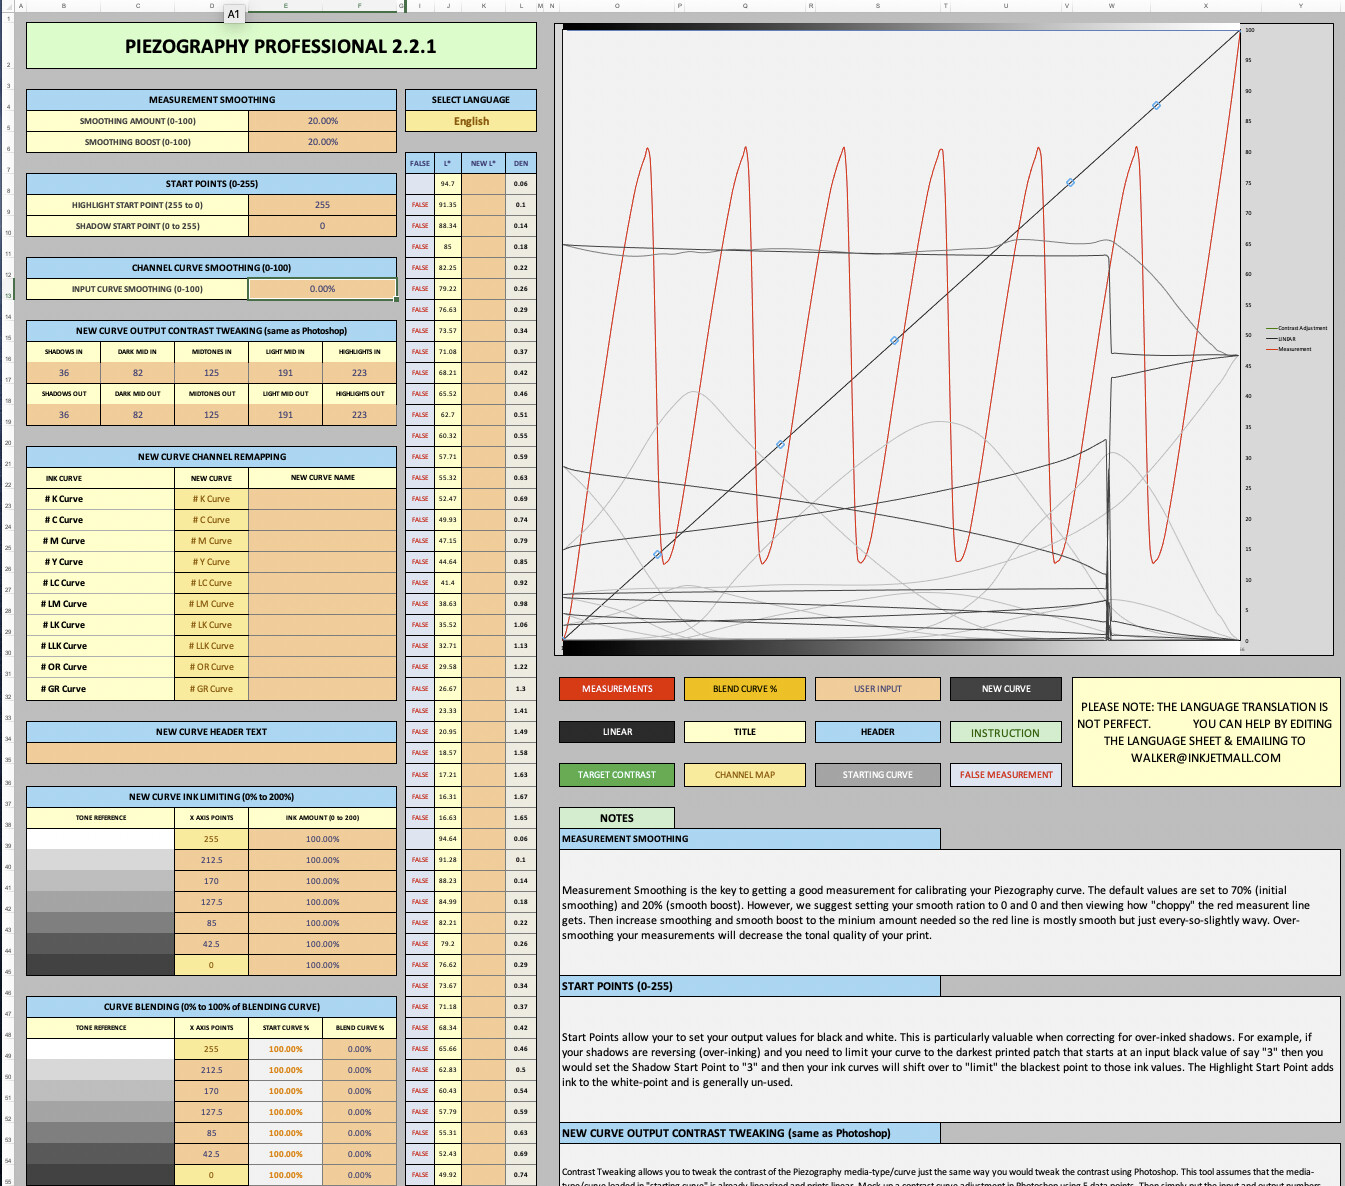
When I loaded the Piezography-21x16step-i1Pro2.pwxf workflow for the i1Pro 2 to measure using i1Pro 3 to see whether it was the iSis, the chart could not be measured because it was different from the Piezography-21x16step-i1Pro2.tif printed in Print-Tool. From within i1Profiler I printed the chart using QTR printer and was able to measure using i1Pro 3 and create a proper curve.
Back to the iSis and I printed the Piezography-512step-i1iSis.tif in Print-tool and measured using Piezography-512step-i1iSis.pwxf for the iSis, then copied measurements into Excel and was able to create a proper curve:
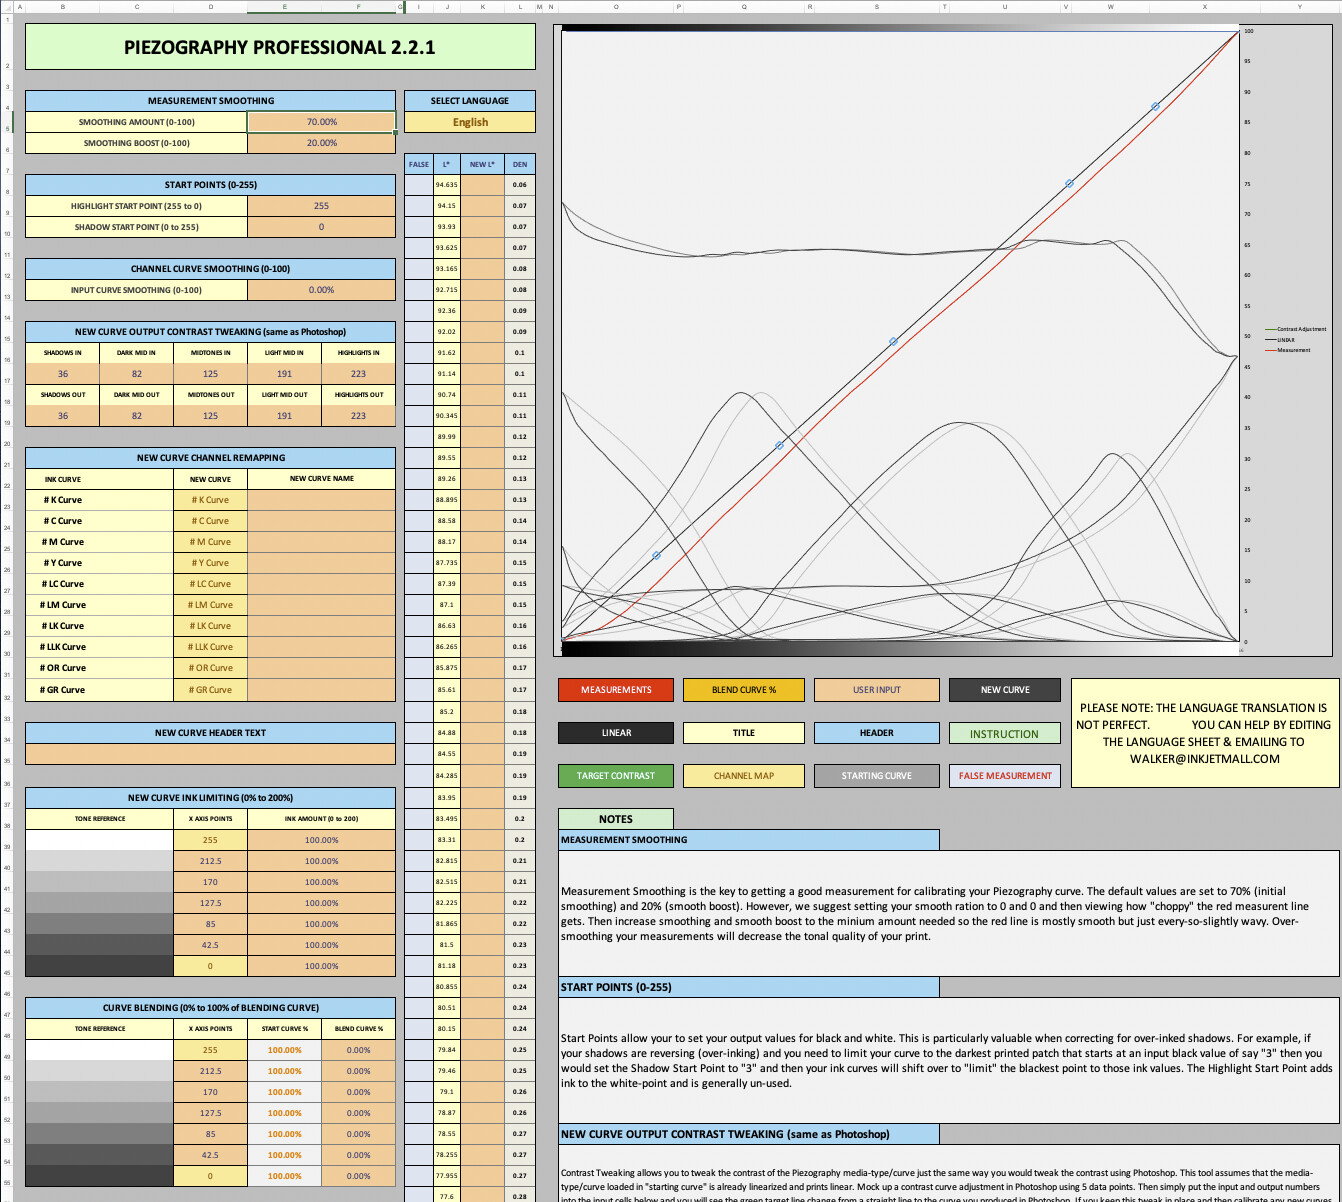
The prints from both linearised curves look outstanding btw.
Would like to understand what’s going on with the blocky curve on Piezography-31x9step-isis.tif and Piezography-31x9step-isis1.pwxf when measured using the iSis. Also why the targets are different for Piezography-21x16step-i1Pro2.tif and Piezography-21x16step-i1Pro2.pwxf.
TIA
 Thank you!