Hi Jeannie,
John asked me how I might respond to your question, so I guess I’ll see if I can add anything useful. He already covered my initial thoughts, and you have already said that you will stay with the Stouffer, which is what I would have recommended, though I’ll add that the 4x5 Stouffer 21-step is way more useful than the skinny strip in my opinion.
I have no direct experience with carbon printing, though I have read a bit over the years. It seems like you have quite a range of control over contrast - the process is capable of handling negatives with exposure scales of >2.00 to <1.20 (similar to Pt/Pd) by varying the pigment load of the tissue and the strength of the sensitizer. These factors, along with any others that have an effect on exposure time, should probably be decided upon before even thinking about digital negatives. A 4x5 Stouffer 21- or 31-step tablet is ideal for this since it gives you measurable steps that you can compare to see exactly how each variable changes the printed result. Often the differences are plainly visible to the eye without the need for a measurement device.
Someone might ask how many steps works best for determining the correct exposure. I think 21 (or 31) is best for most long-scale processes since there is enough separation to see the effect of changing exposure, but they are not so close that interpretation becomes difficult.
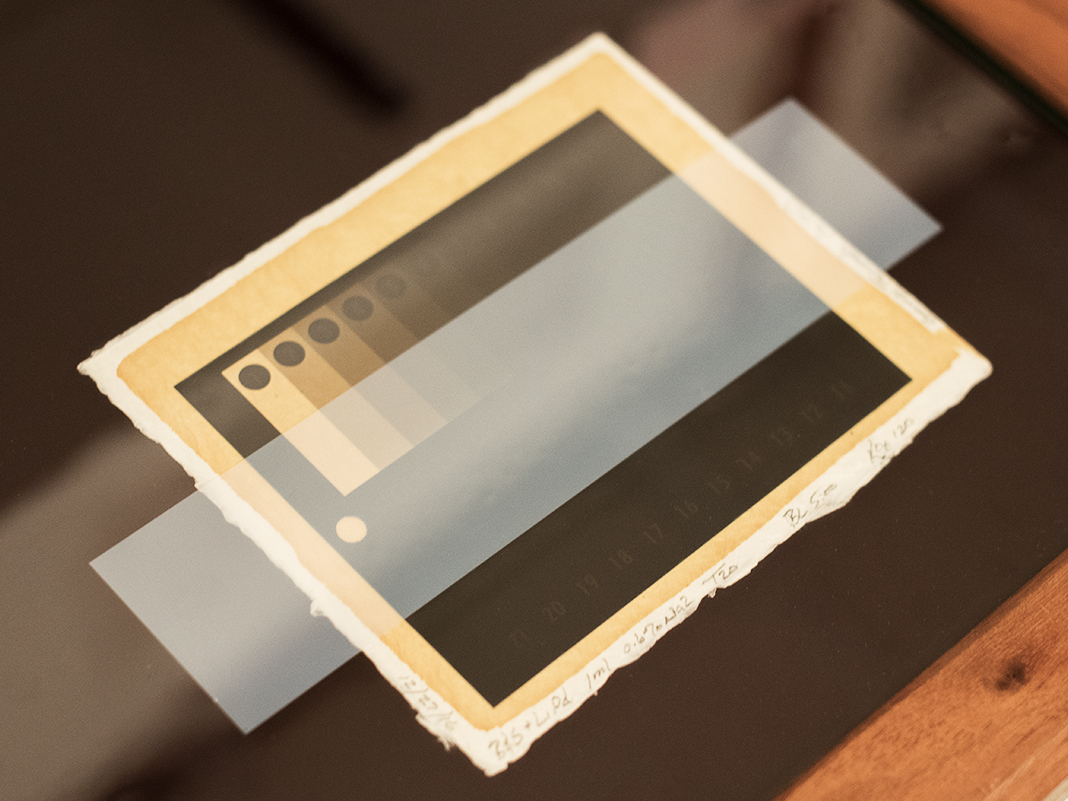
Here is a picture showing how I set up an exposure test:
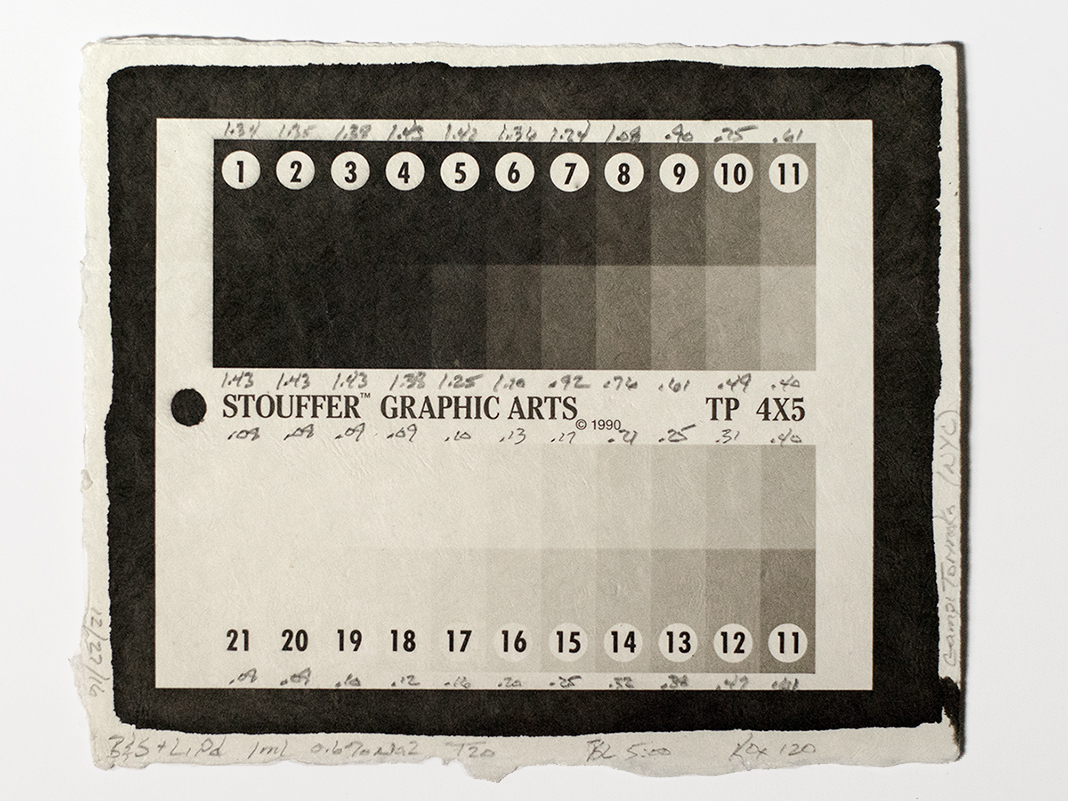
The result of a full stop overexposed:
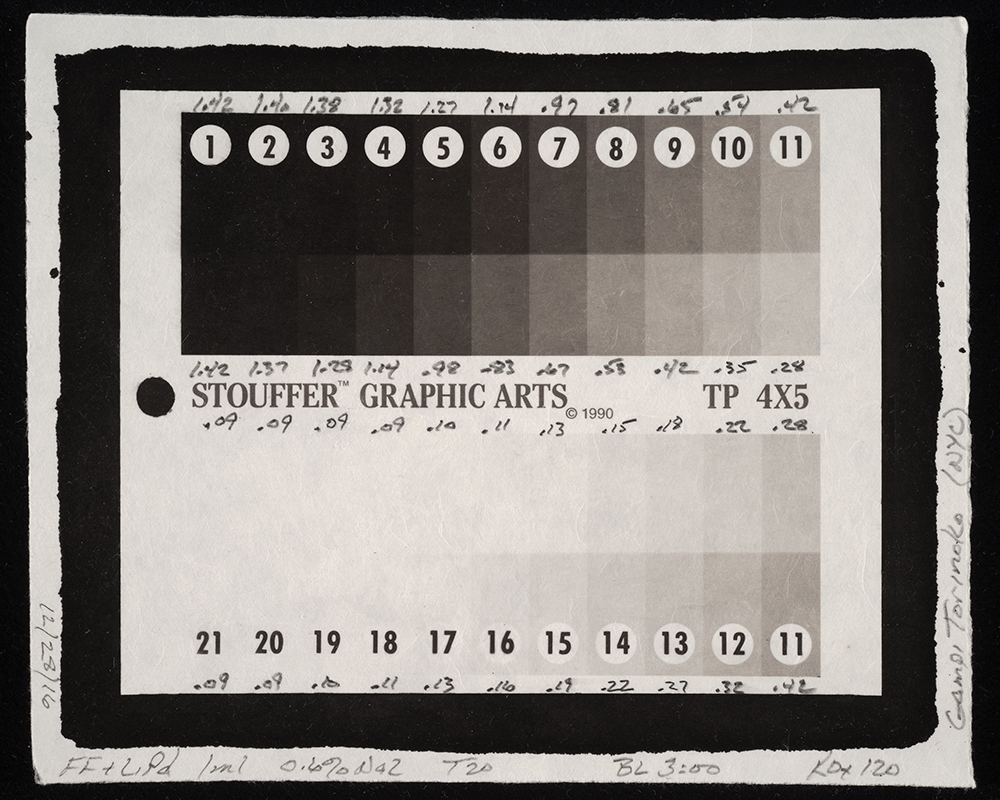
Slightly overexposed:
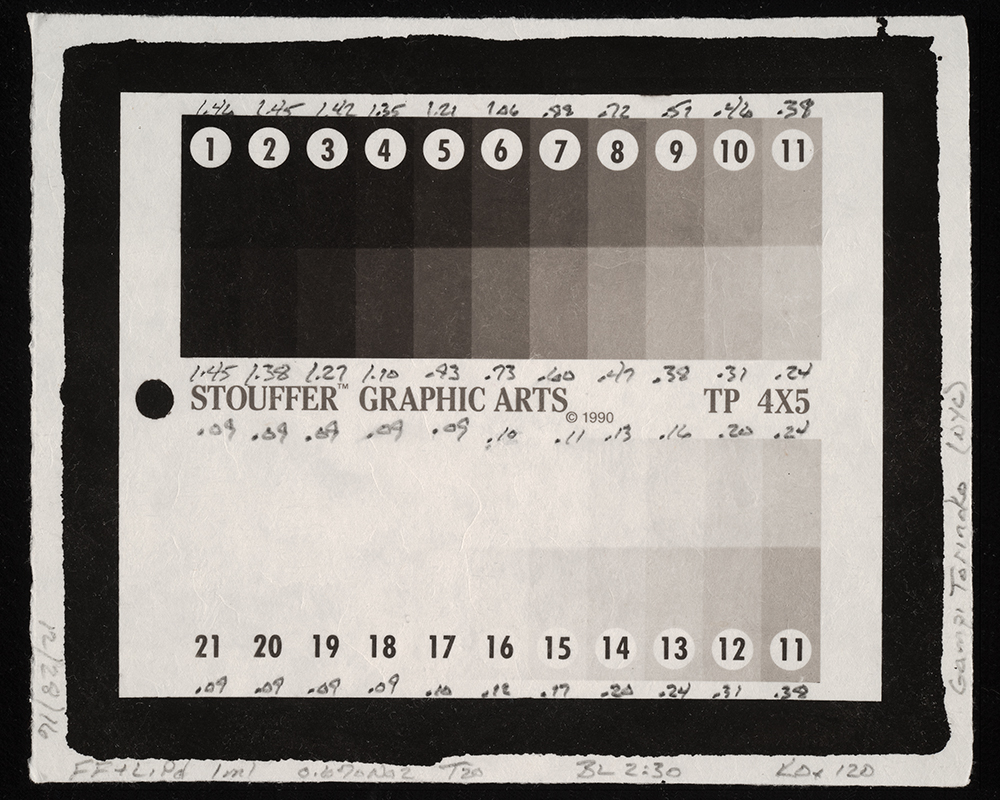
Correctly exposed:
What I am looking for is steps 1&2 of the part not covered with Pictorico film to be merged, and both not covered and covered parts of step 1 to be merged (or very, very close). The caveat is because the film base density (step 1) of the Stouffer tablet itself is about 0.05 or 1/6th stop, and ideally should be subtracted from the empirically determined time.
The UV base density of Pictorico Ultra Premium (TPS) film happens to be 0.15 (+/- 0.01) which happens to be 1/2 stop, which makes the 21-step tablet ideal since the steps are 1/2 stop (0.15) apart. For films with lower base density such as Fixxons or InkPress there may be an advantage to using a 31-step tablet since the 1/3 stop increments (0.10) are closer to the 0.07 base density of those films.
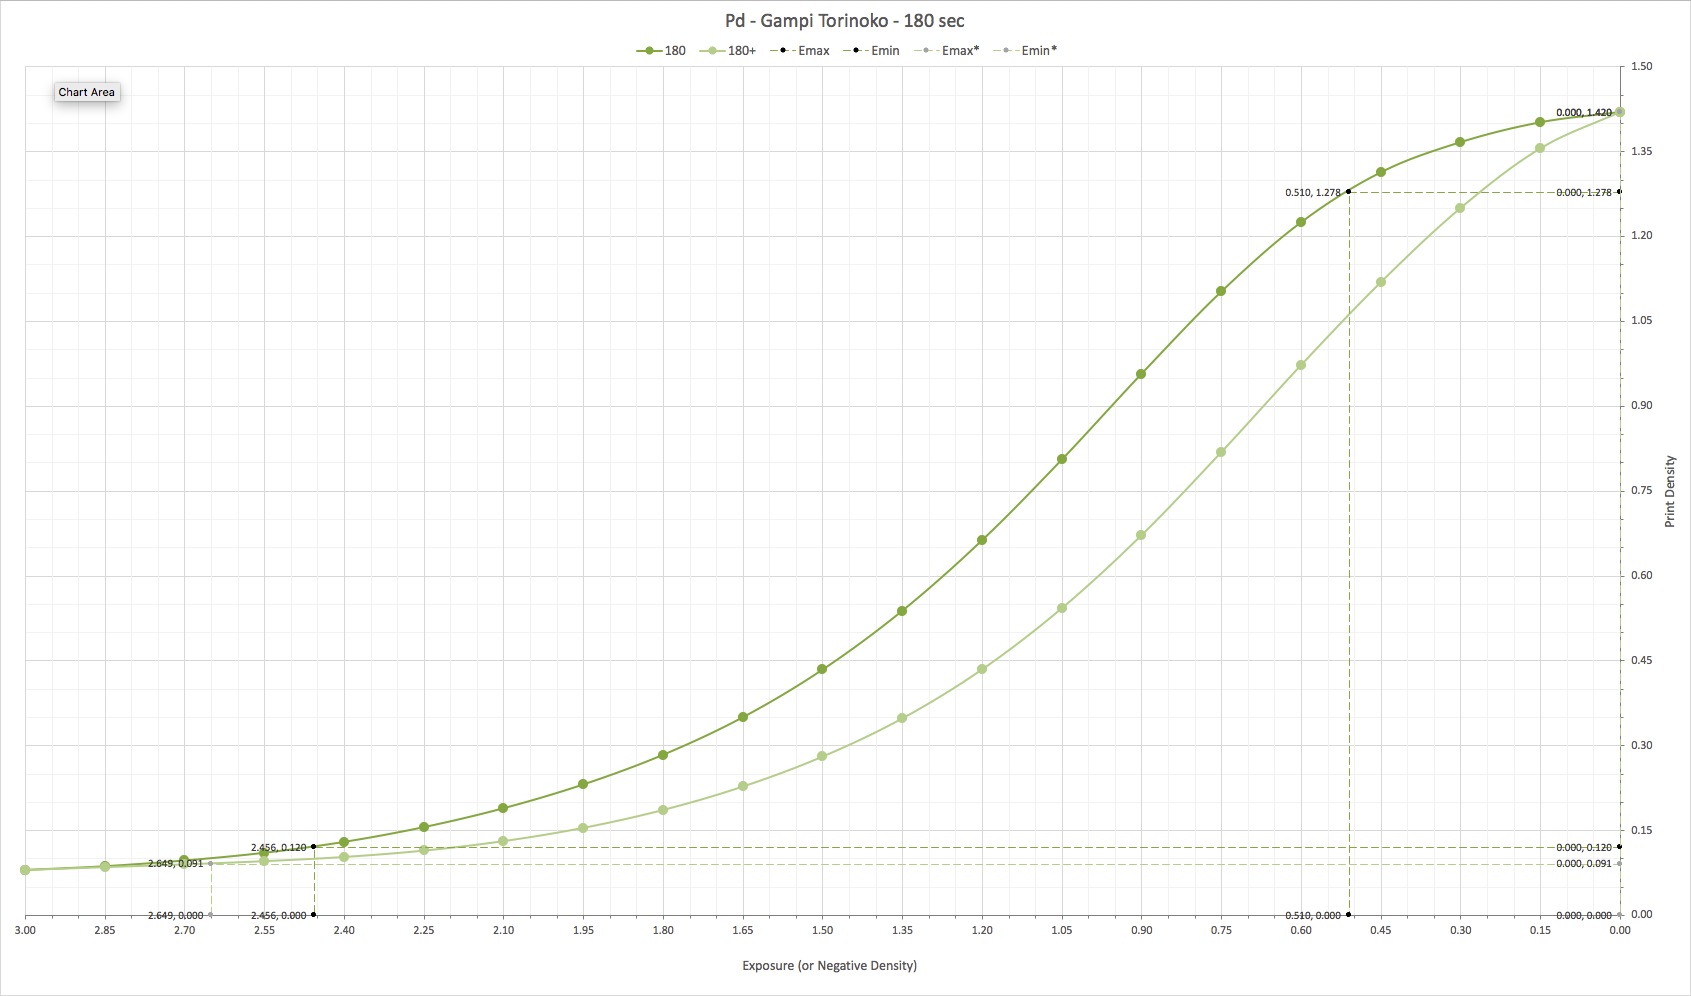
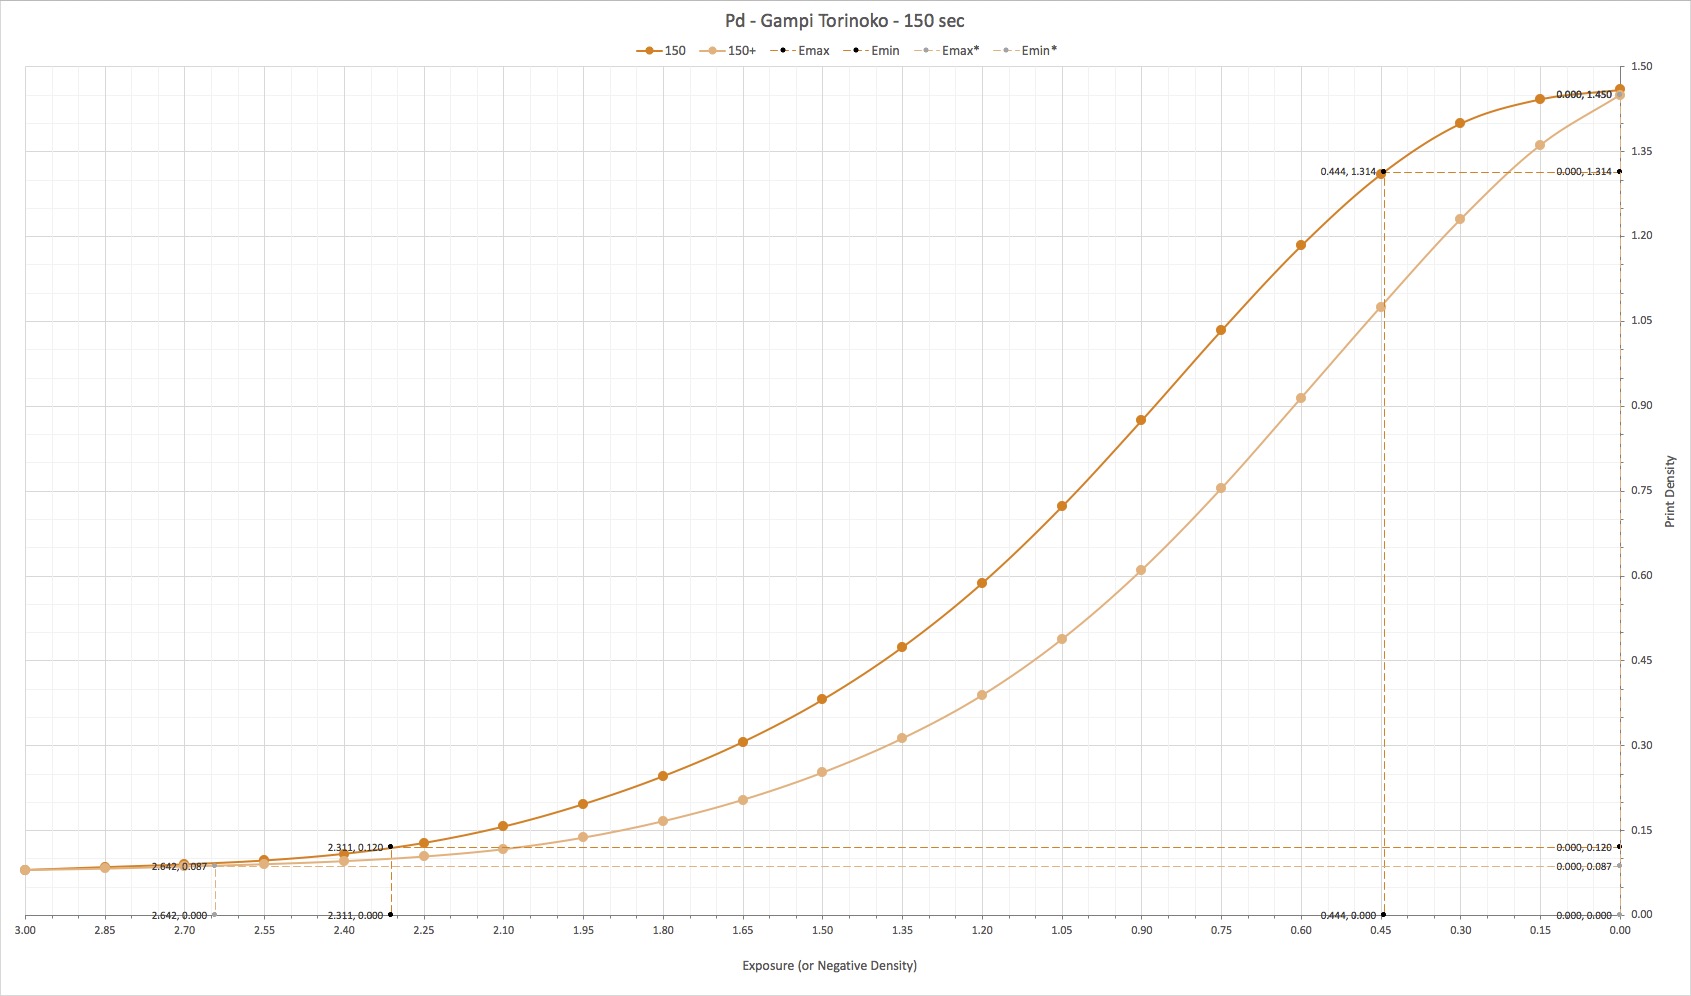
Here are graphs of the readings from the above test prints, in the same order as above. I think they illustrate nicely the effect of the Pictorico film base on the characteristic curve.

Back in the mid-90s, the museum that I worked for sent me to a sensitometry workshop. The first thing that we were asked to do was to take a set of 101 2" square chips of photographic paper printed in equal increments from paper white to maximum black (0-100%) and put them in the correct order from light to dark. Some of us struggled with the extreme light end (0-10%); all got the mid-range (10-90%) easily; no one got the extreme shadow end (90-100%) correct. Our eyes cannot distinguish very close dark tones very reliably. This is where measurement devices like densitometers and spectrophotometers are very useful. It is also why trying to determine correct exposure with 129-steps is akin to tilting at windmills - the steps are too close together even if evenly spaced in terms of film density.
If you have stayed with me this far, I hope this has been of some use. ![]()
~ Keith